¶ 1. Introduction
This page is a work in progress, tests needed. Silex is free/libre software which means you need to contribute.
This tutorial is very long but it should work fine if you follow each step. If you would like us to develop a WordPress plugin that makes it a little easier, you can vote for this feature here
You may want to check this video too, it is an other attempt to document the WordPress integration
By the end of this tutorial, you will have a WordPress backend to edit your website. The frontend will be designed with Silex drag and drop interface and it will be hosted on GitLab pages for free.
Requirements: you need **a regular WordPress website. Local WordPress (development) will not work because Silex and GitLab will not be able to access it.
This guide includes all the setup necessary to make your WordPress ready for Silex. We will install a number of plugins such as SCF (ex-ACF)
Feel free to ask in the chat or forums if you need explanations about why this step or that action
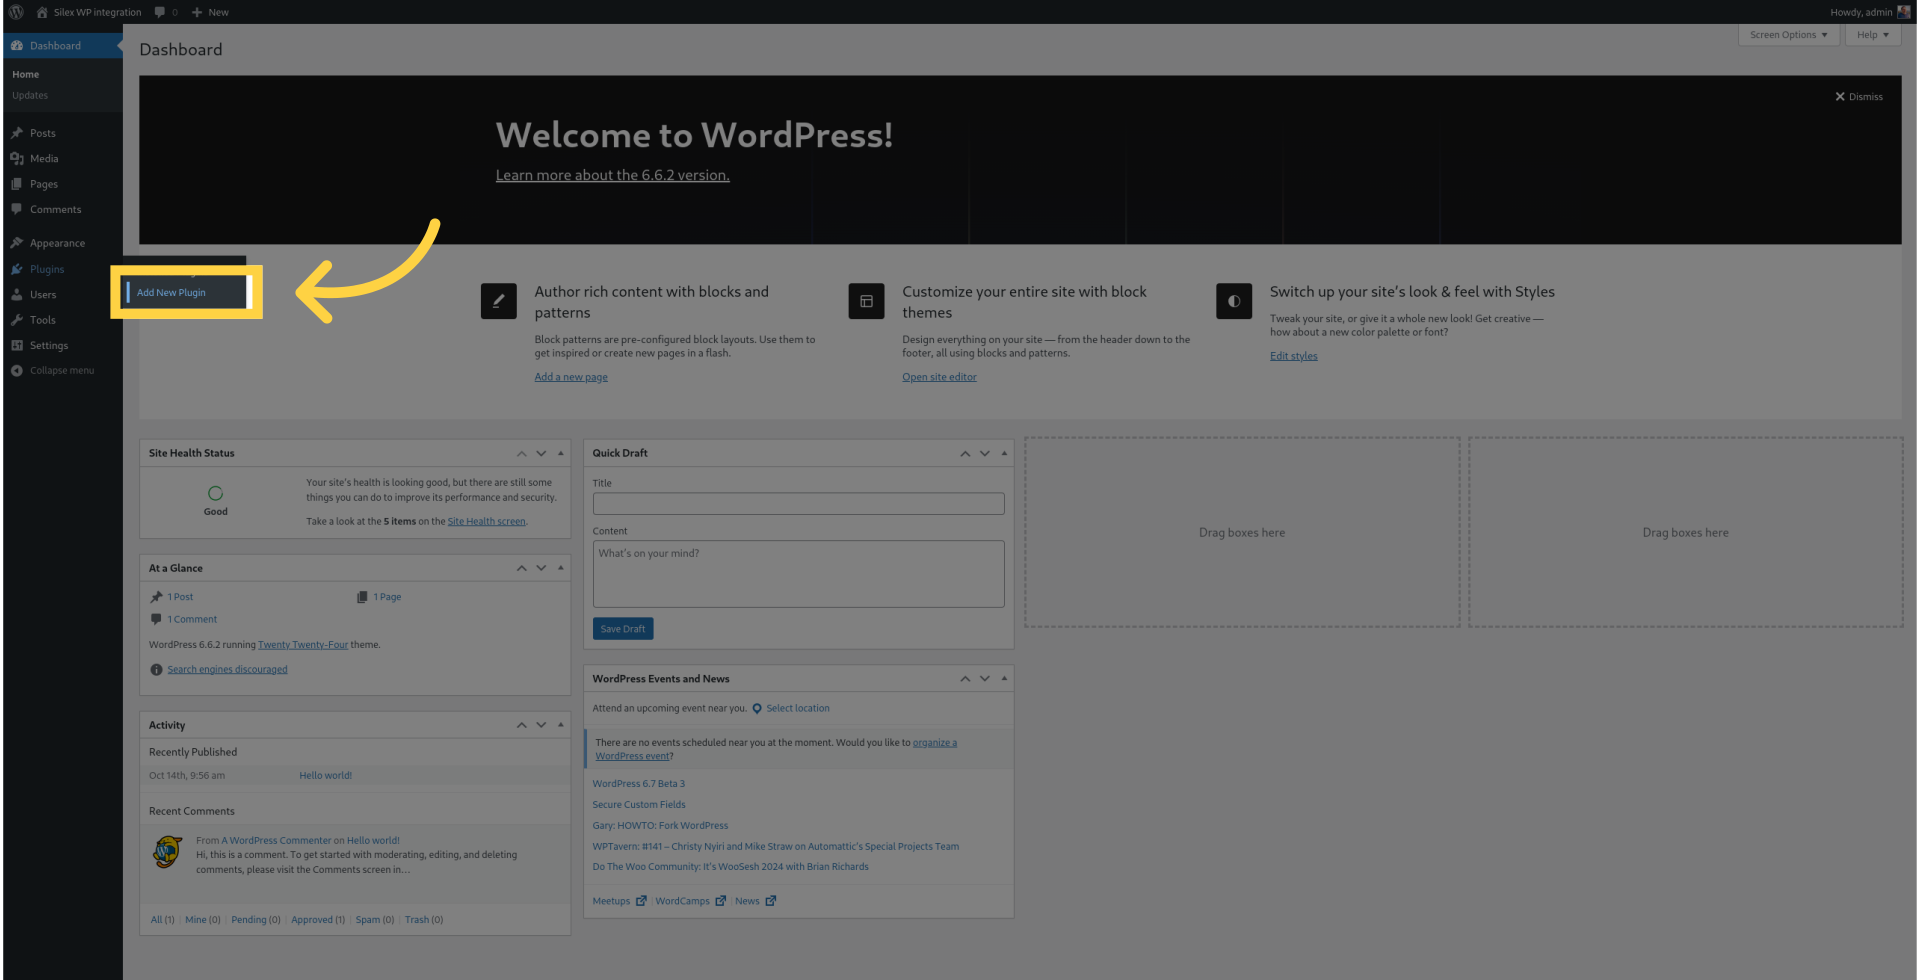
¶ 2. Click "Add New Plugin"
Let's start from your WordPress admin, click on "add new plugin" from the "plugin" tab.
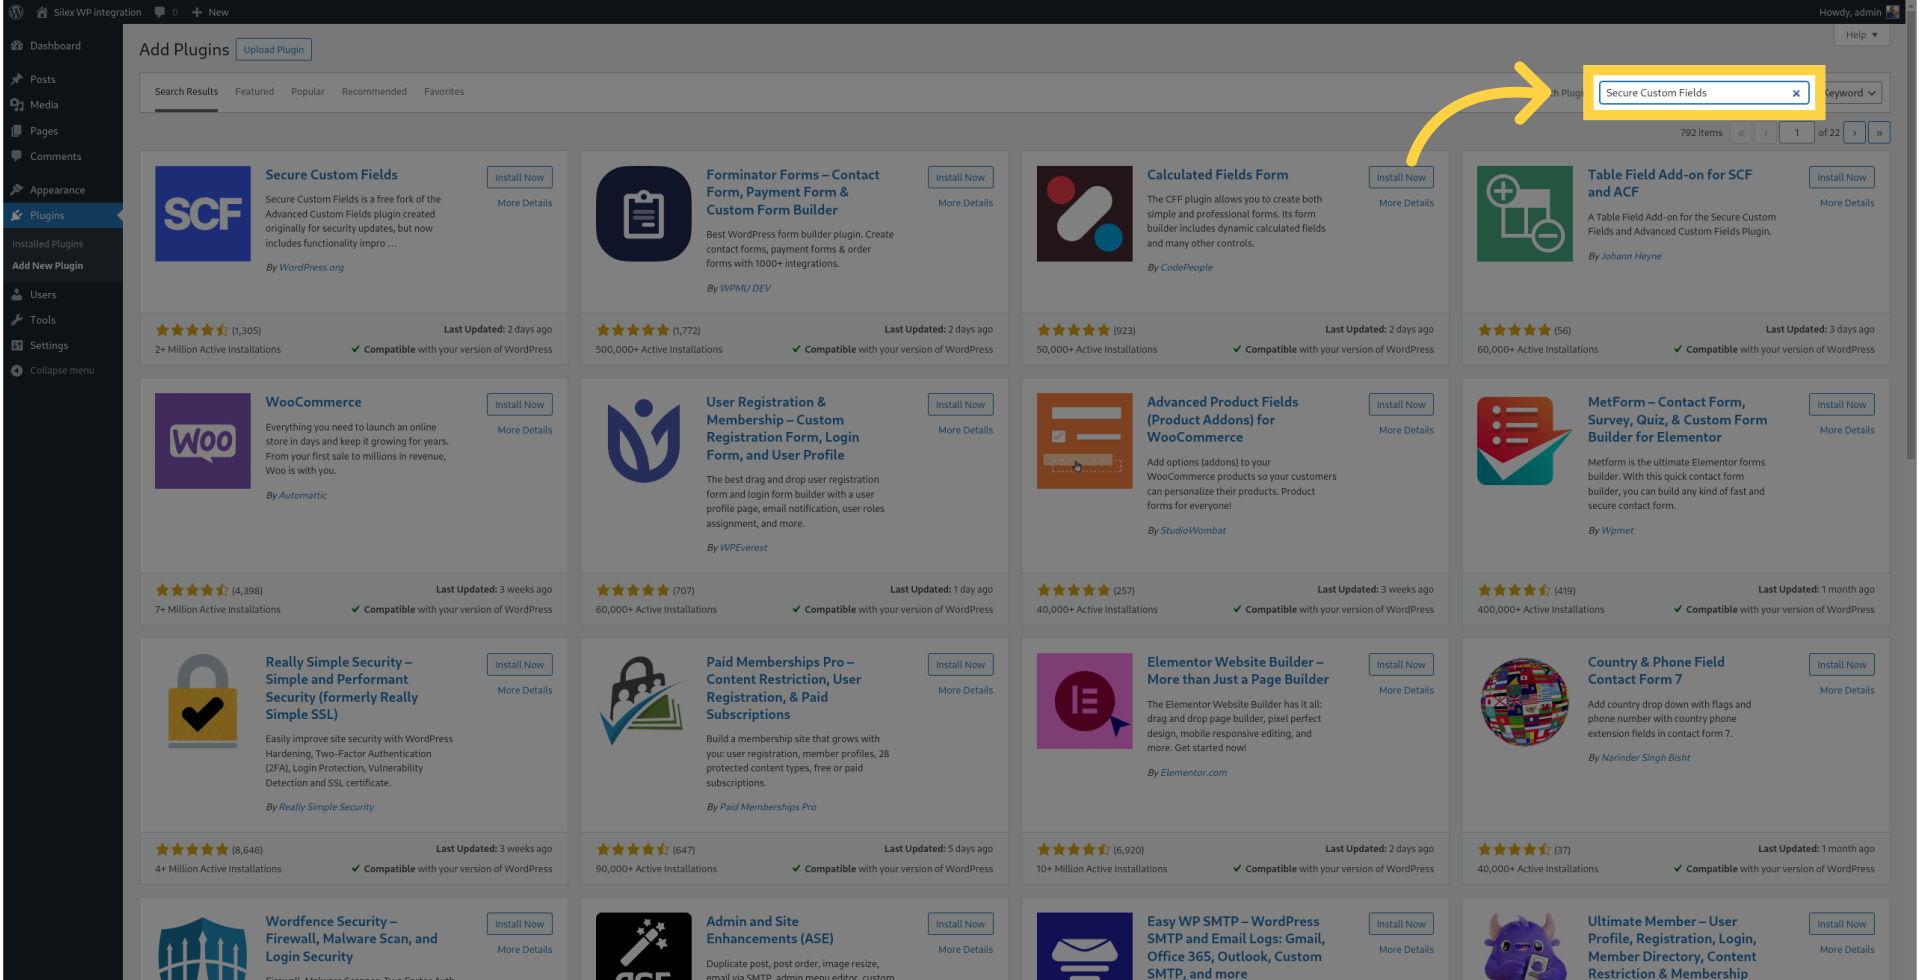
¶ 3. Install "Advanced Custom Fields" plugin
Fill "Secure Custom Fields."
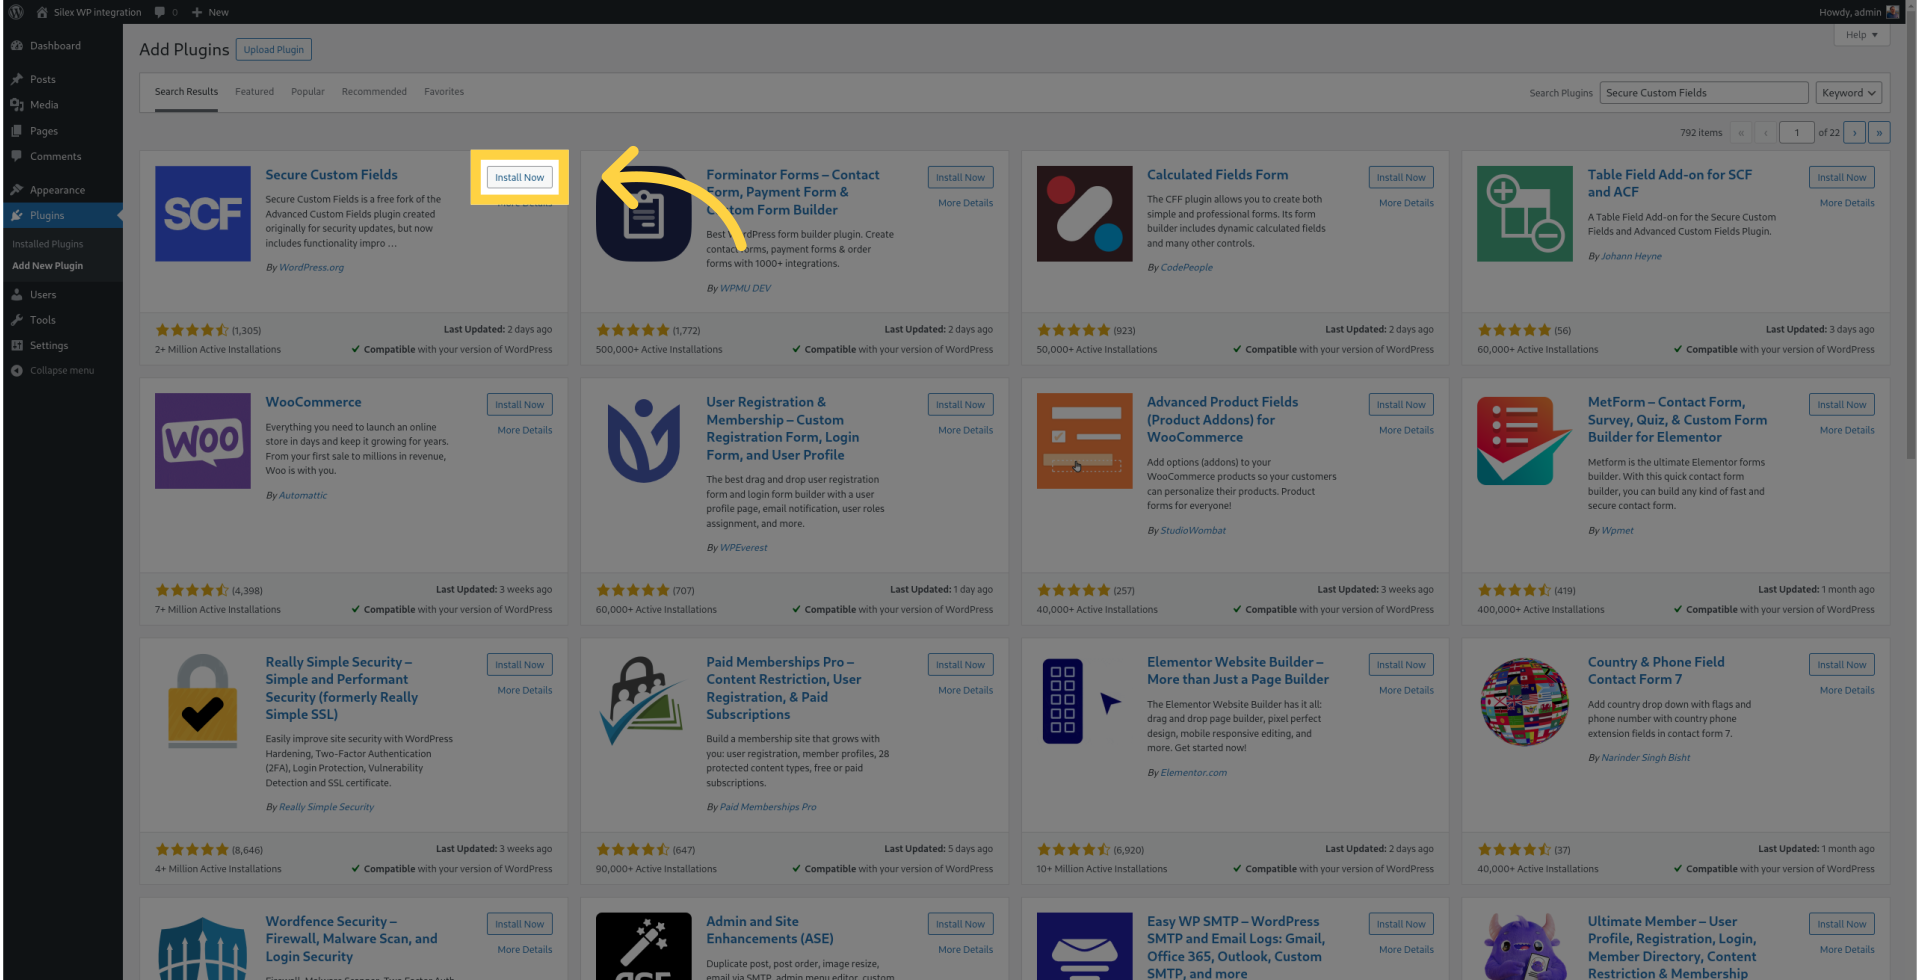
¶ 4. Click "Install Now"
Initiate the installation process.
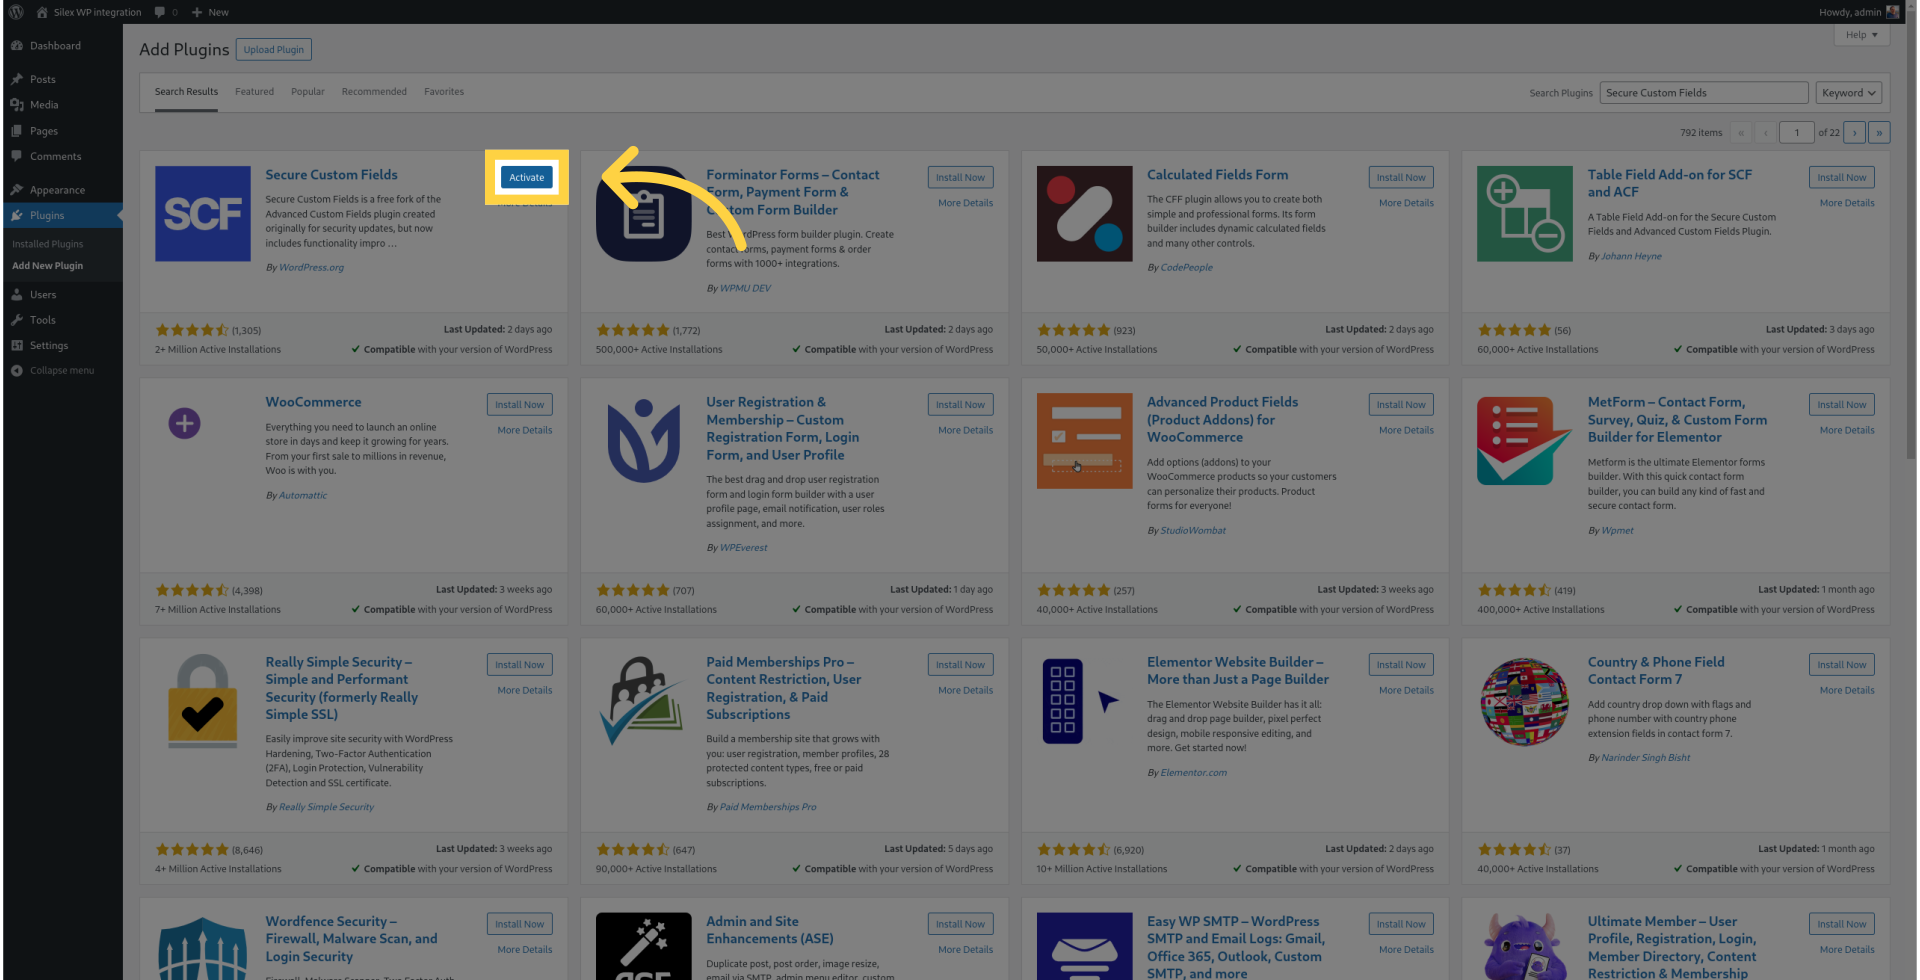
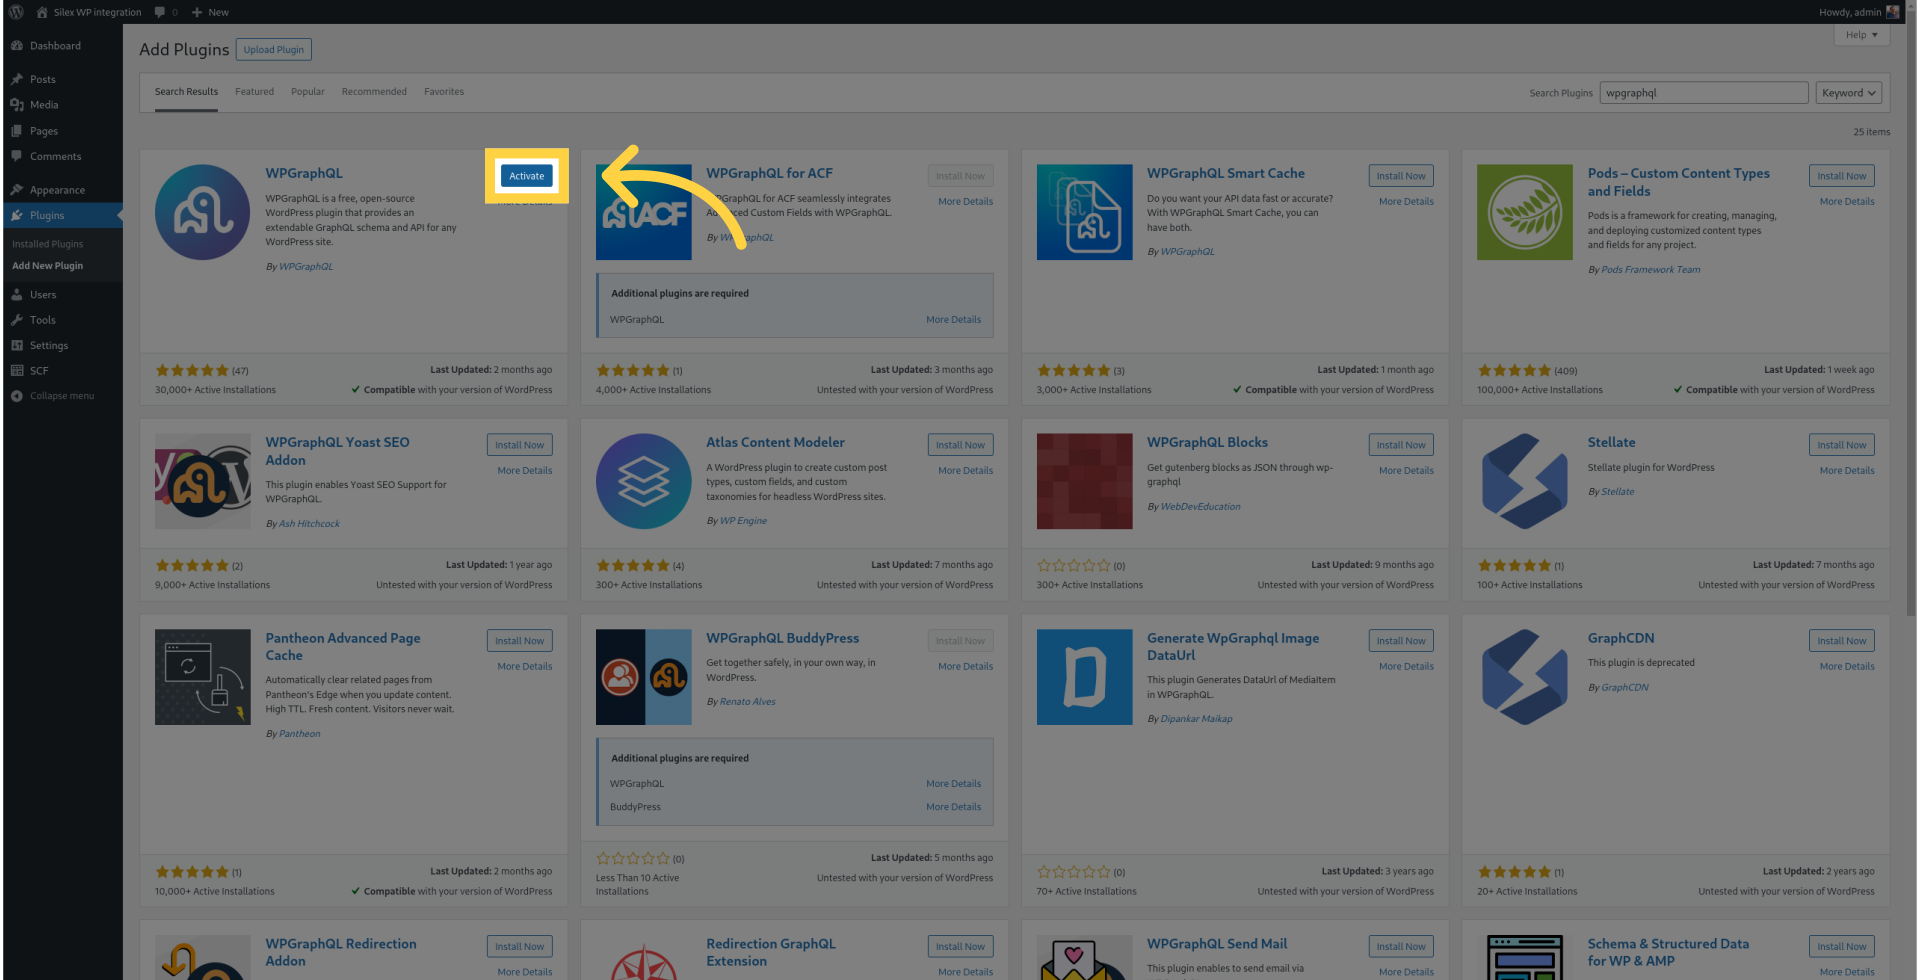
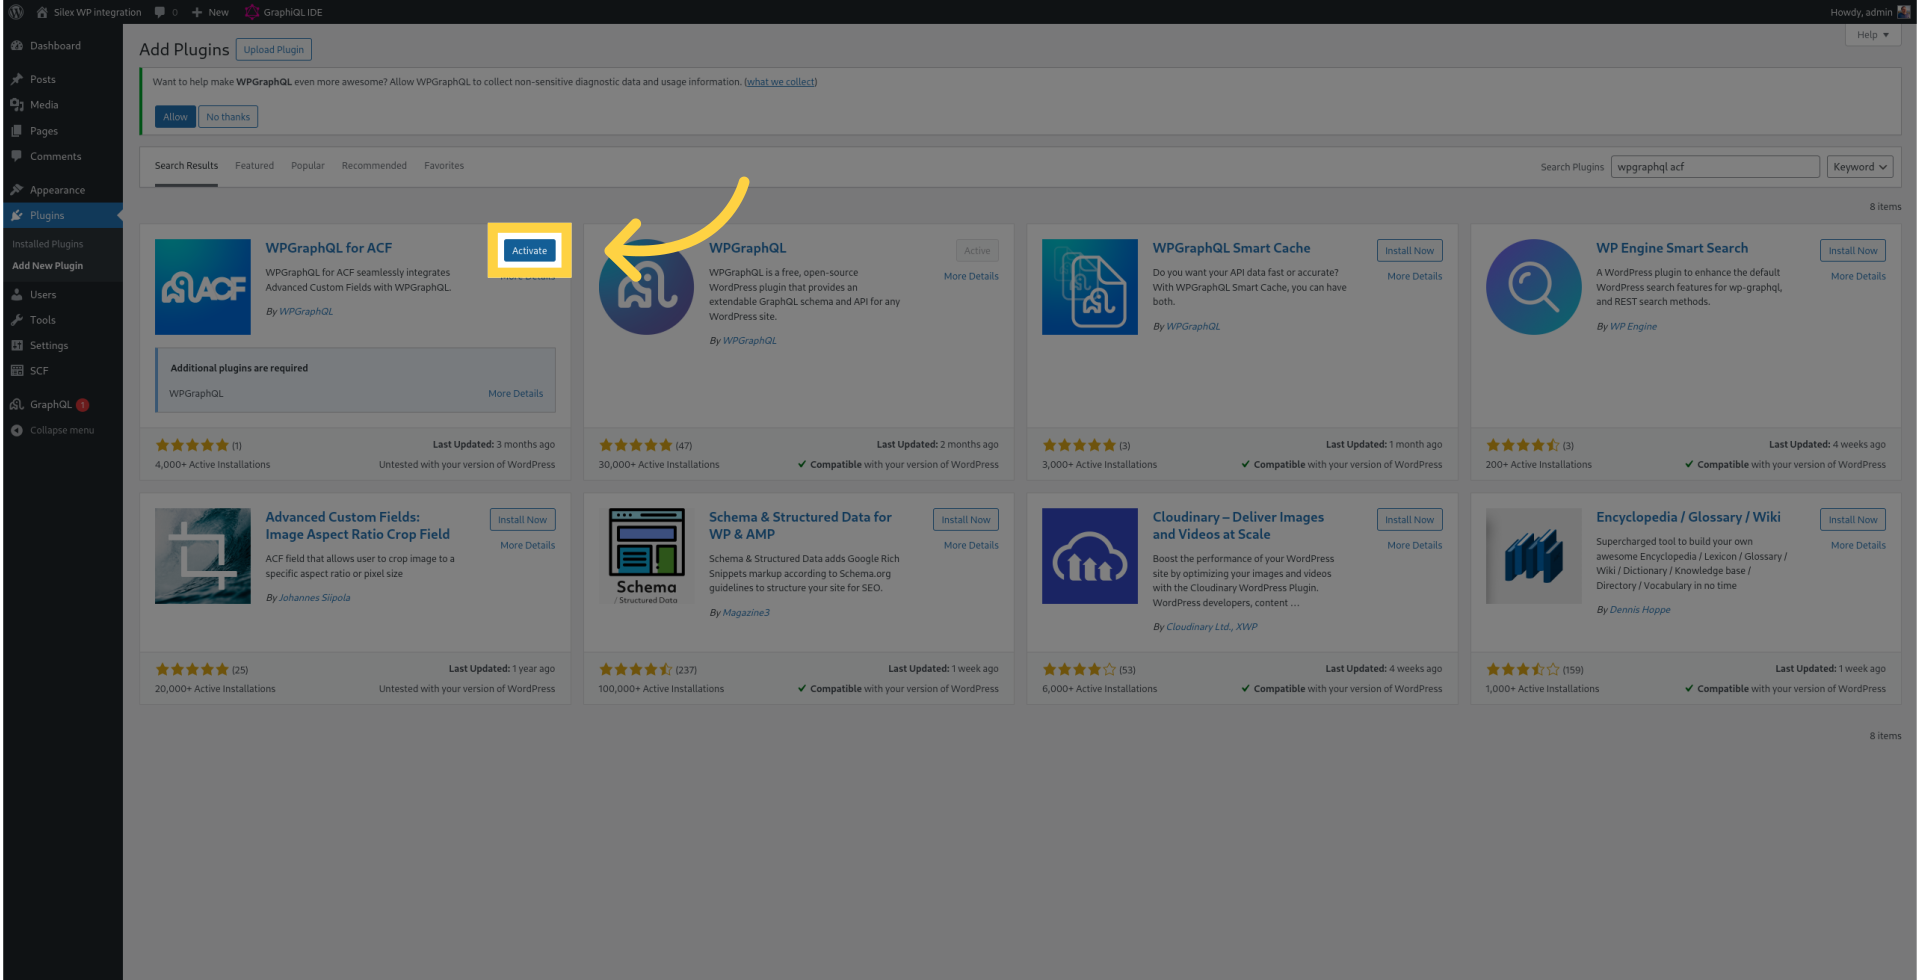
¶ 5. Click "Activate"
Activate the plugin.
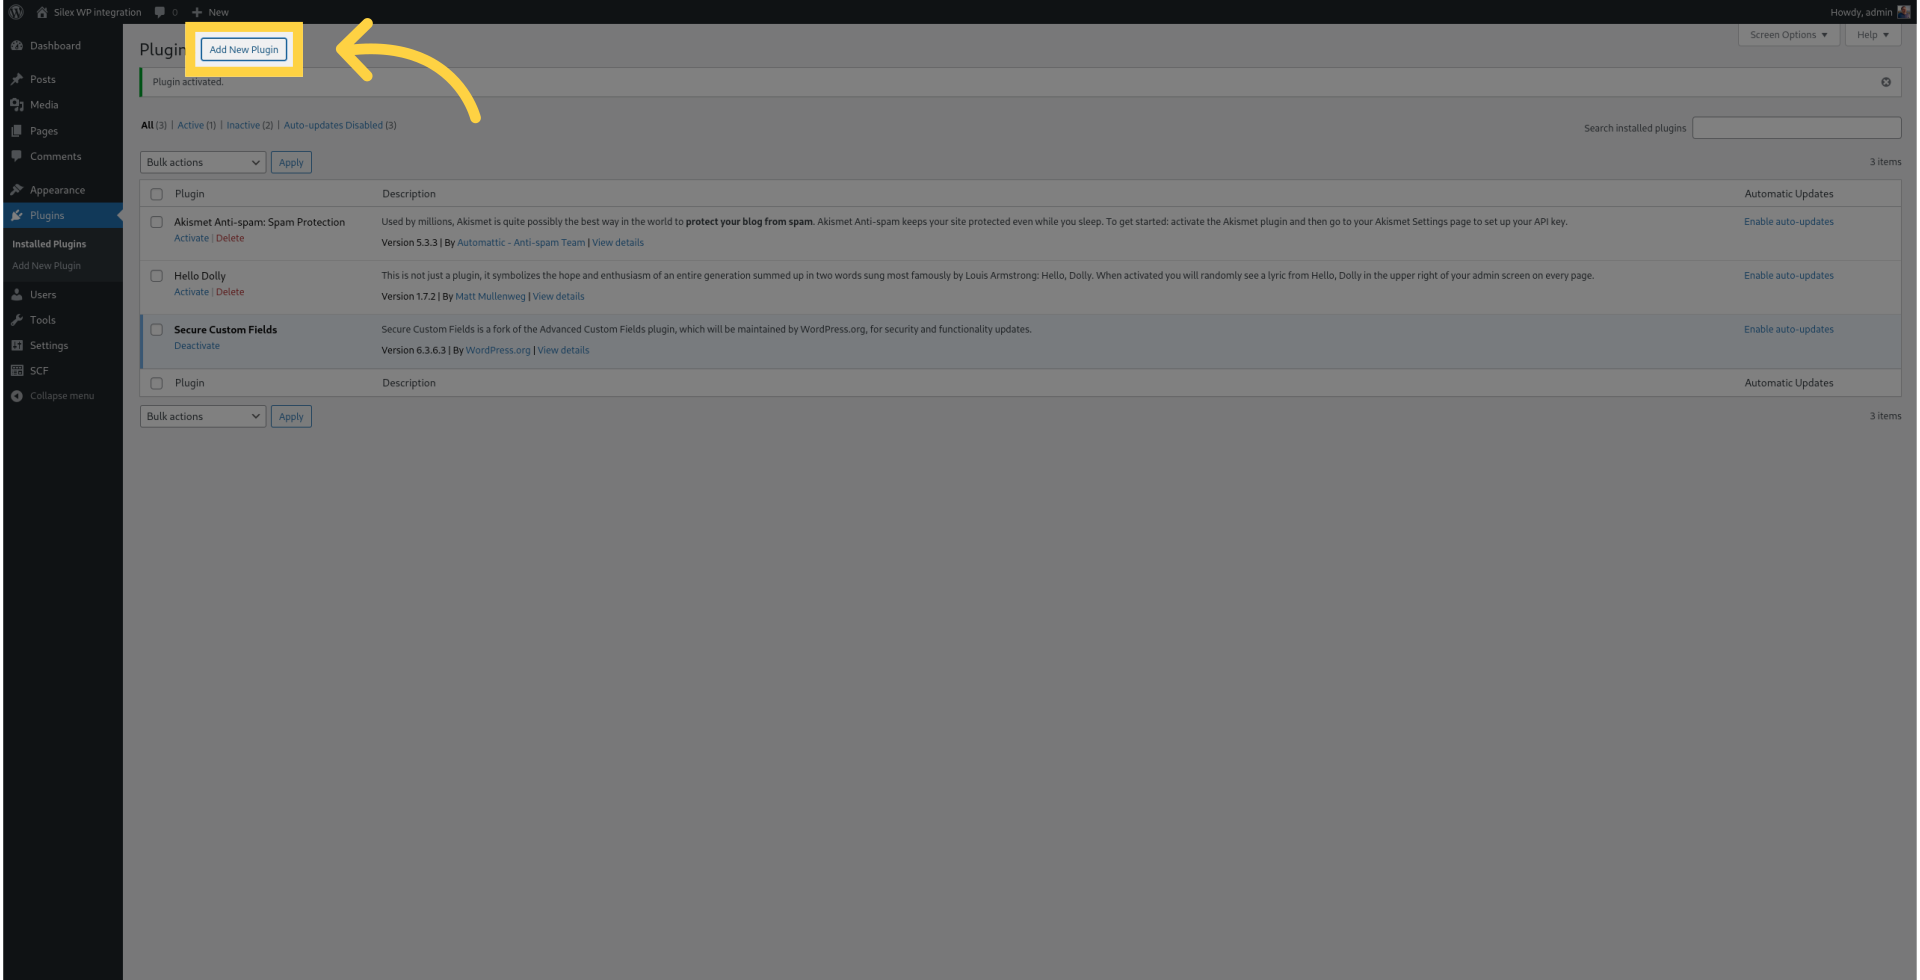
¶ 6. Click "Add New Plugin"
Let's add another plugin.
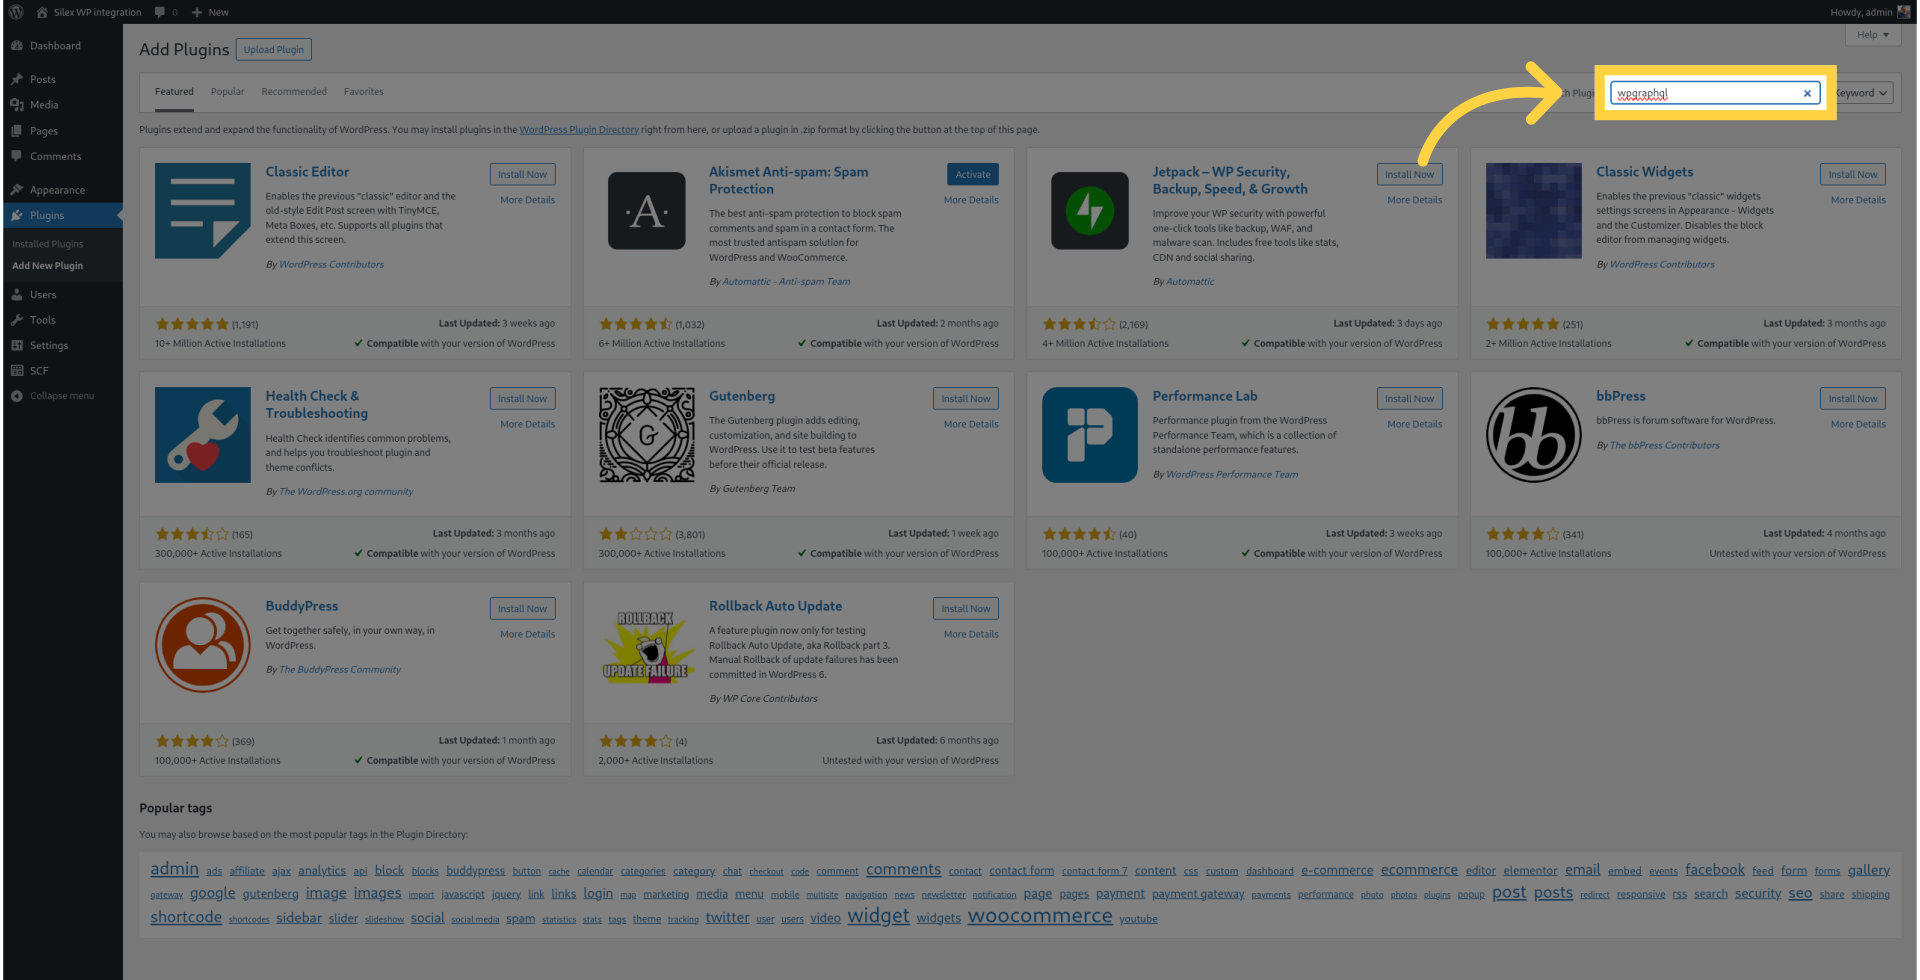
¶ 7. Fill "WPGraphQL"
Enter "WPGraphQL" in the search field.
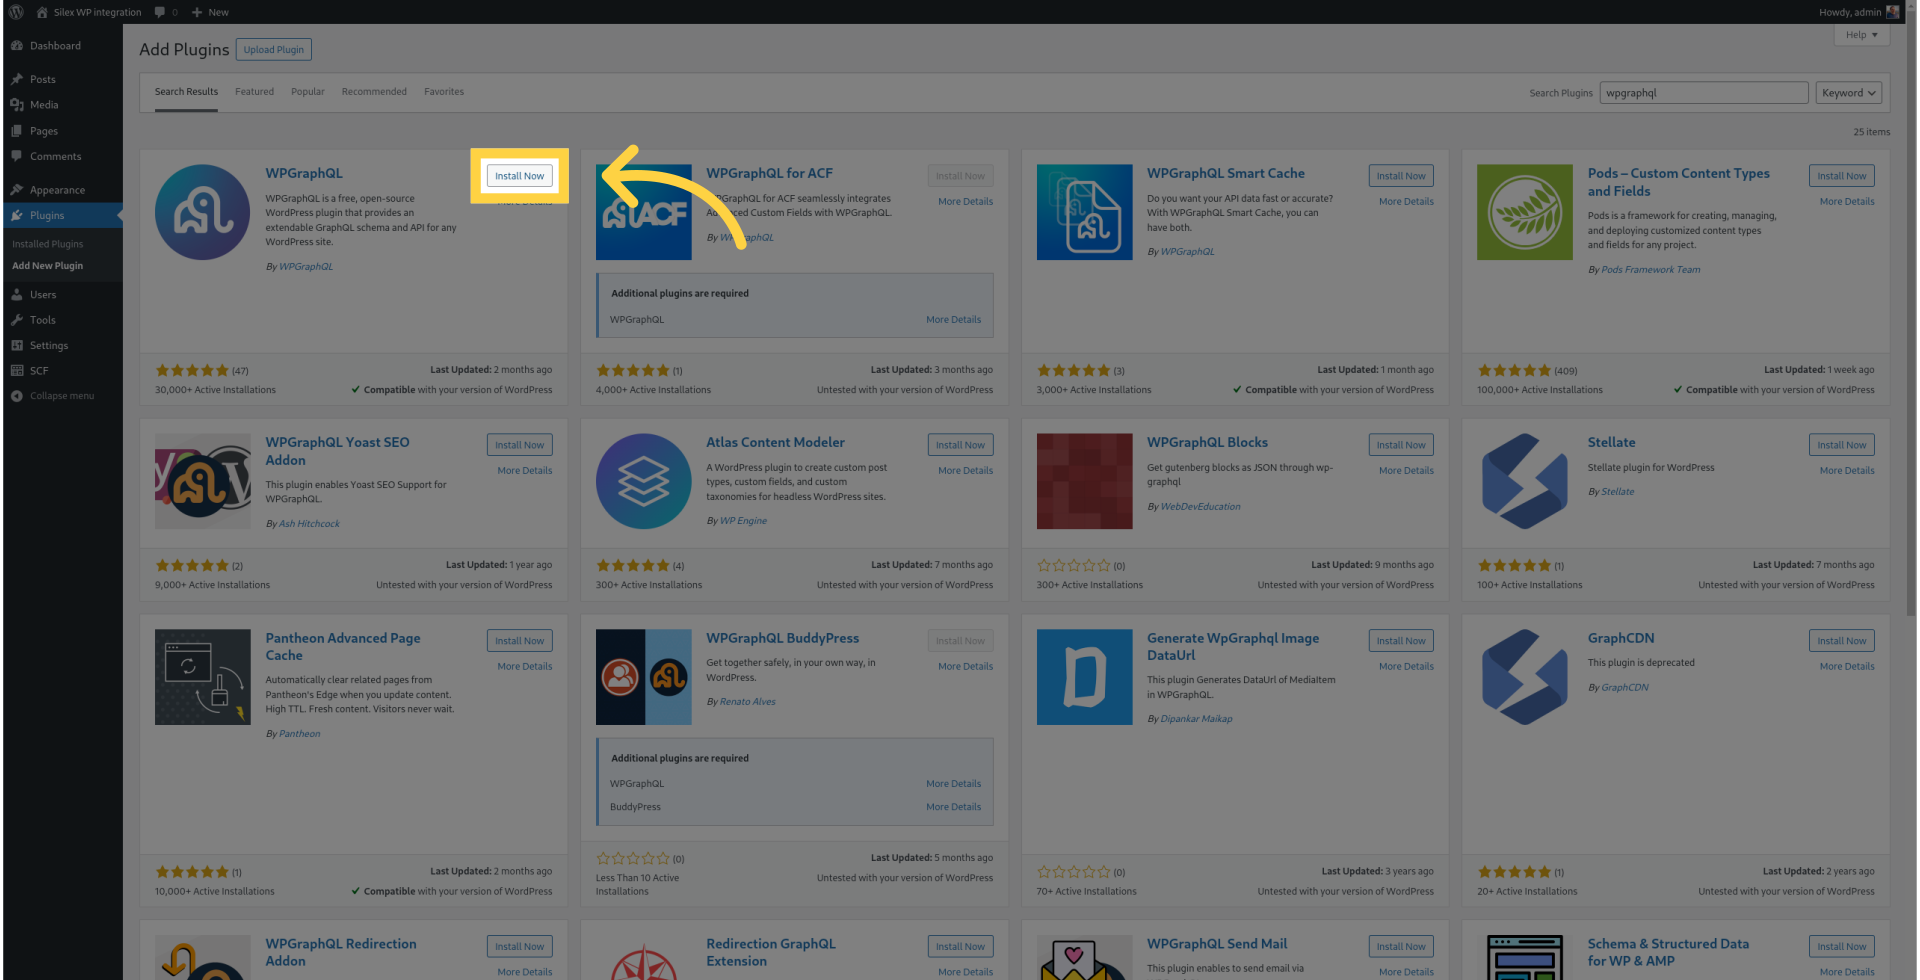
¶ 8. Click "Install Now"
Initiate the installation process.
¶ 9. Click "Activate"
Activate the plugin.
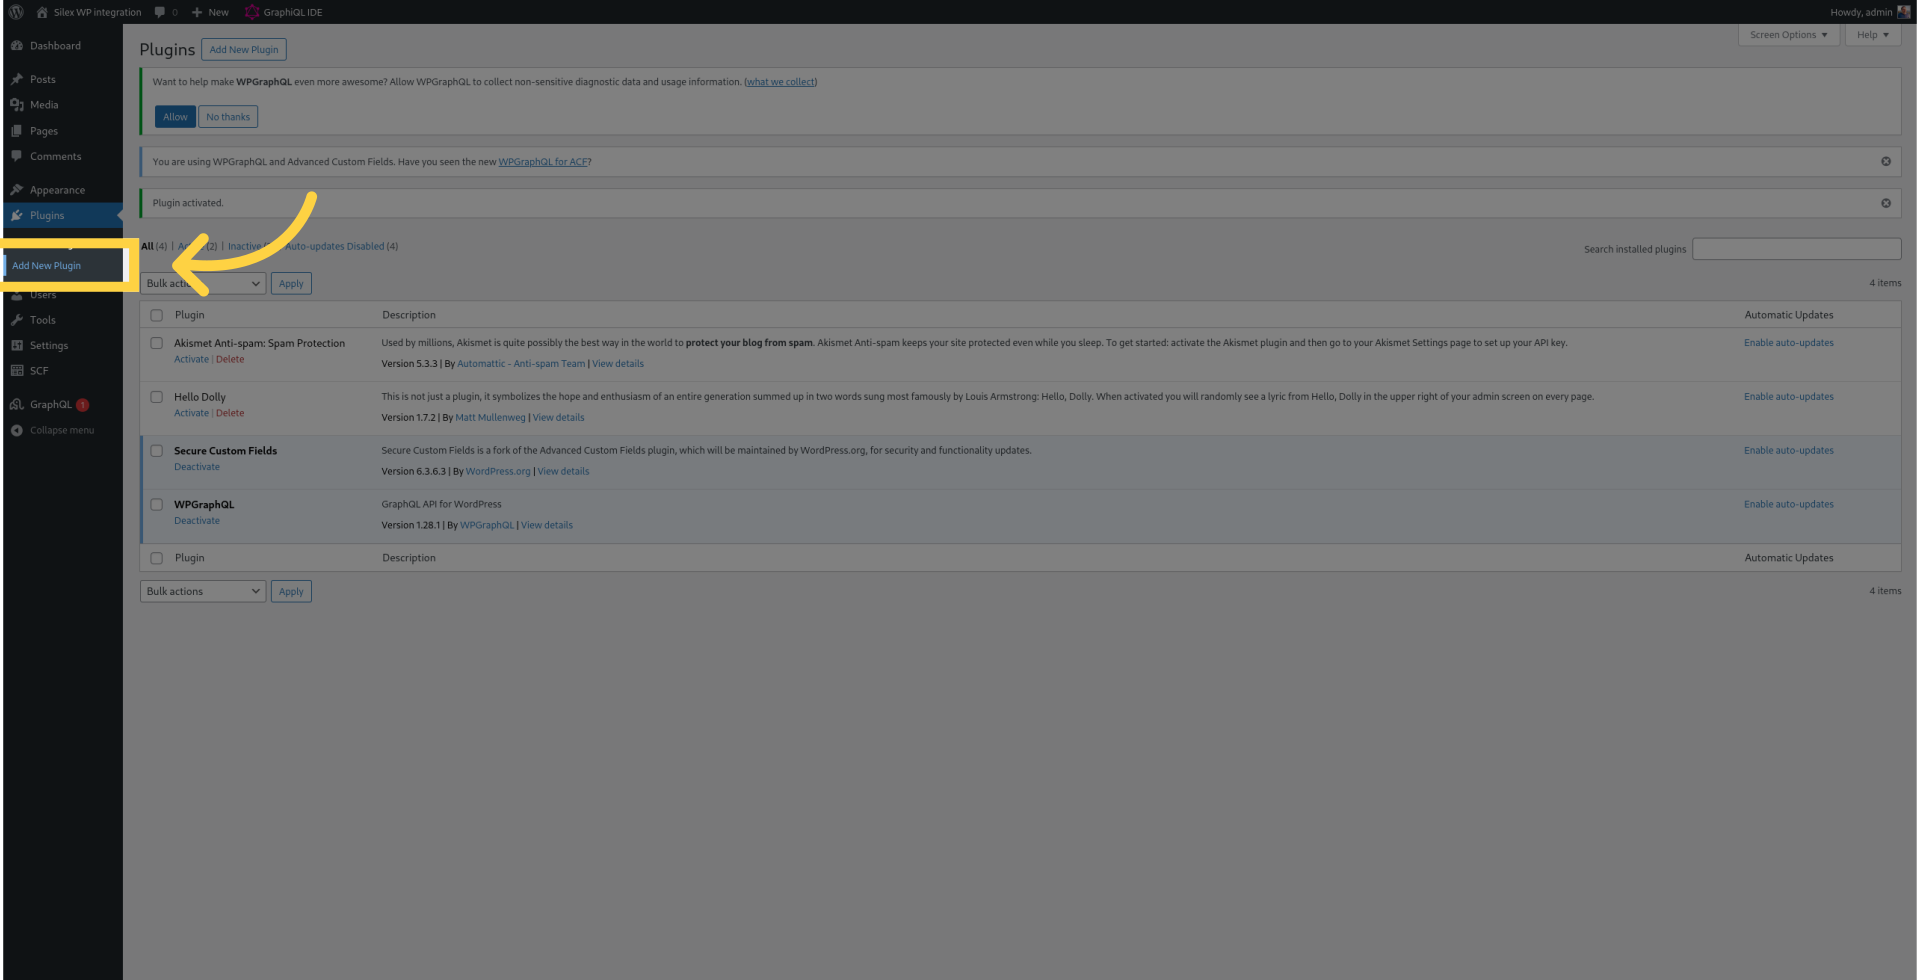
¶ 10. Click "Add New Plugin"
Add a new plugin.
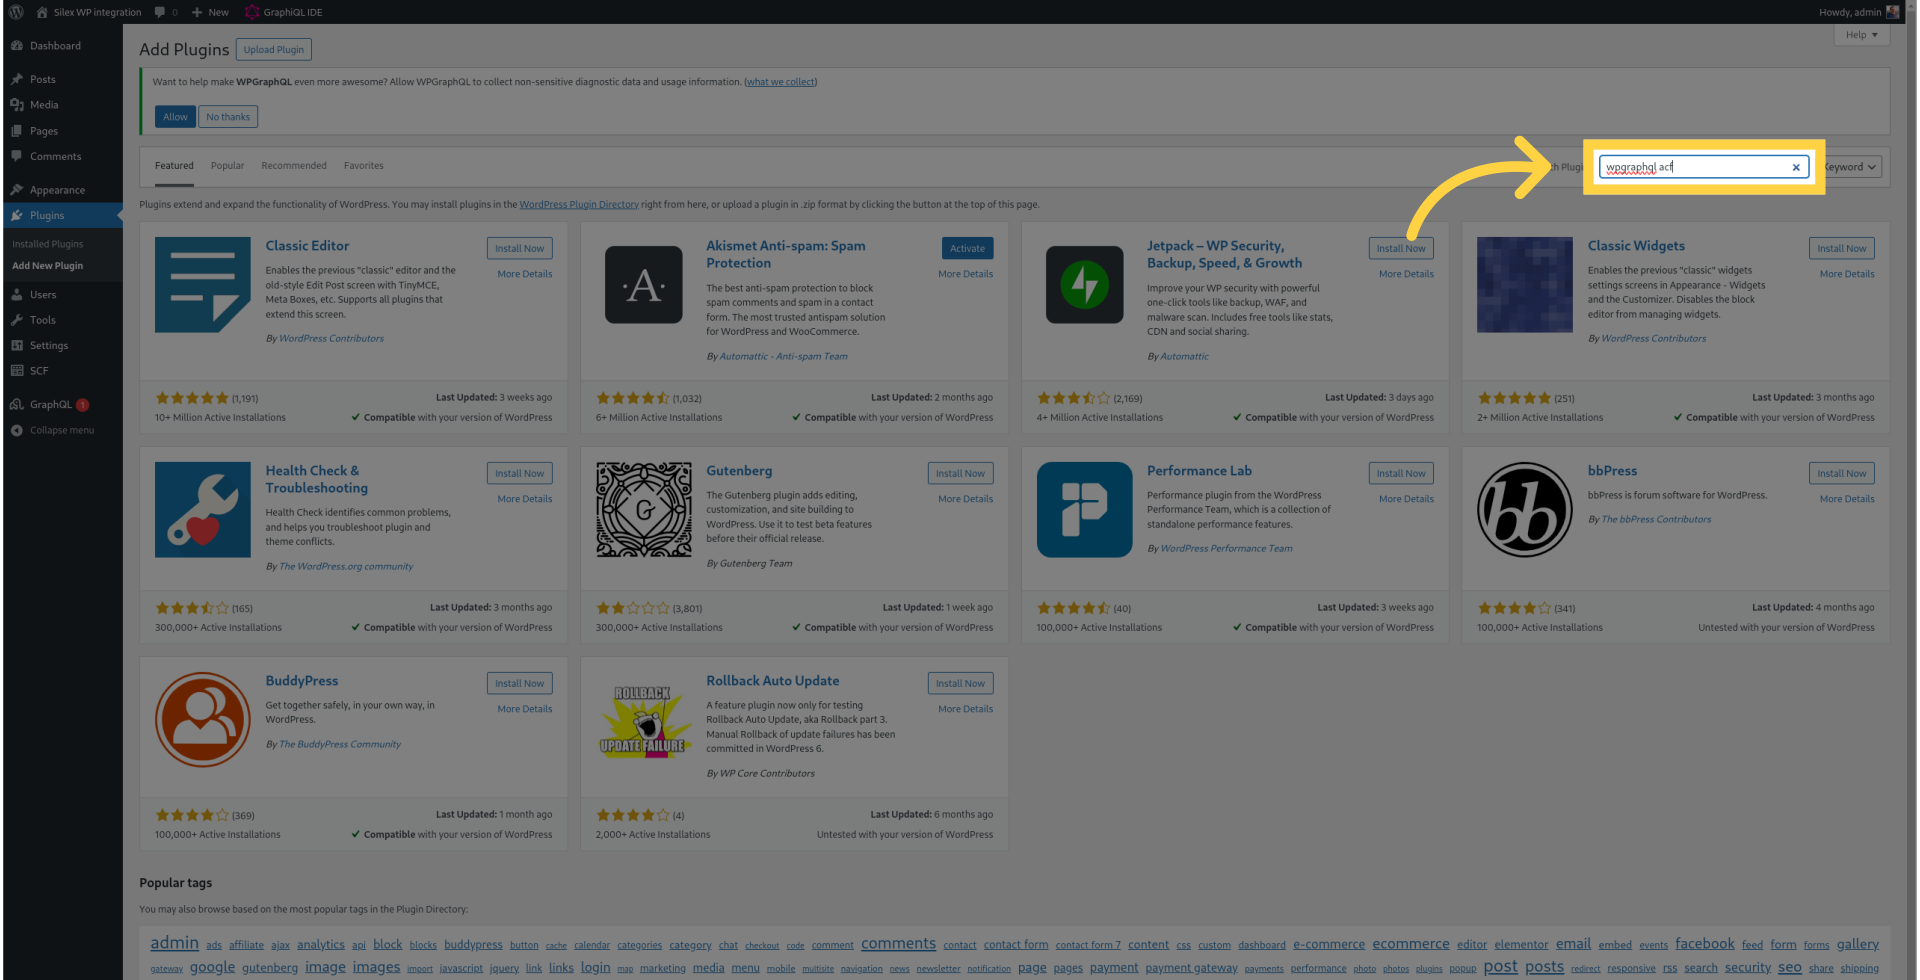
¶ 11. Fill "WPGraphQL ACF"
Fill in the search box with "WPGraphQL ACF."
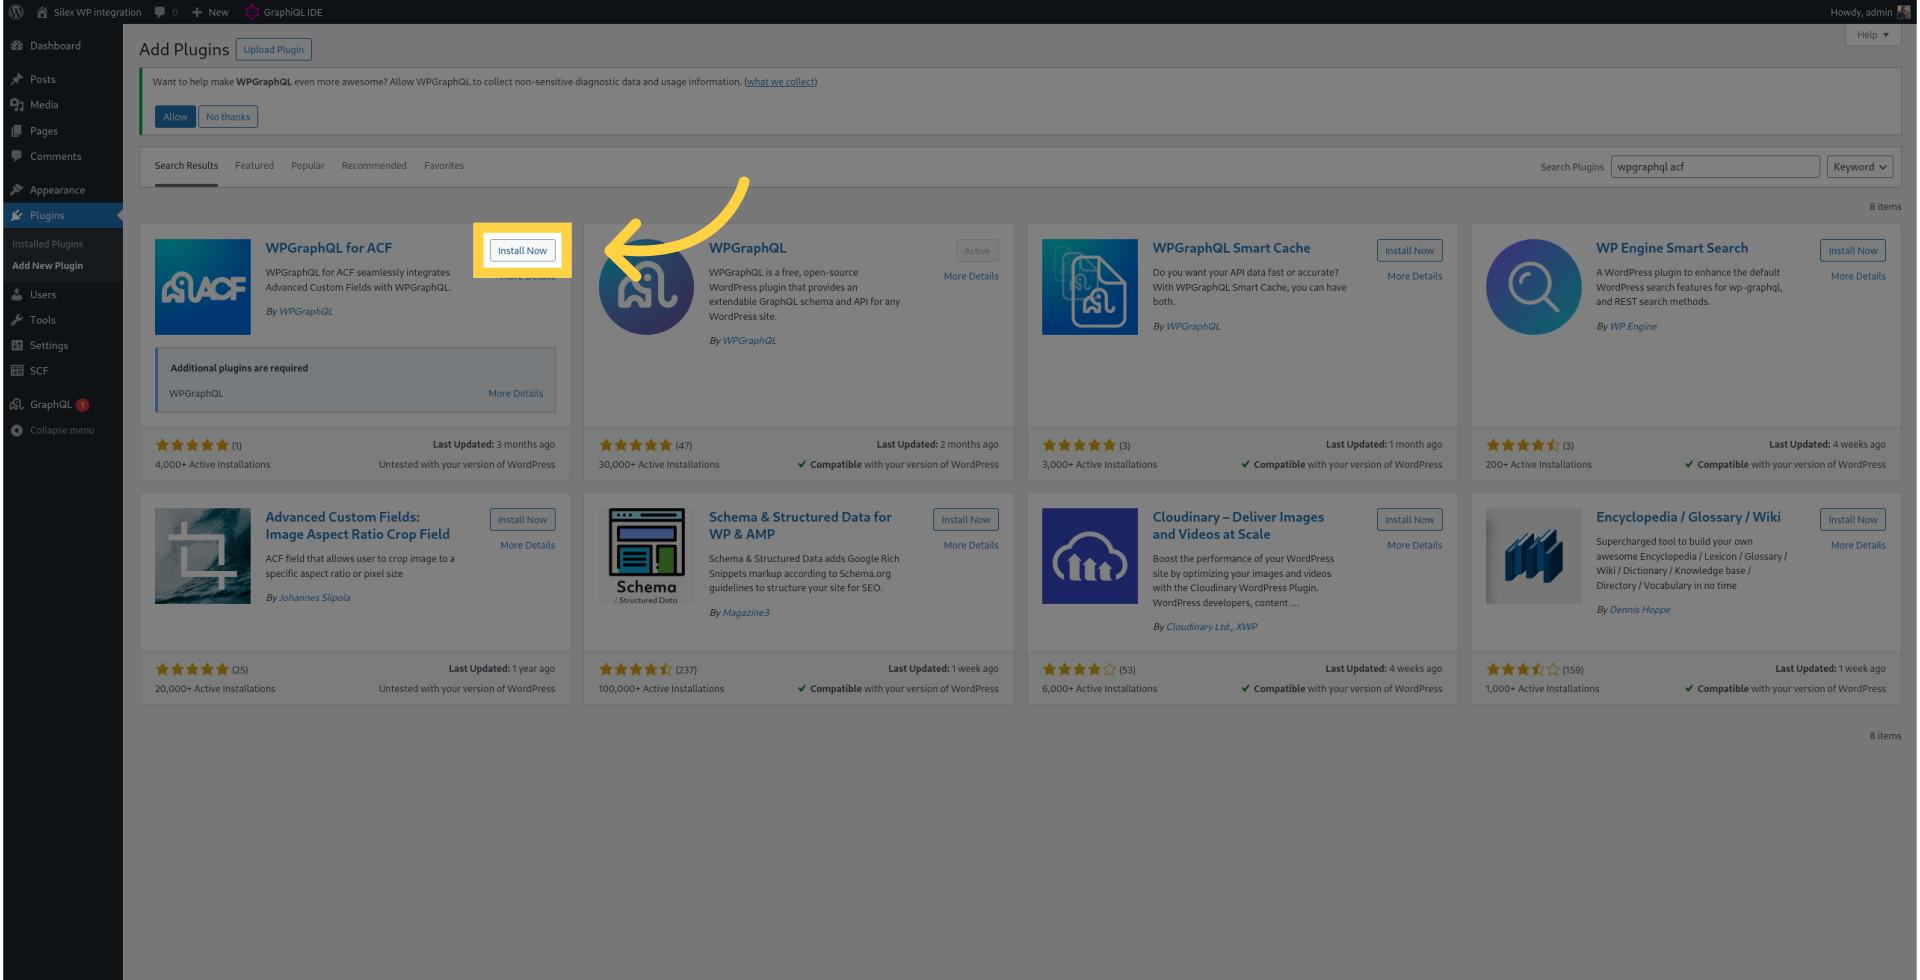
¶ 12. Click "Install Now"
Initiate the installation process.
¶ 13. Click "Activate"
Activate the plugin.
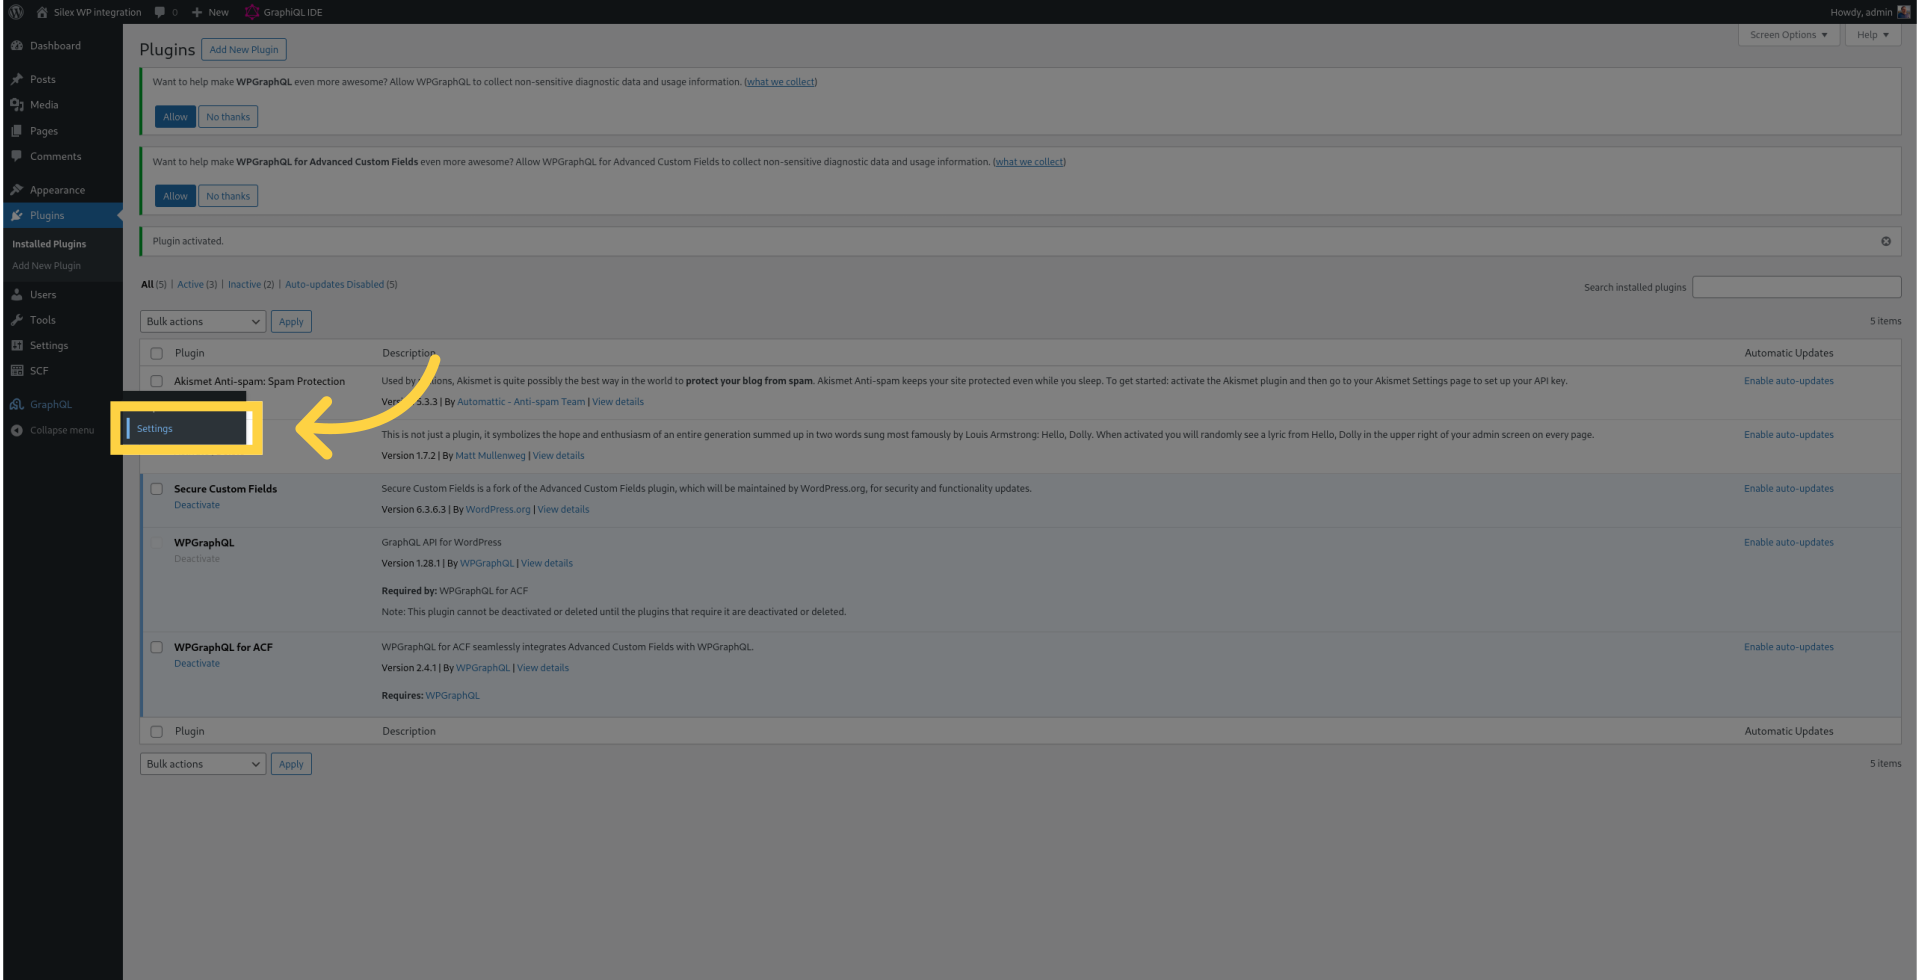
¶ 14. Click "Settings"
Access the settings.
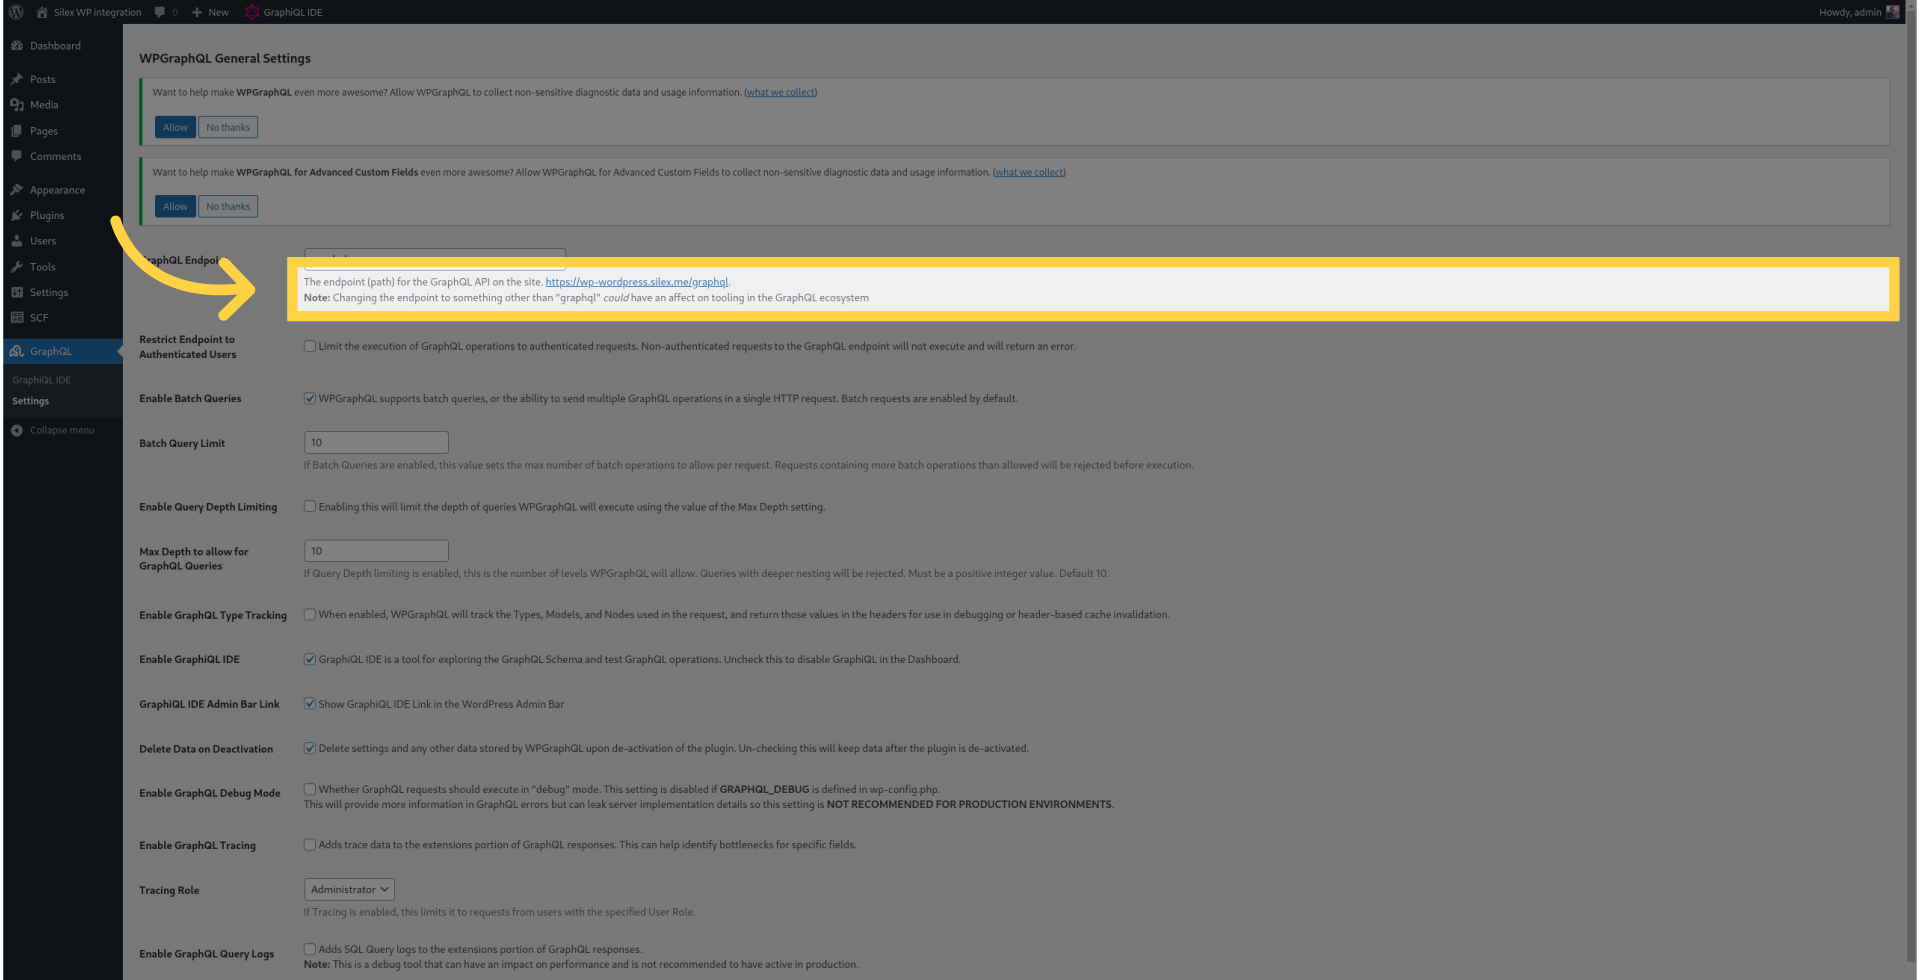
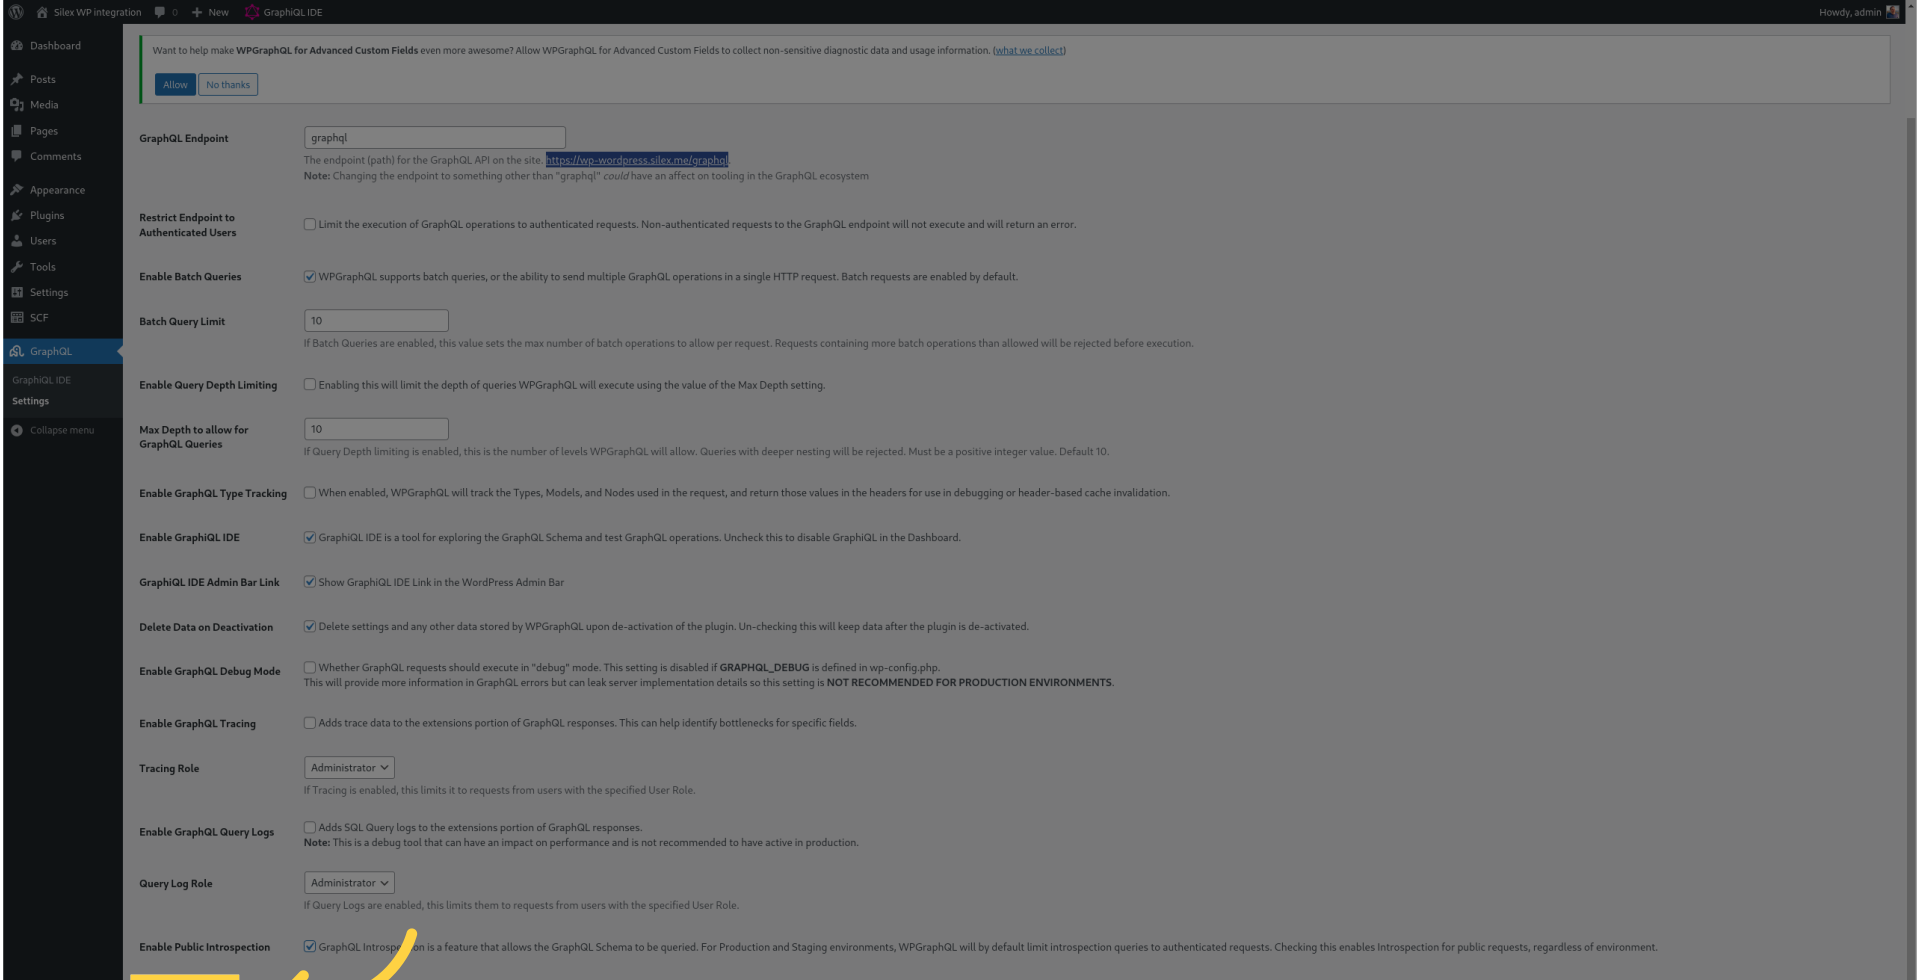
¶ 15. Copy the value of "The endpoint" for the GraphQL
Set the GraphQL API endpoint.
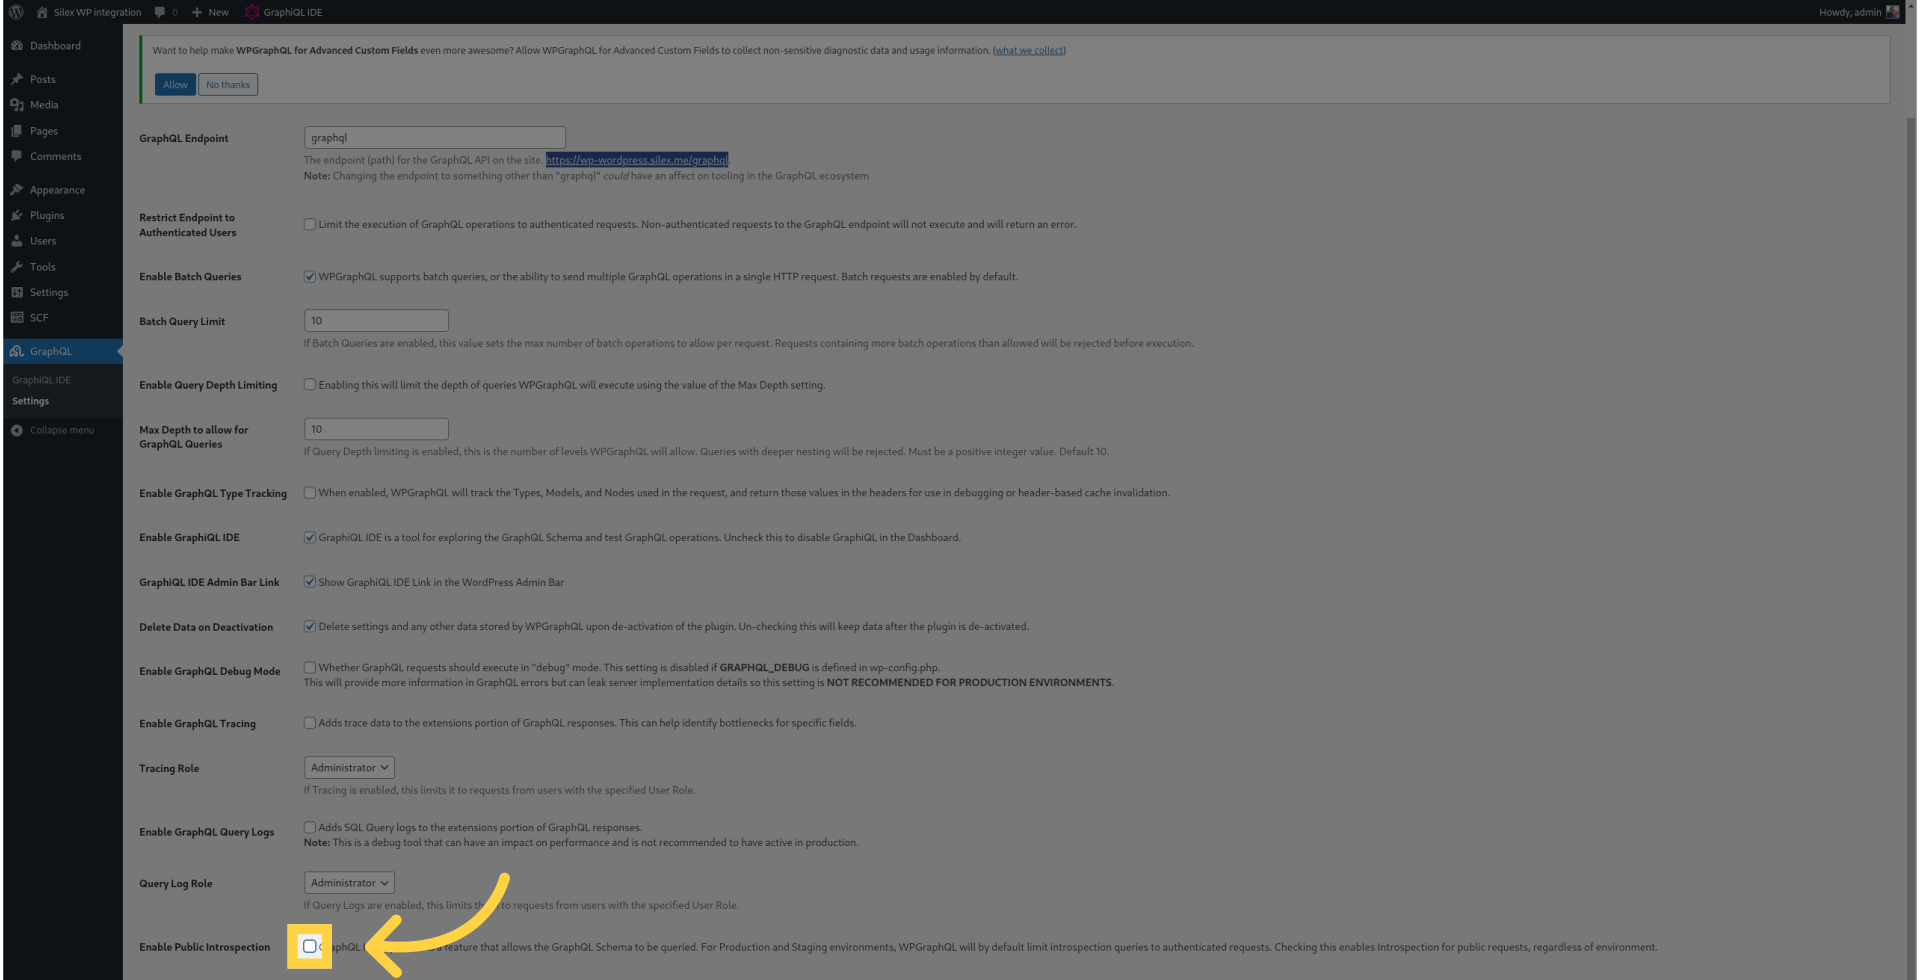
¶ 16. Enable Public Introspection
Select "Enable Public Introspection."
¶ 17. Click "Save Changes"
Save the changes made.
¶ 18. Switch to "v3.silex.me"
Switch to "v3.silex.me."
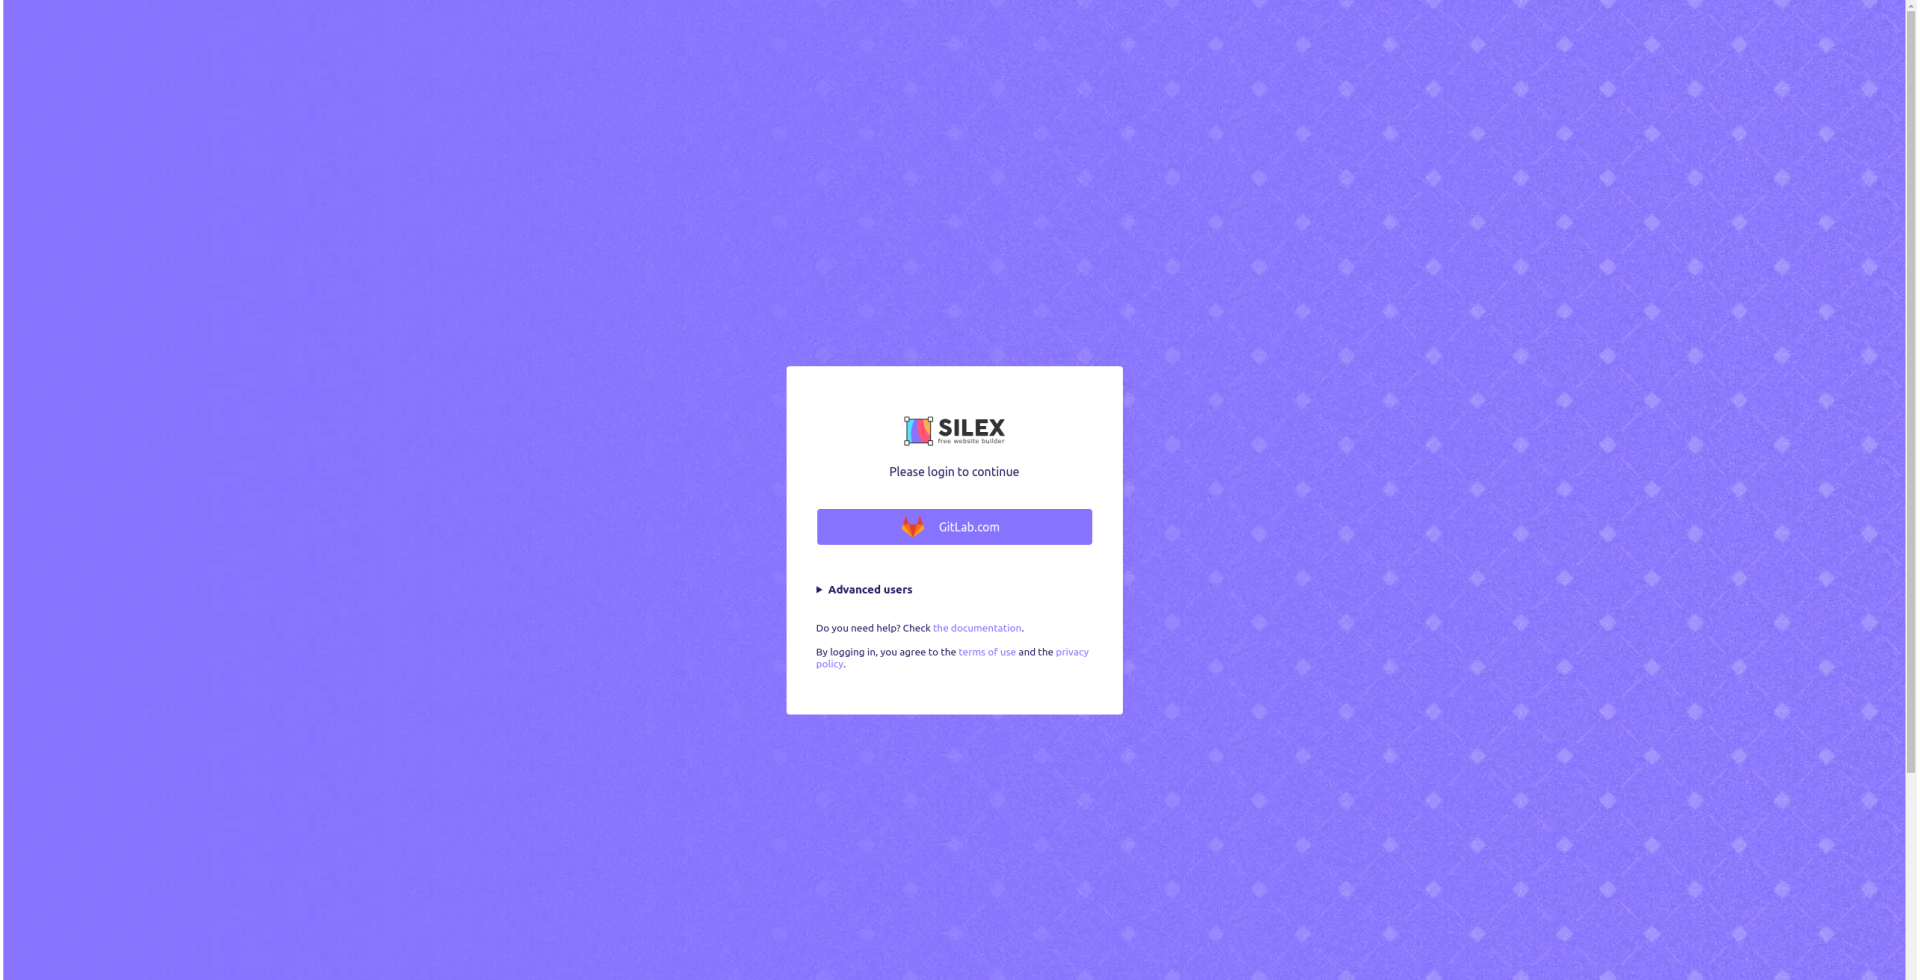
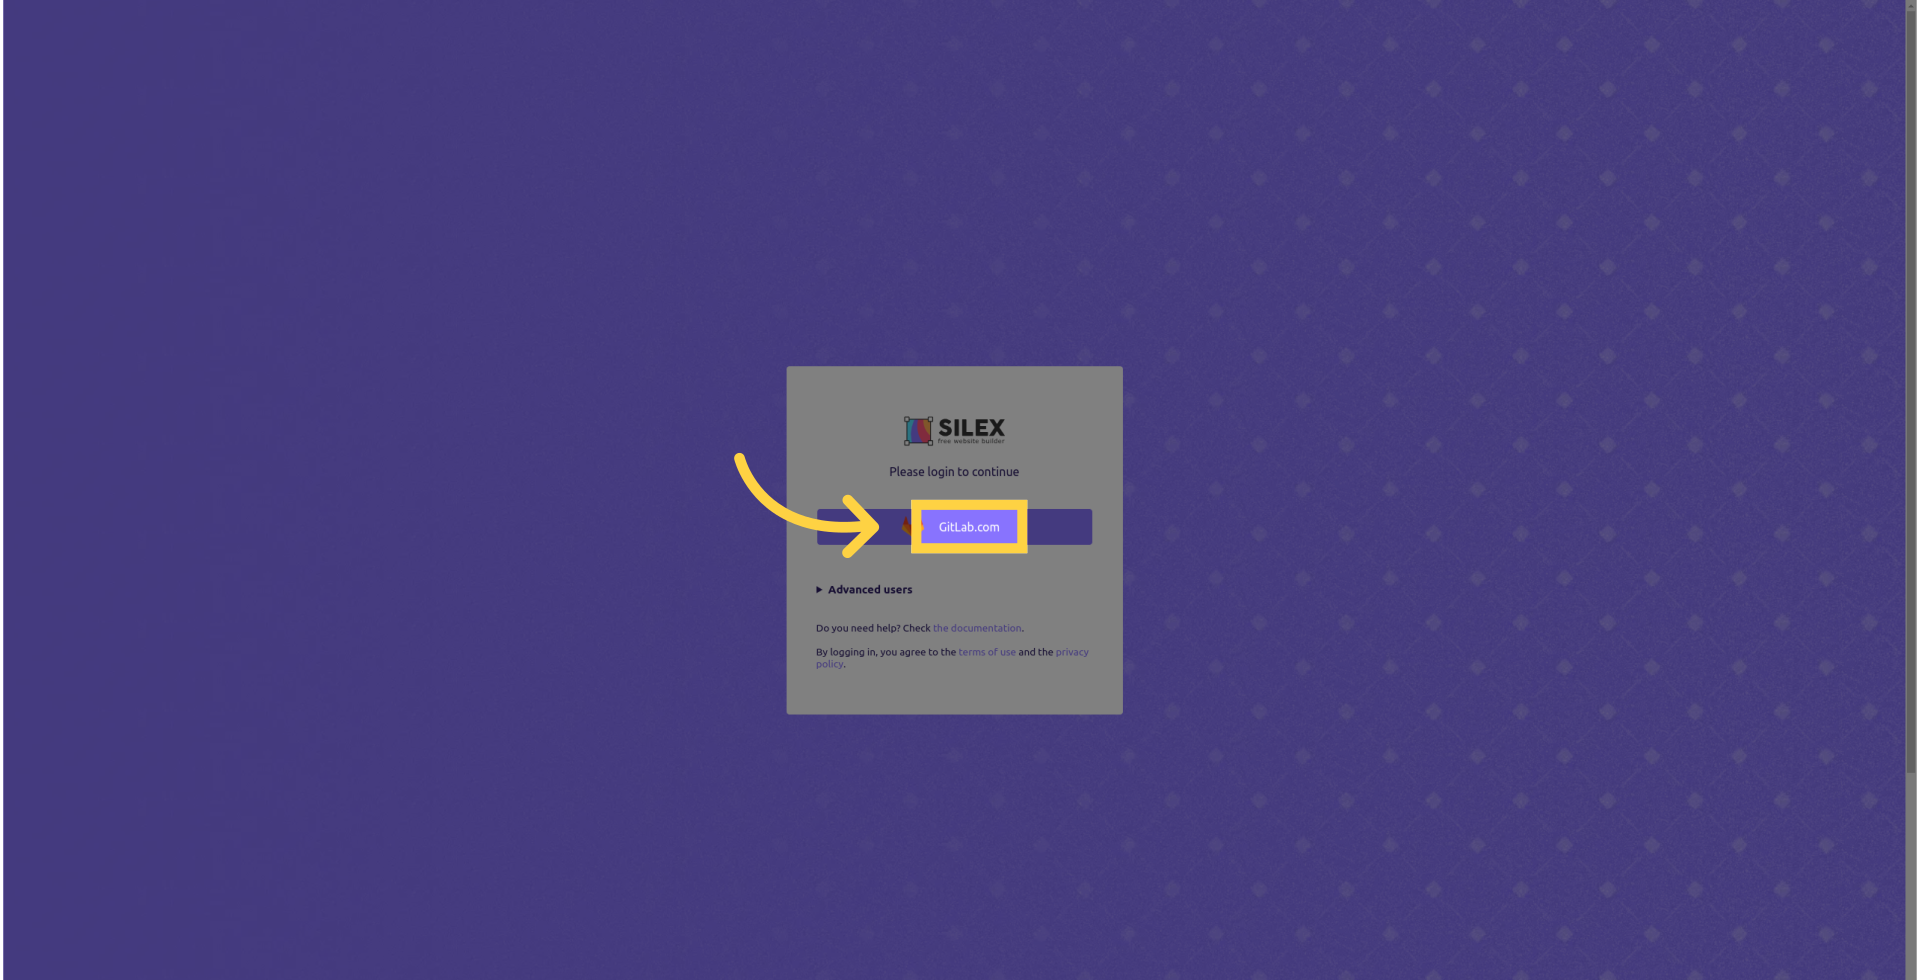
¶ 19. Login with GitLab.com
Access Silex with your GitLab account.
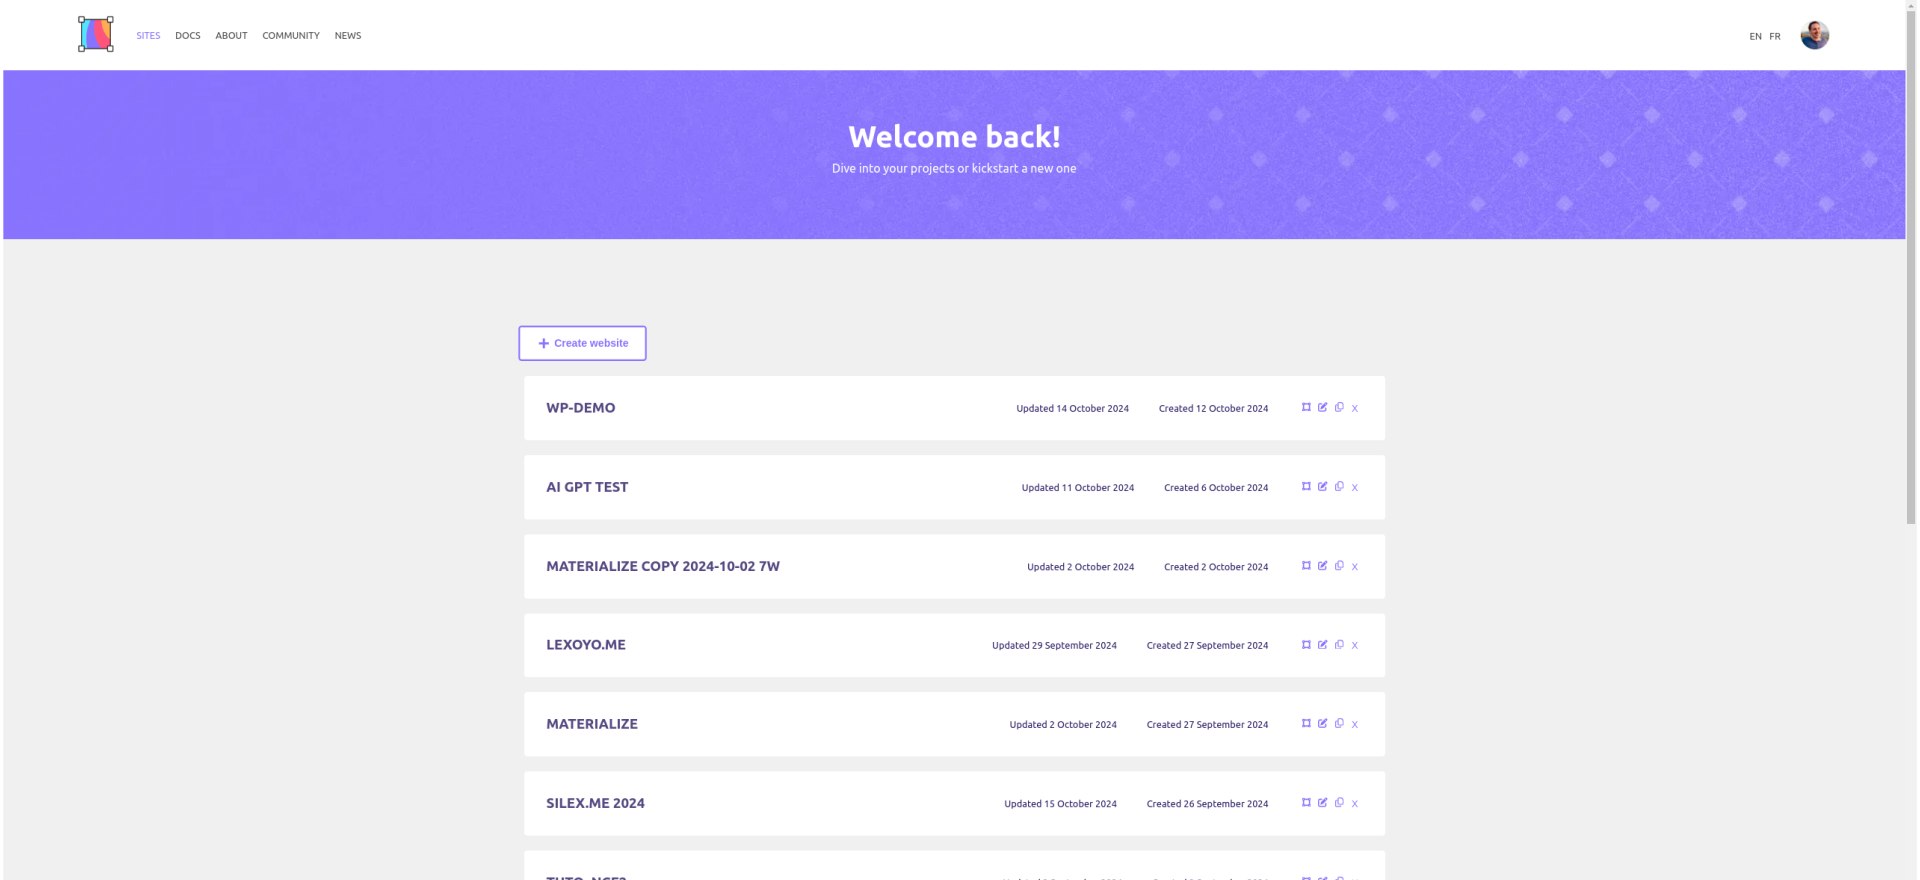
¶ 20. Create a new site
Say hi to the dashboard, create a new empty site.
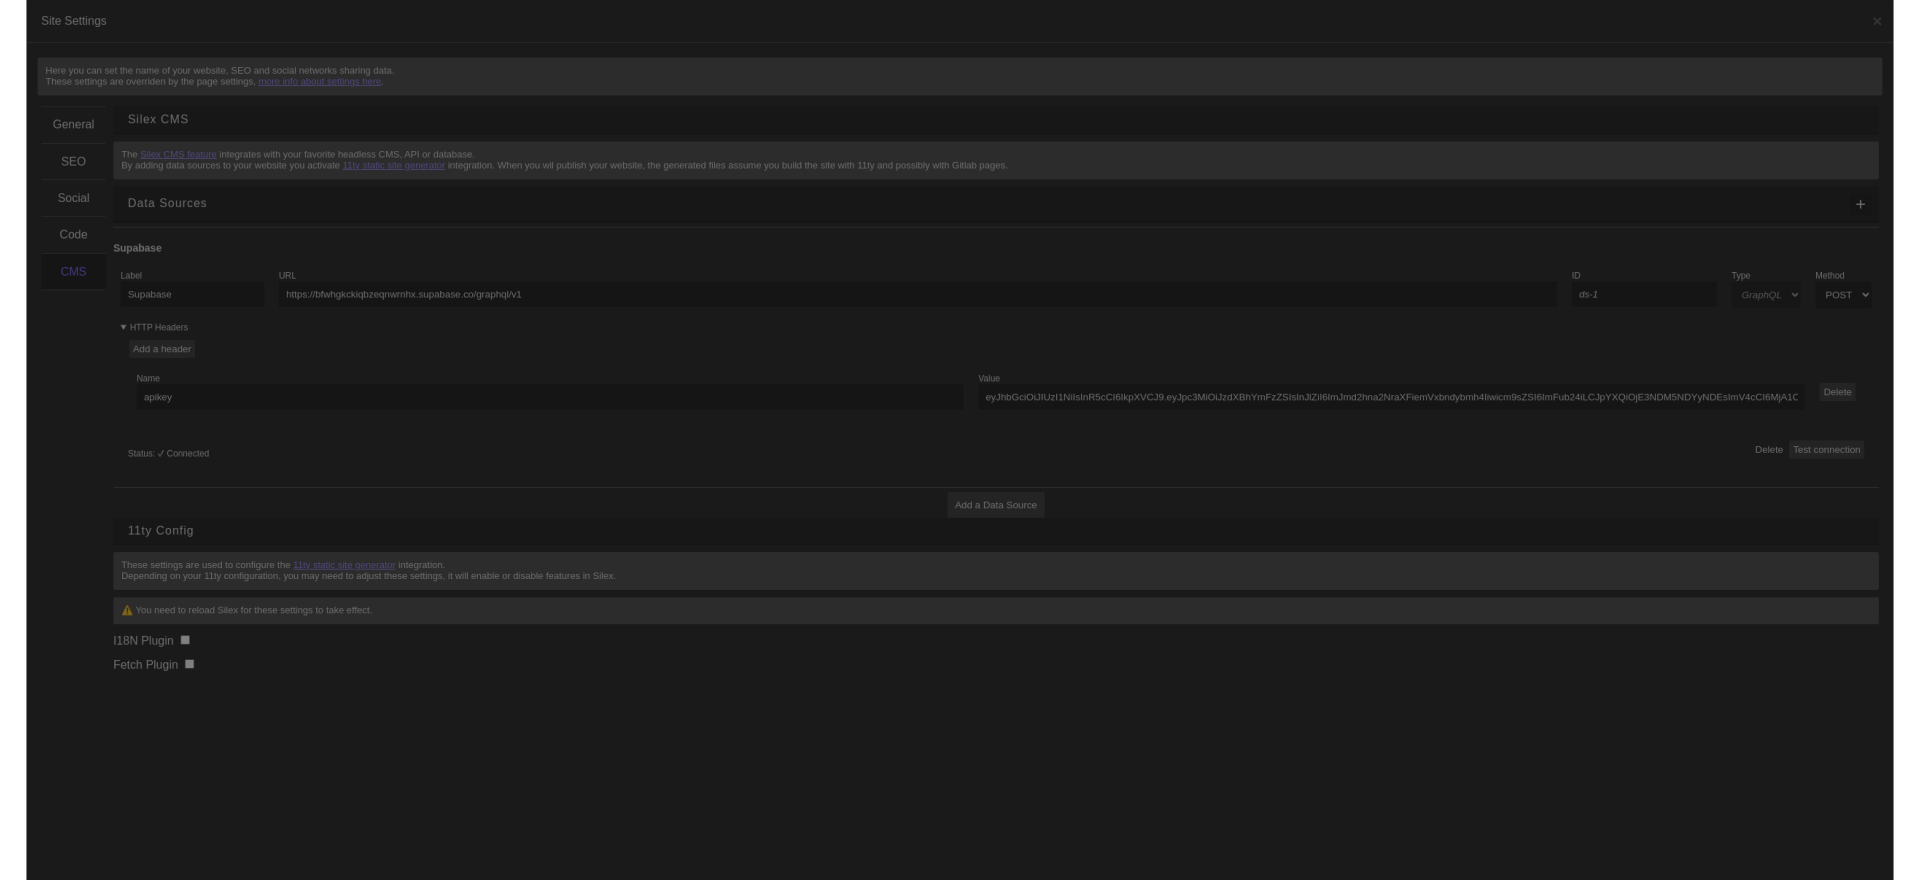
¶ 21. Open the website settings
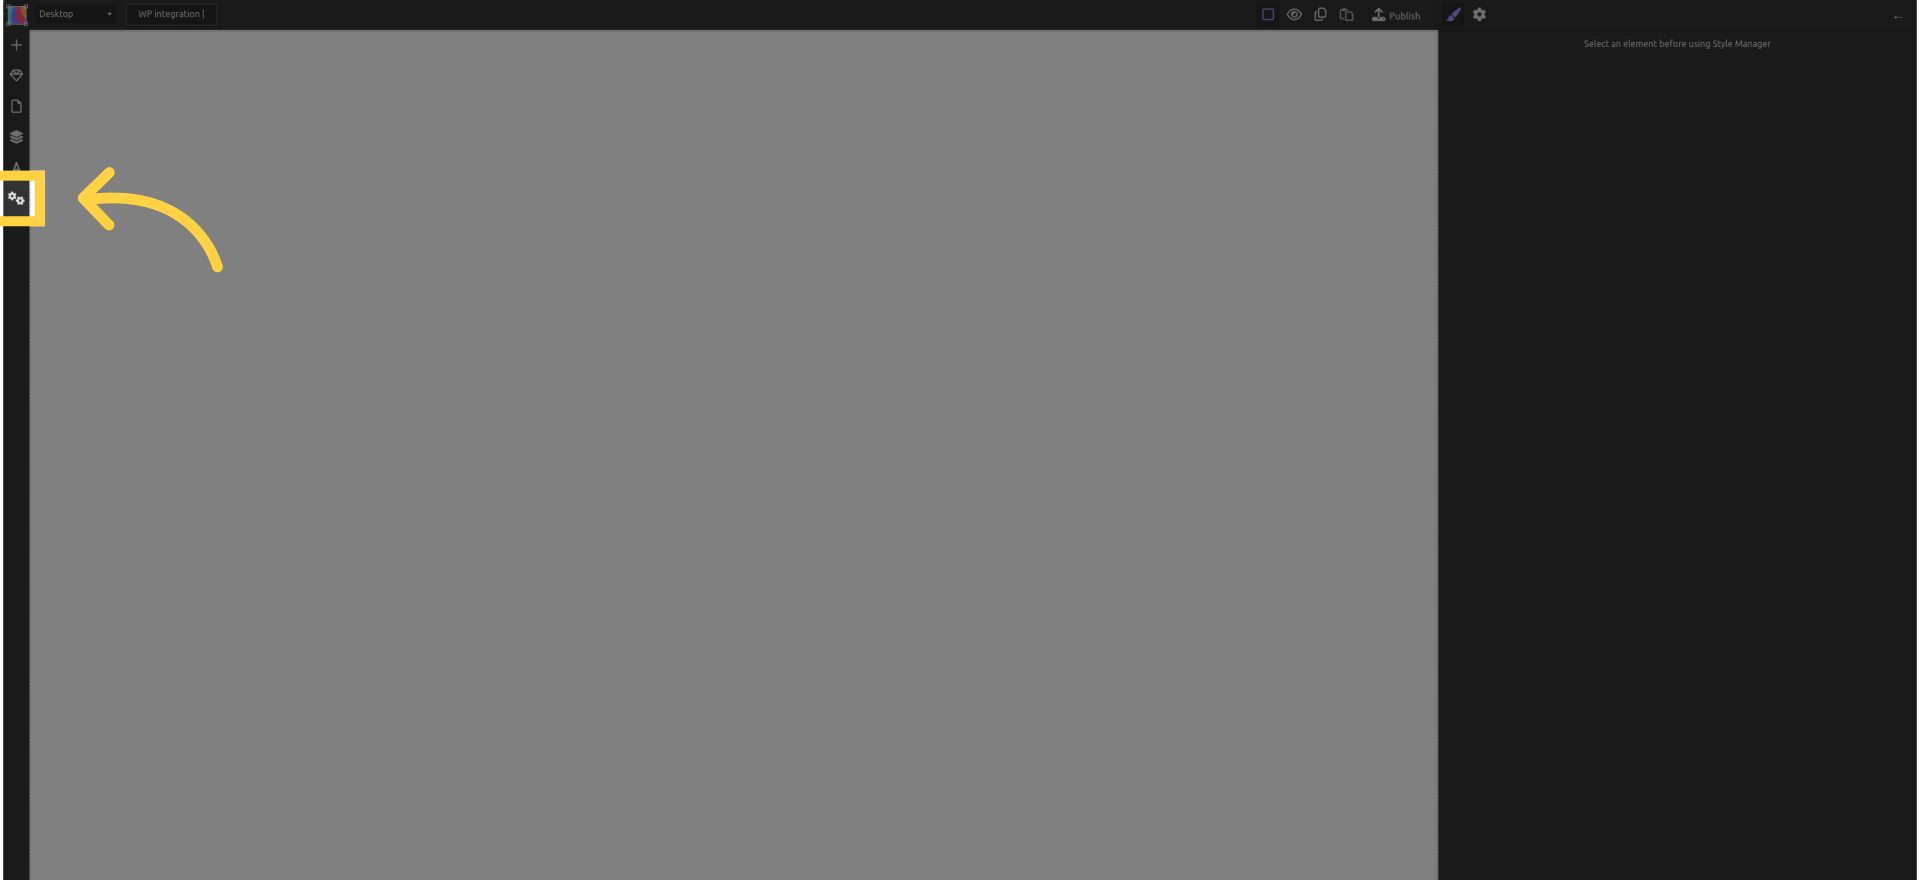
¶ 22. In the "CMS" tab
Access the CMS settings for the website

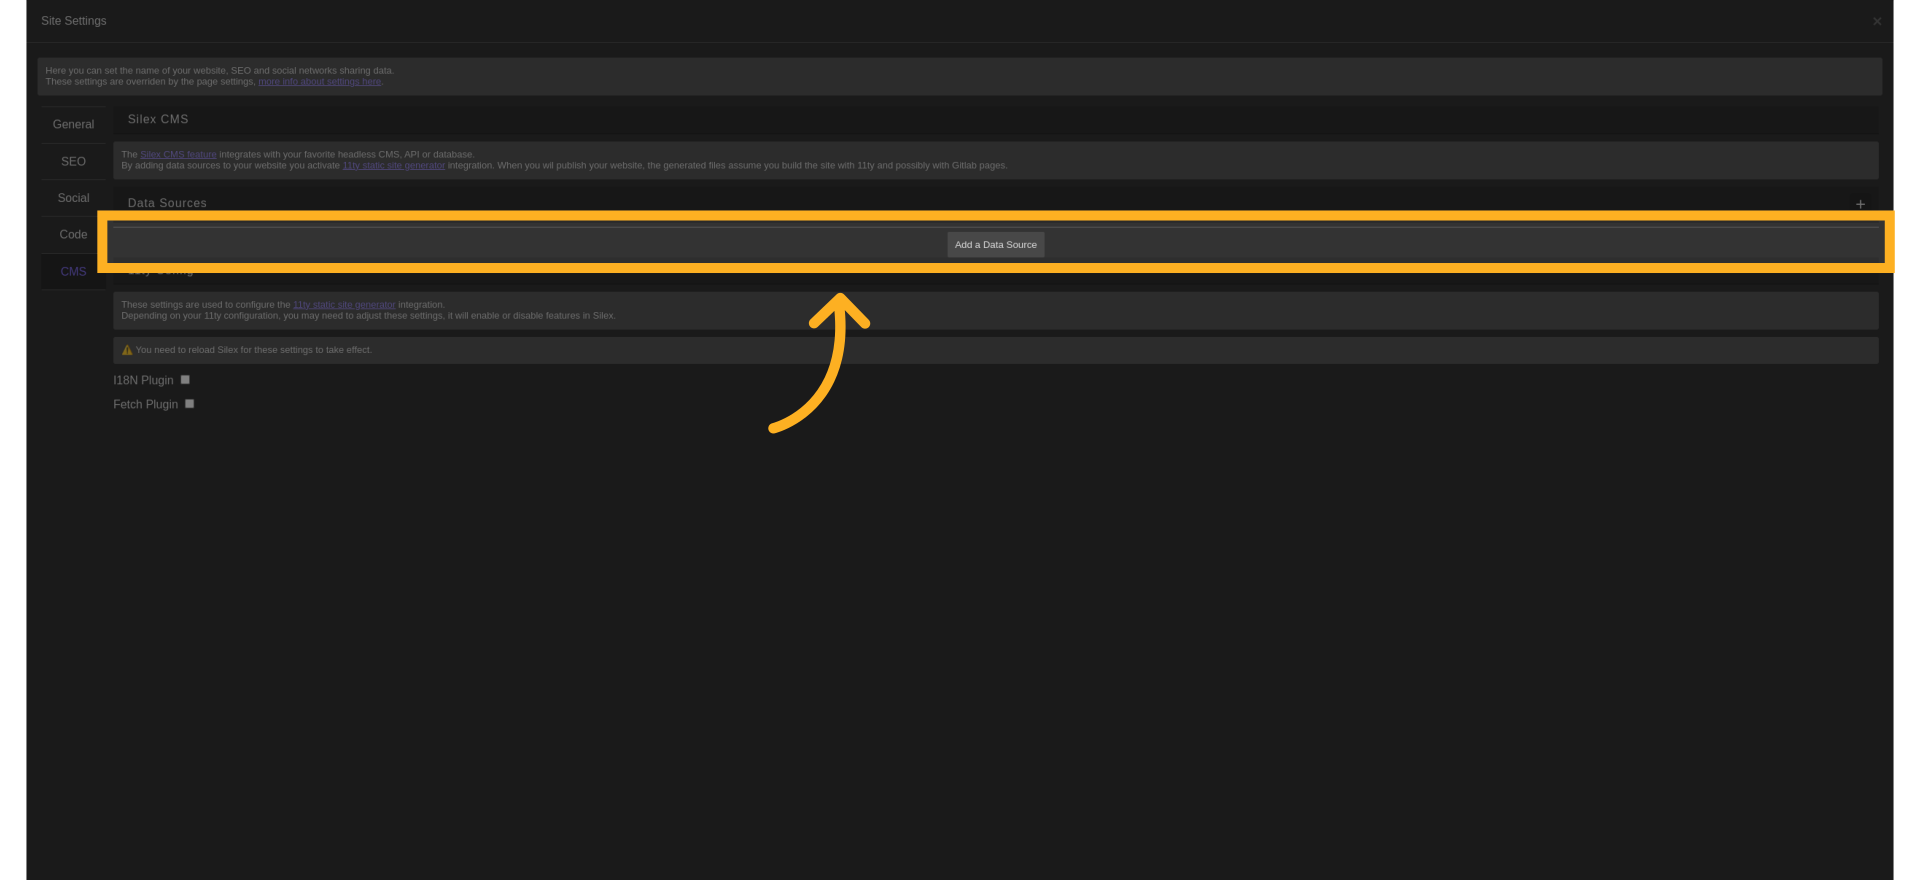
¶ 23. Add a data source
Click on the "Add data source" button.
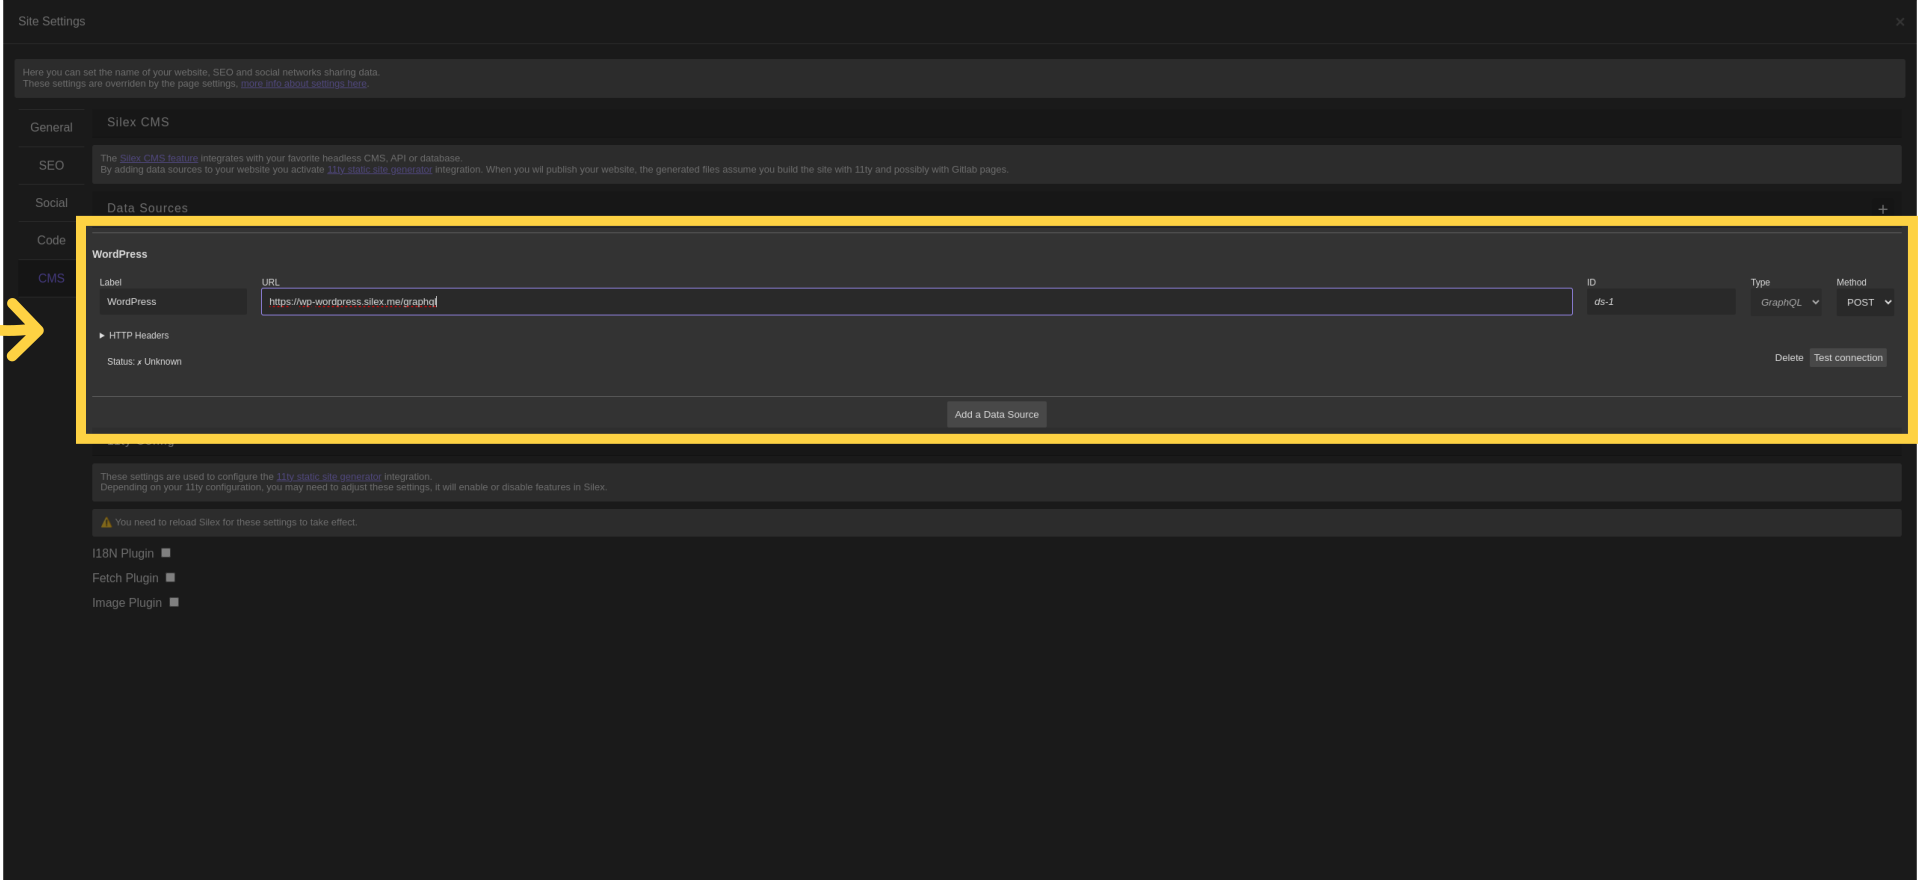
¶ 24. Fill here the value from before
Enter information in the field that was the value "Endpoint."
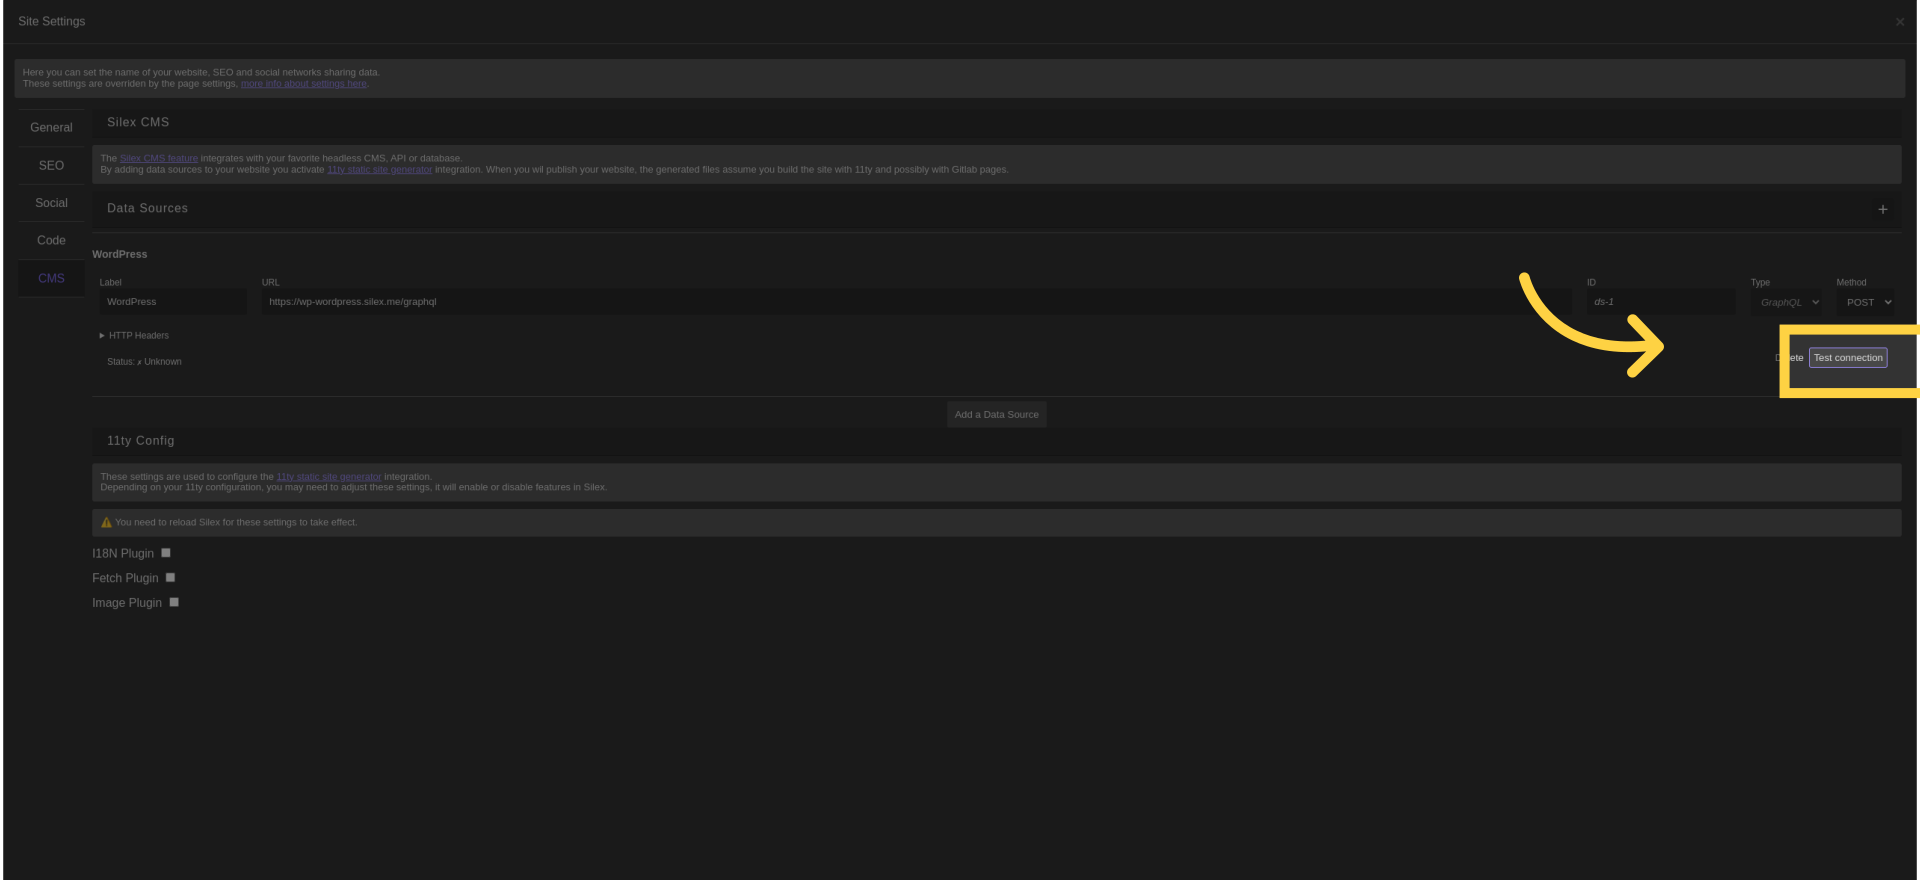
¶ 25. Click on "test connection"
Make sure that this does not display any error.
¶ 26. Click "Apply"
Apply the changes.
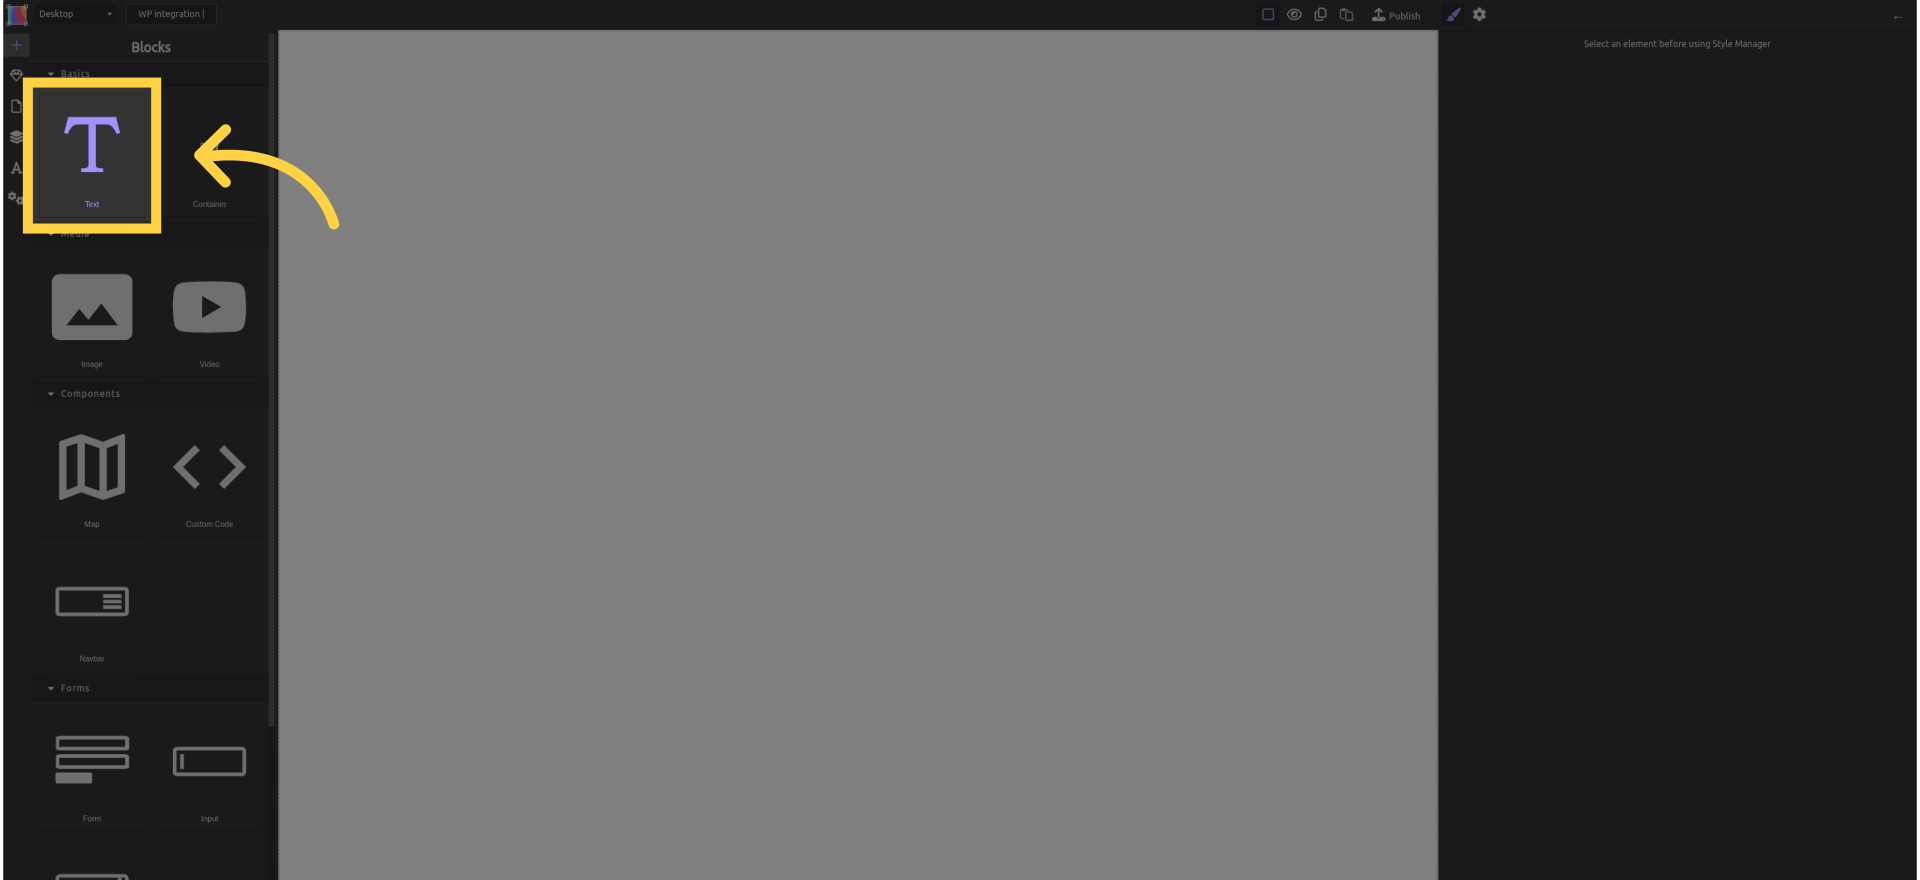
¶ 27. Click on "+"
Add a text to your site.

¶ 28. Use the text block
Drag a text to the canvas.
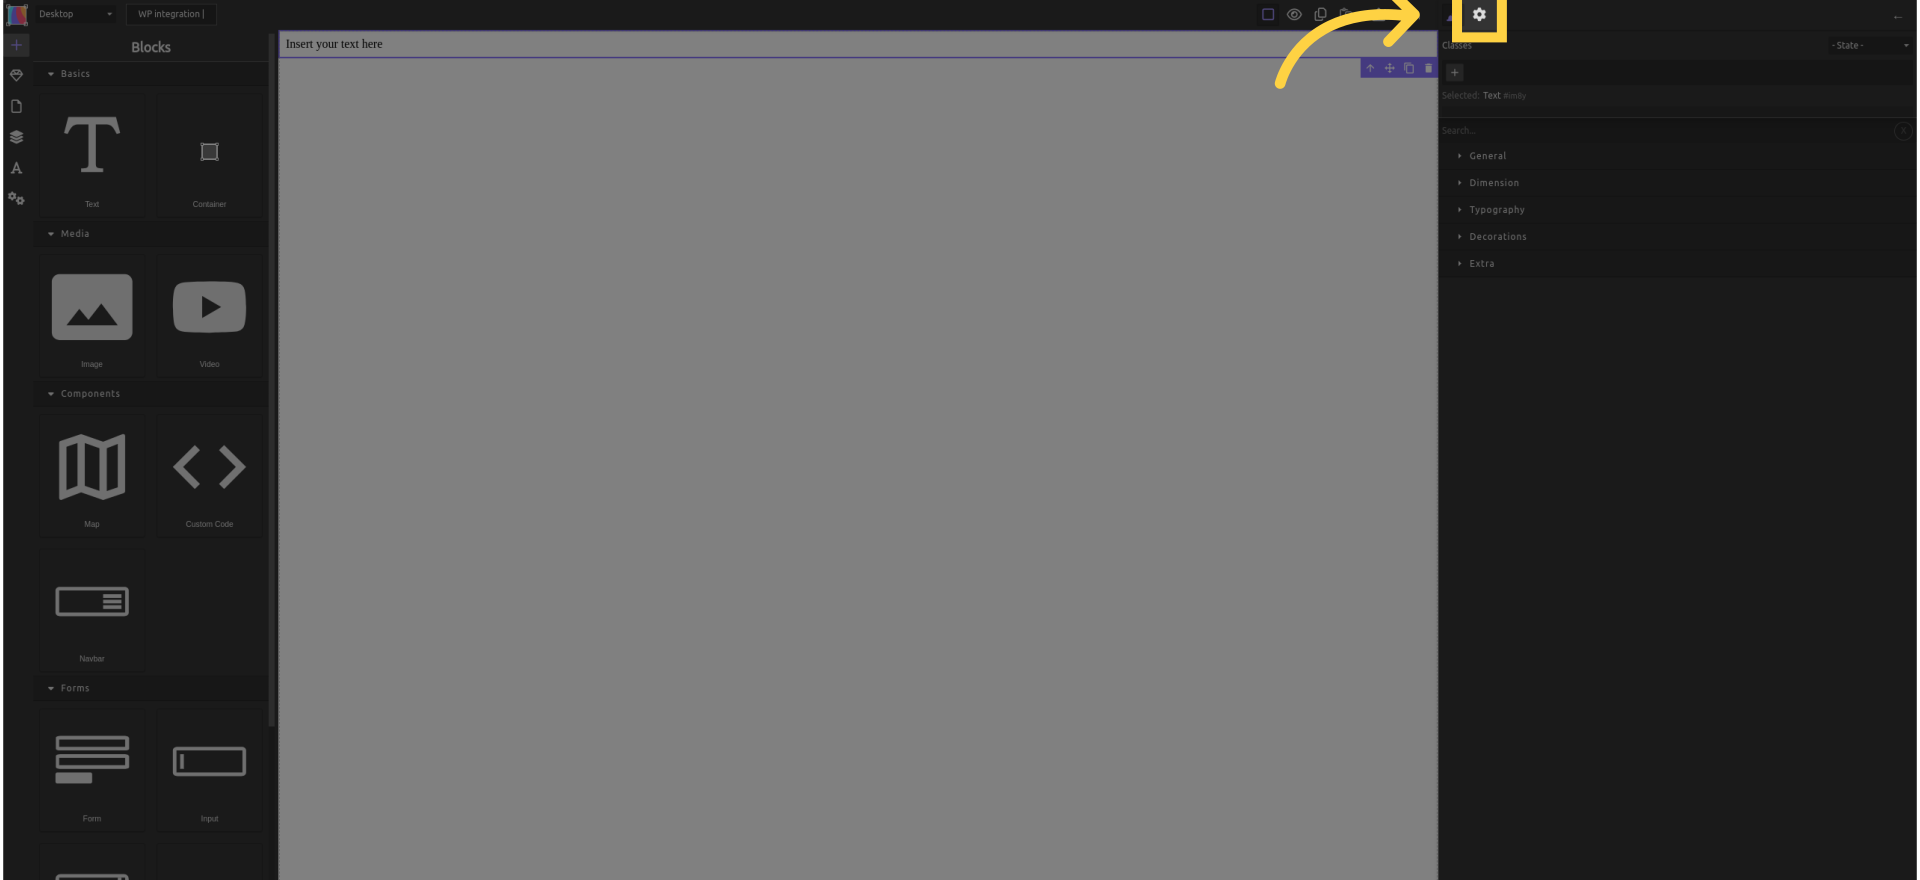
¶ 29. In the element's settings
Open the settings of the new text block.
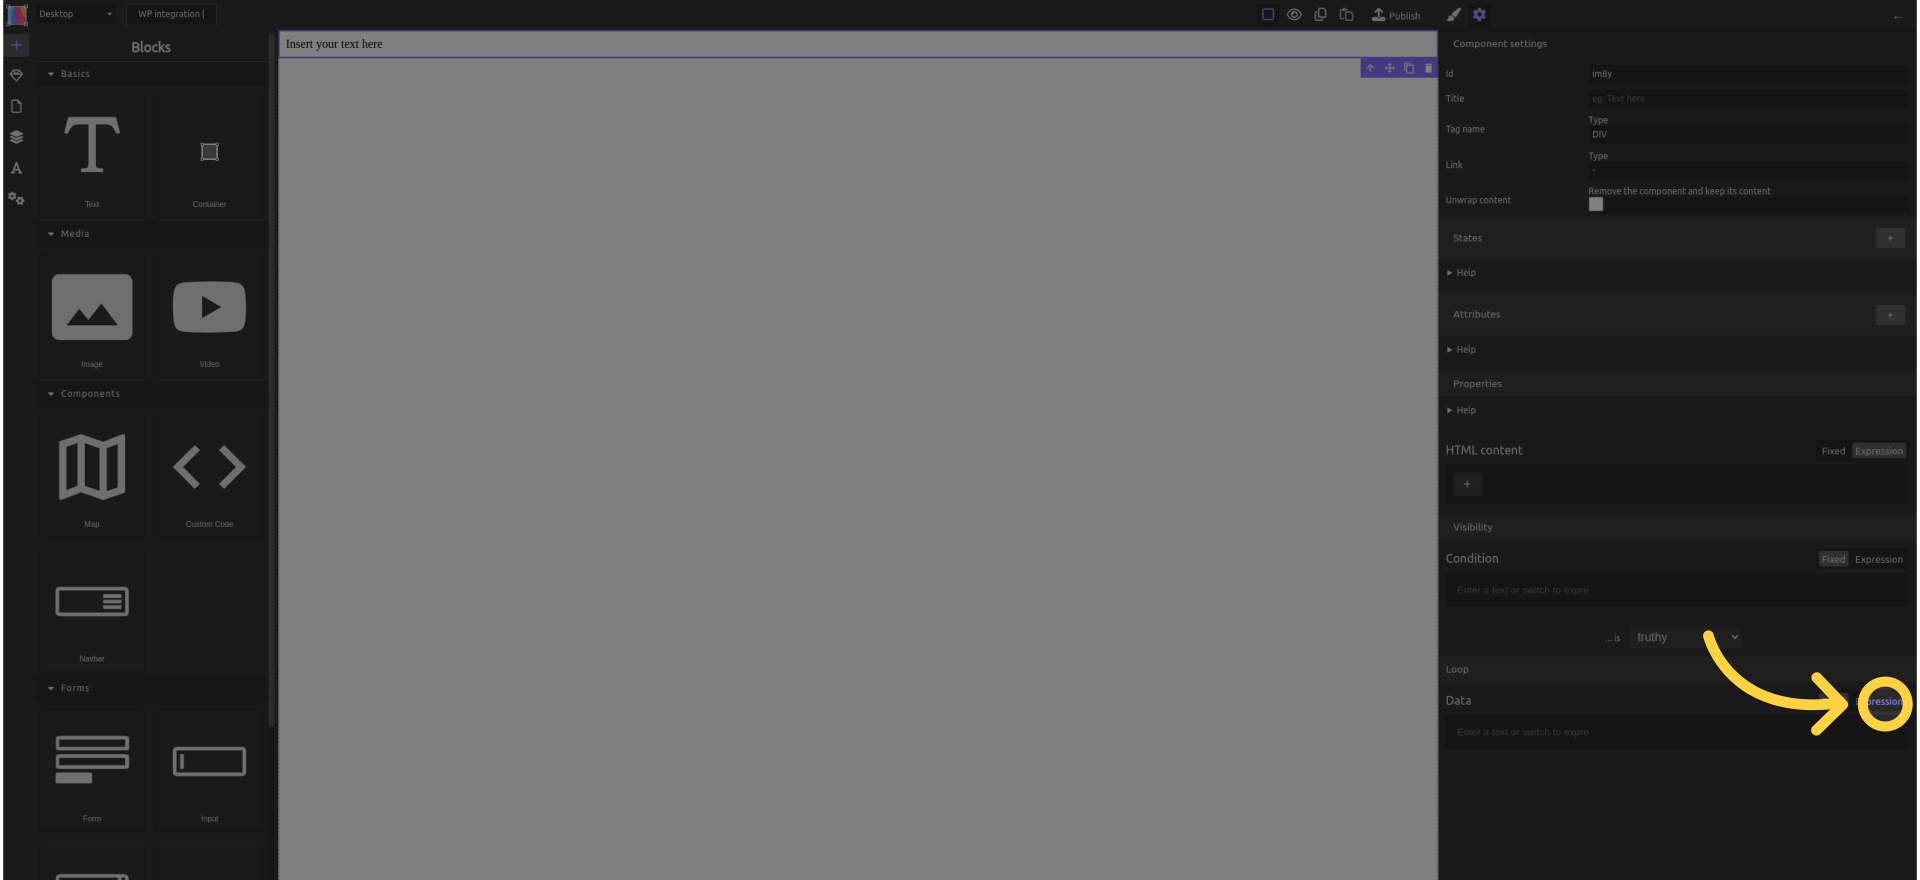
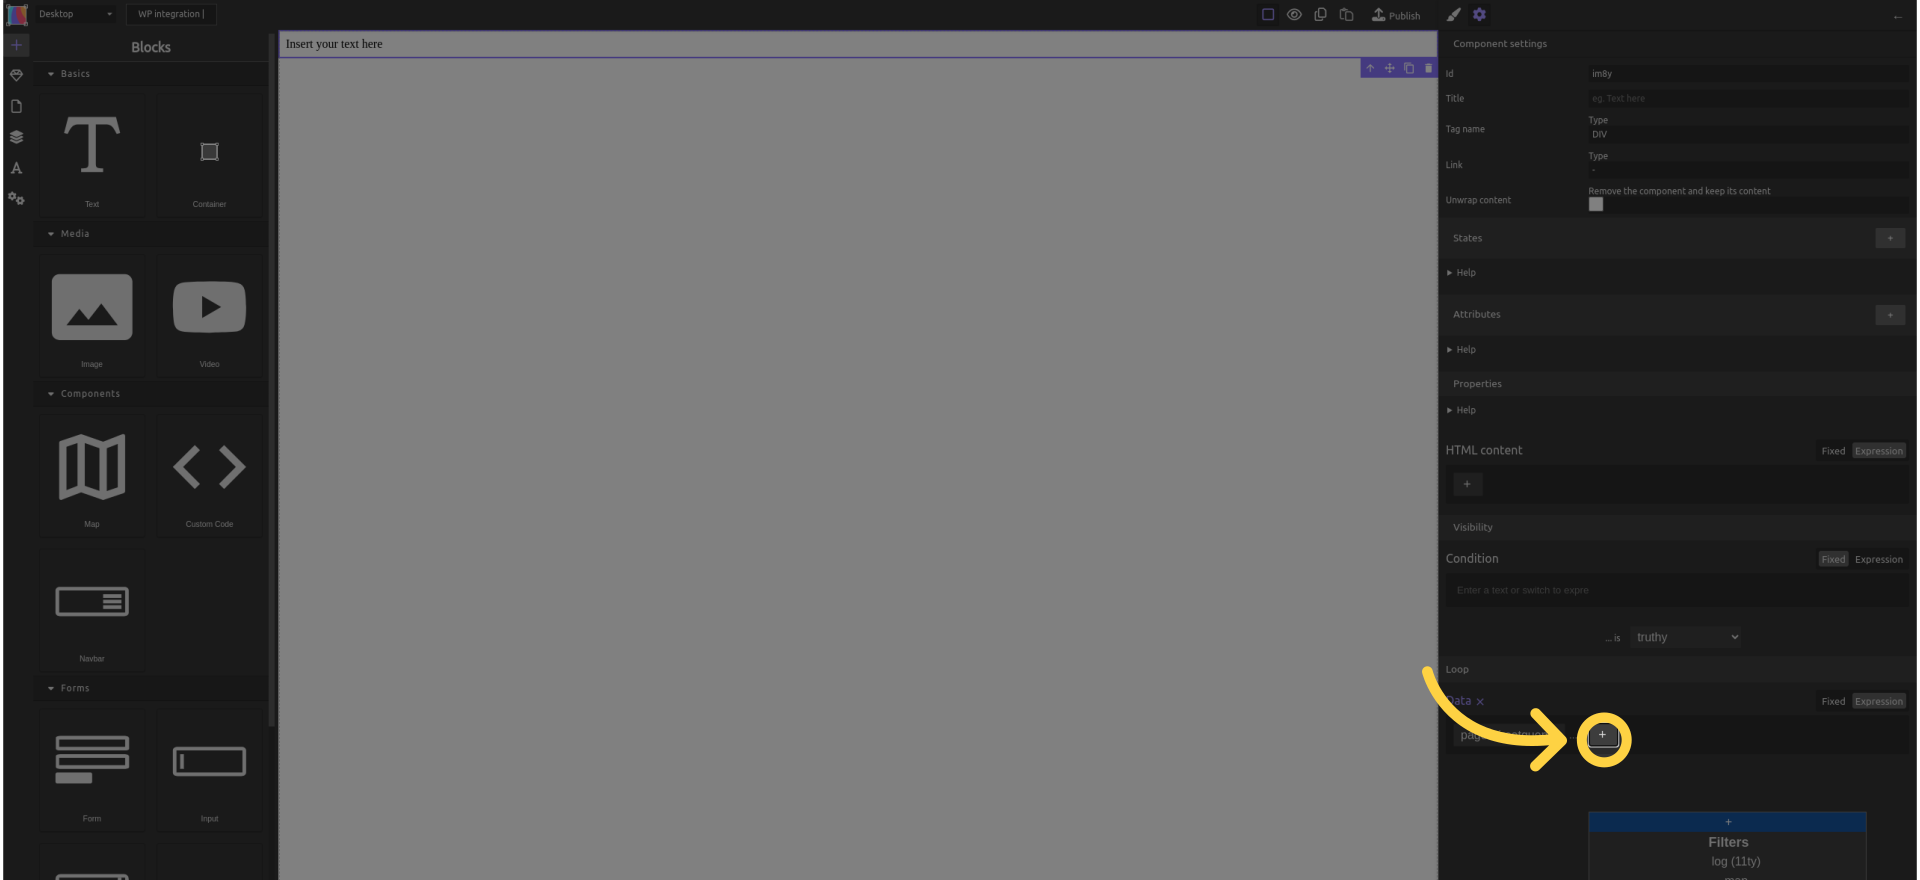
¶ 30. In the loop section, click the "expression button"
Add an expression in the loop field.
¶ 31. Select "Pages"
When you will publish your site, it will duplicate the text field, one per page in WordPress.
The "{ }" next to "Pages" means it is an object, not an array.
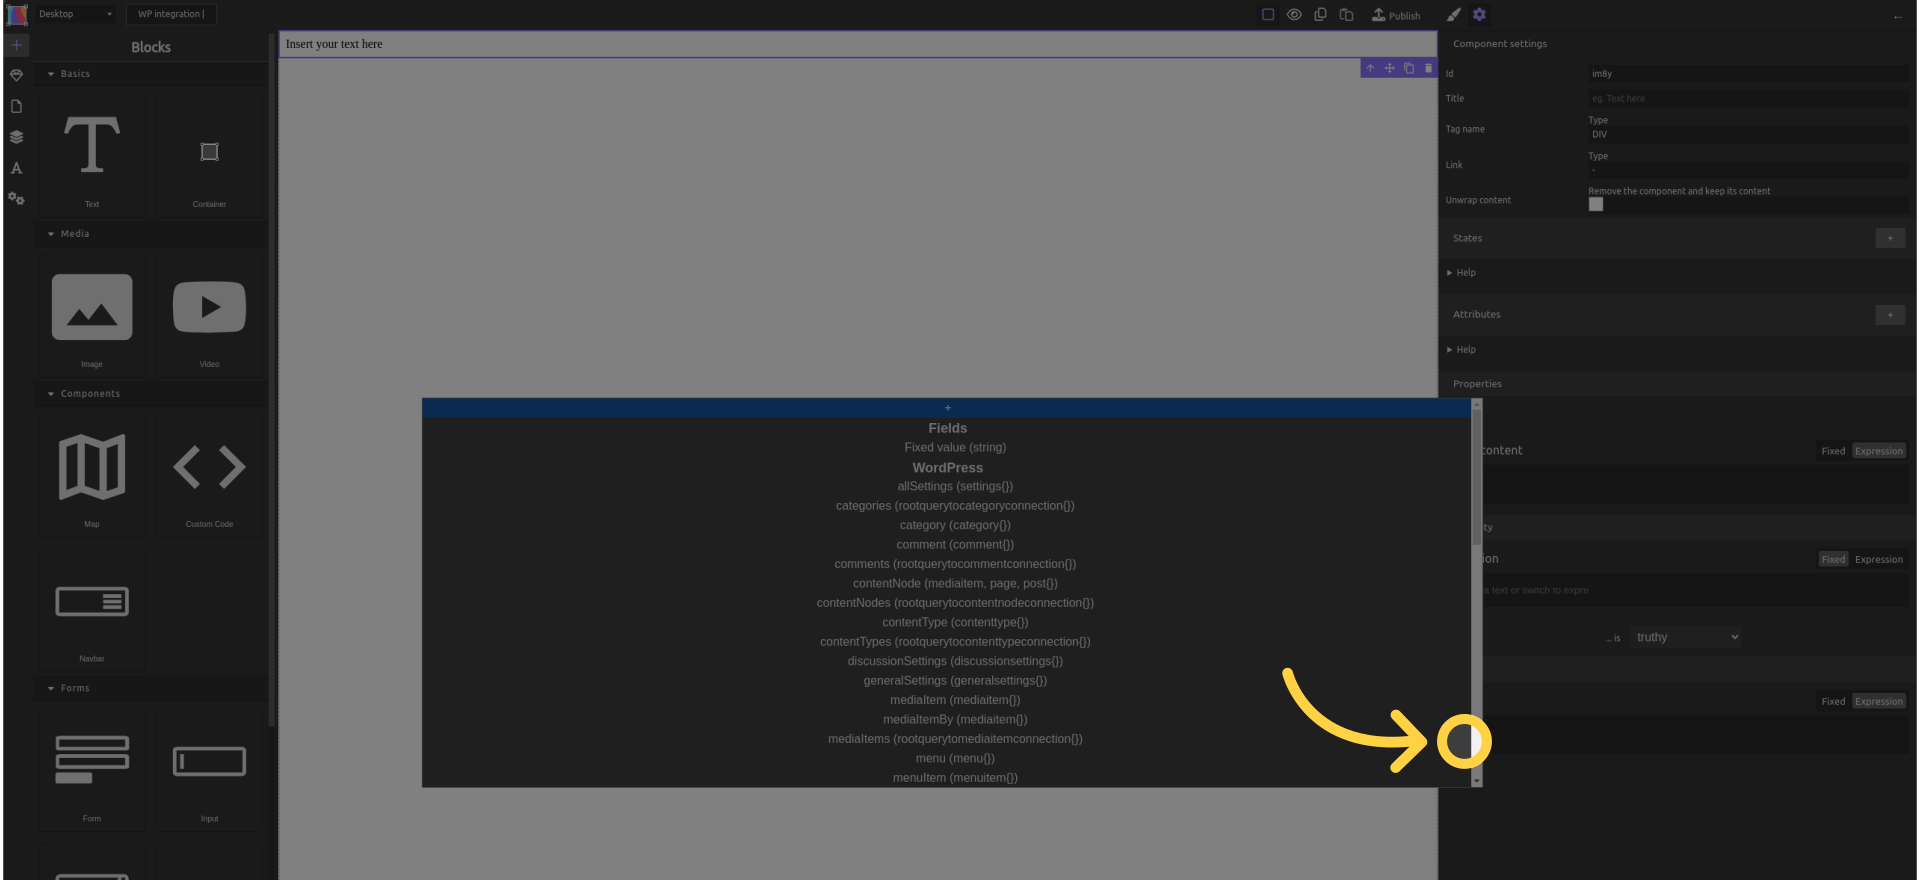
¶ 32. Select "nodes"
The "[ ]" next to "nodes" means it is an array of pages. You can loop on that.
When you publish your site, it will duplicate the text field, one per page in WordPress.
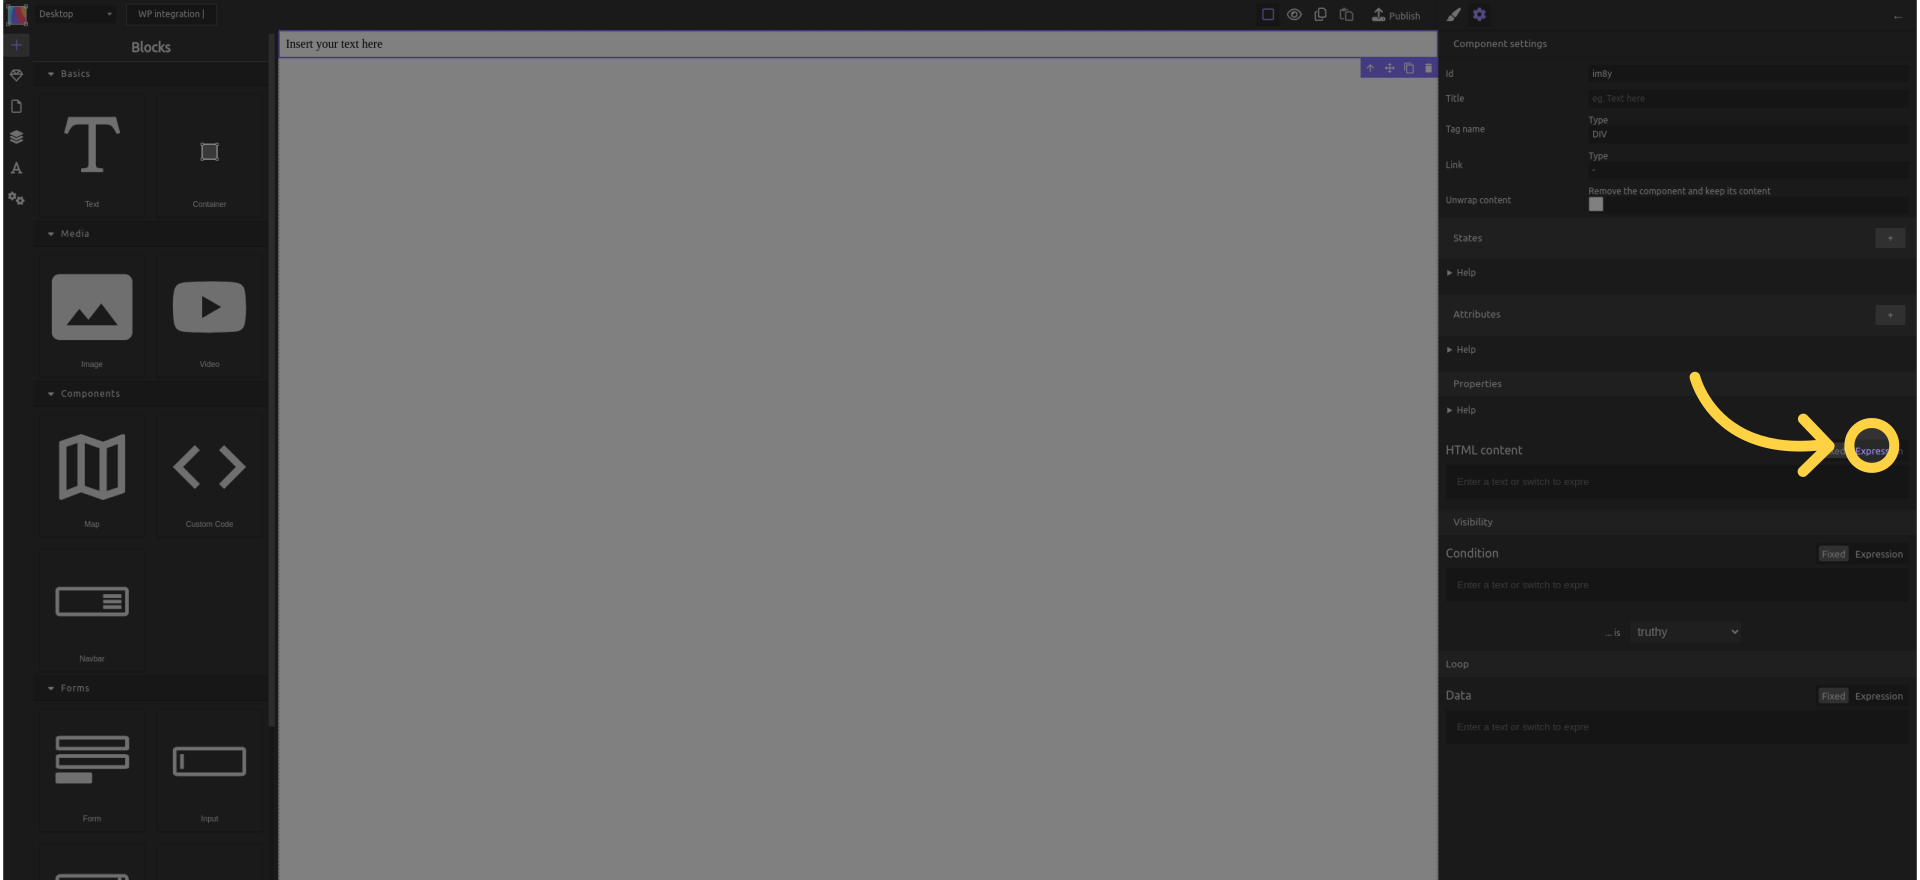
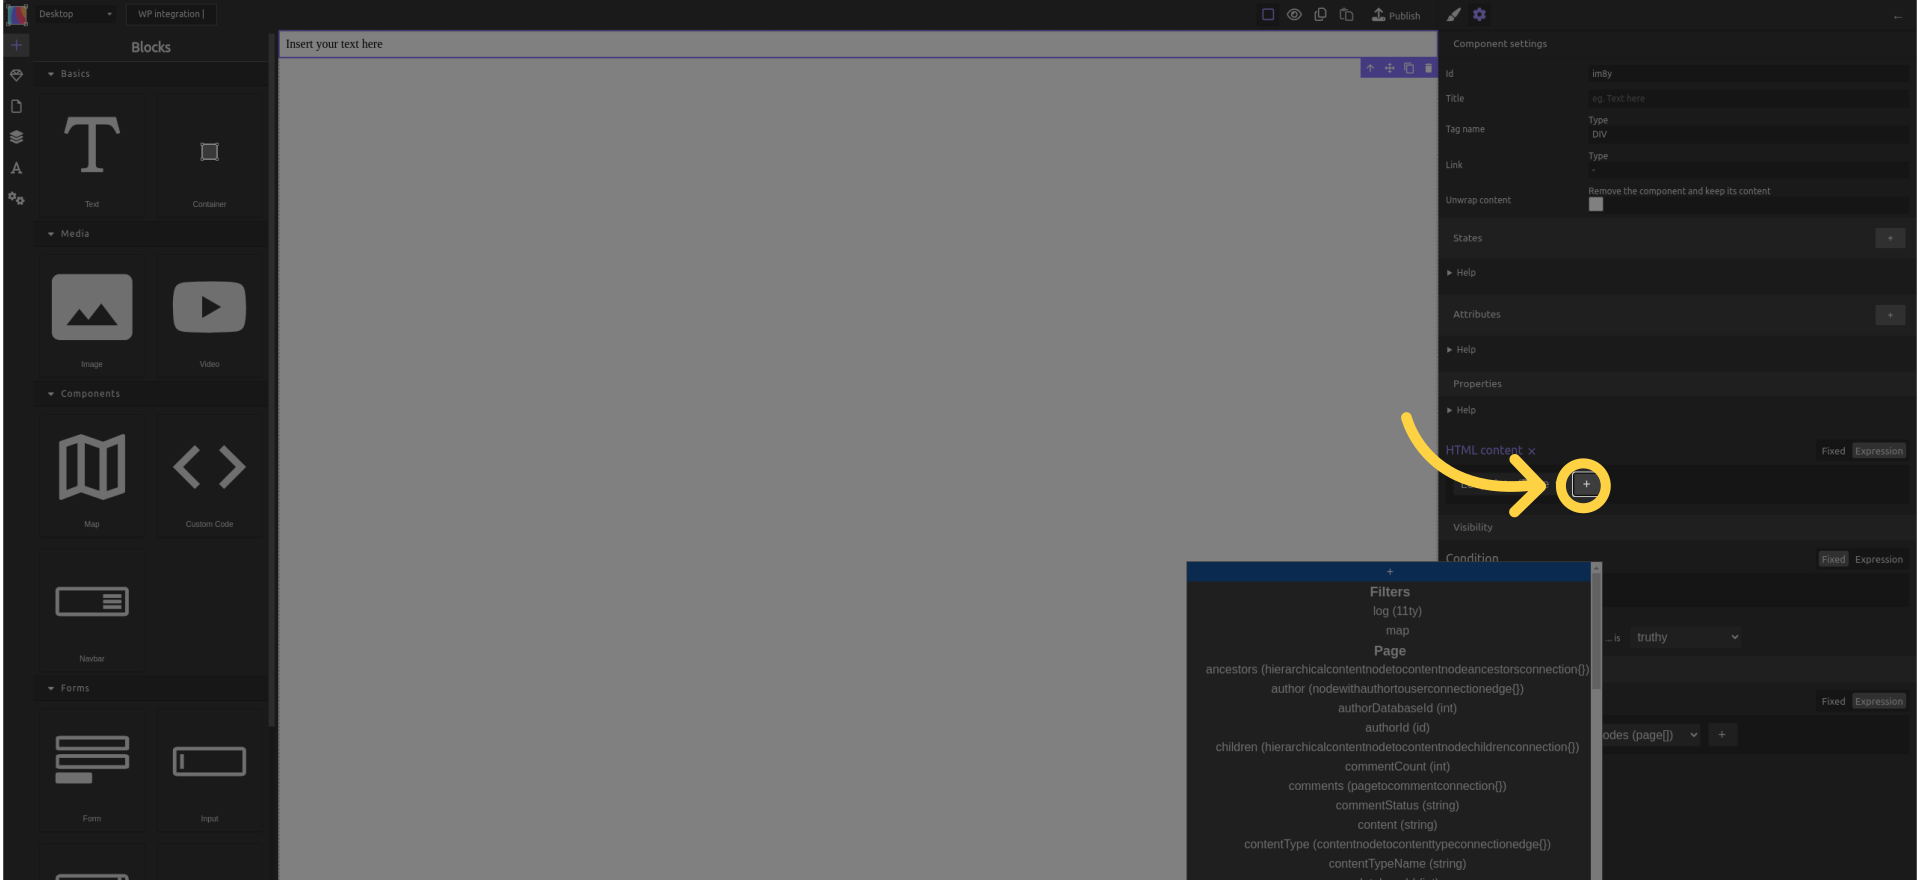
¶ 33. Click on "expression" in "HTML content"
This will make the content of the text field an expression. When you publish your site, the text content will be replaced by the expression you select.
¶ 34. Select "Loop data"
Loop data is the one page that the text field represents.
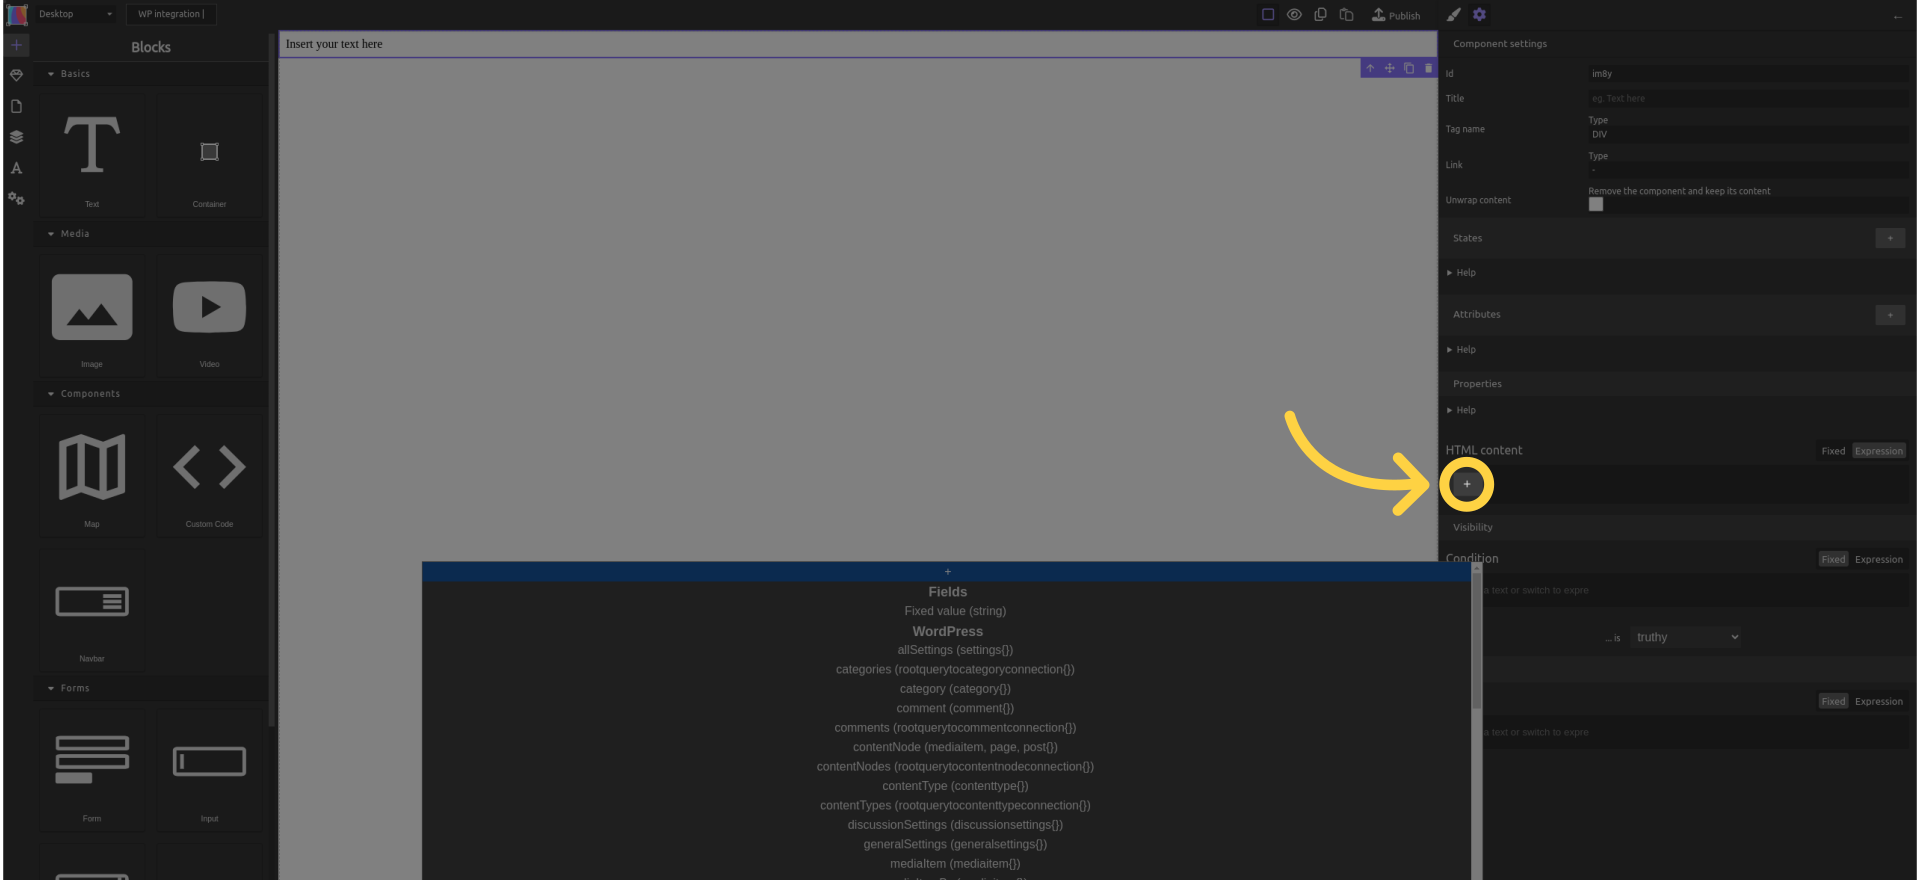
¶ 35. Select "Title"
The pages have a title, so you can make the text field display the page title.
When you publish your site, the text content will be replaced by the page title.
¶ 36. Click "Publish"
Publish the changes.
¶ 37. Click "GitLab.com"
Select GitLab to publish to GitLab pages hosting (free and good quality).

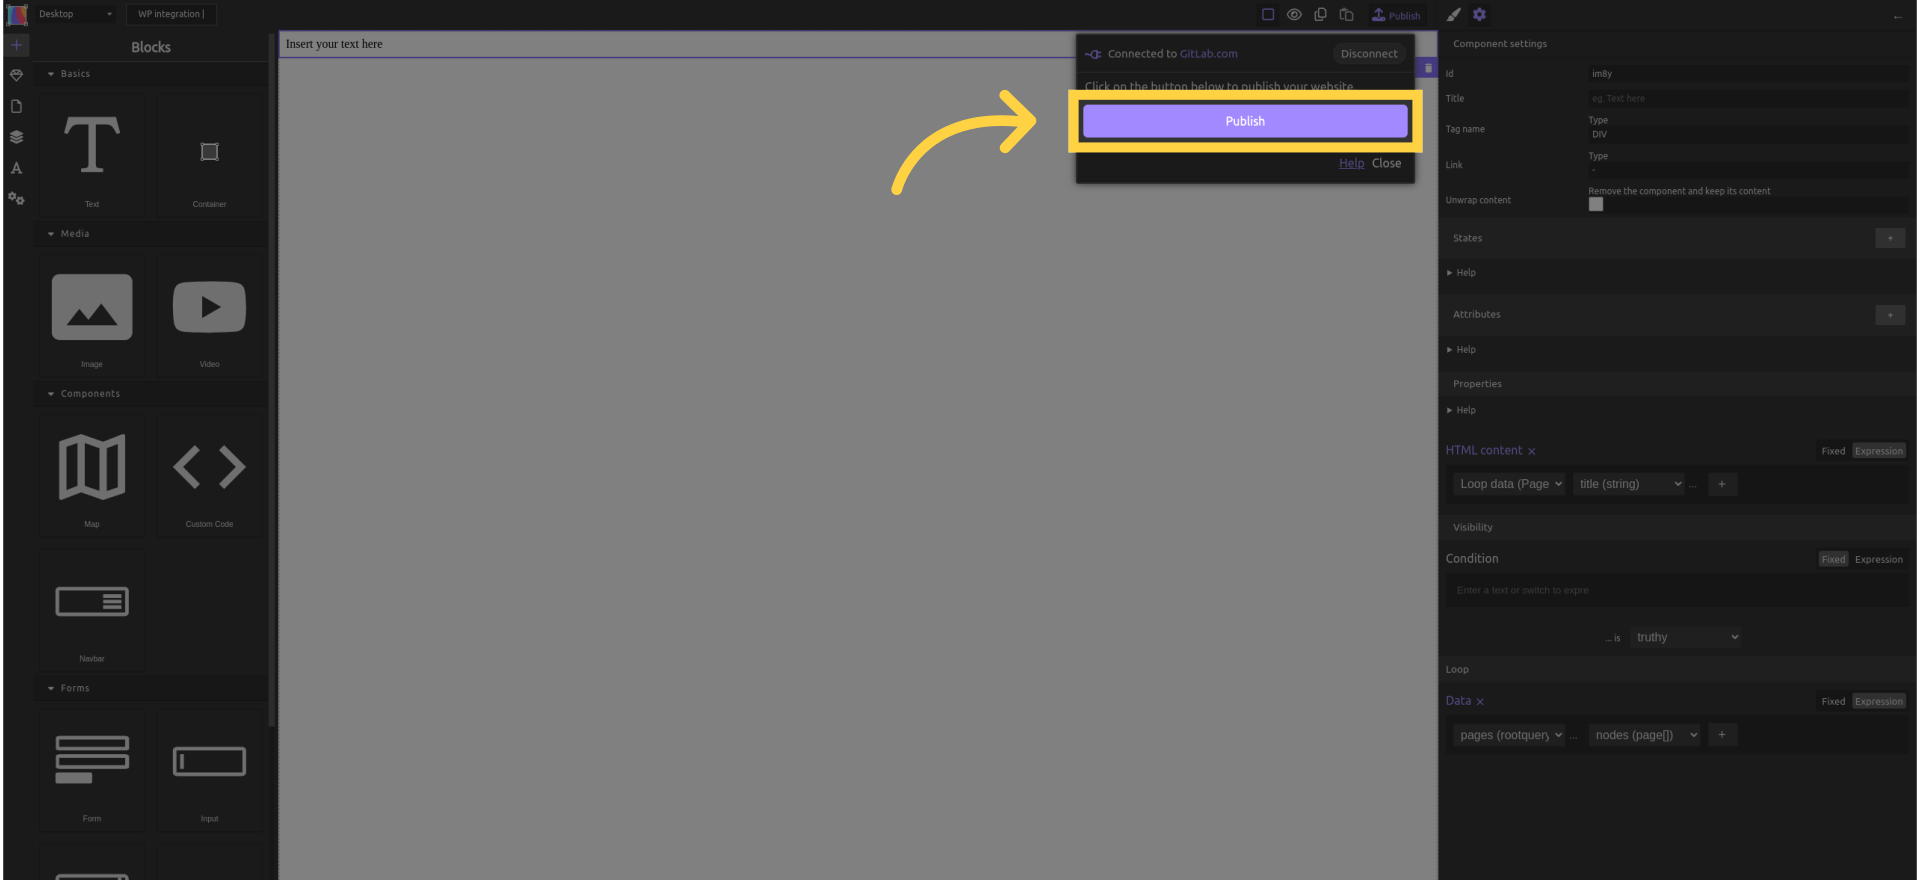
¶ 38. Click "Publish"
Publish the website. Wait 30 seconds.

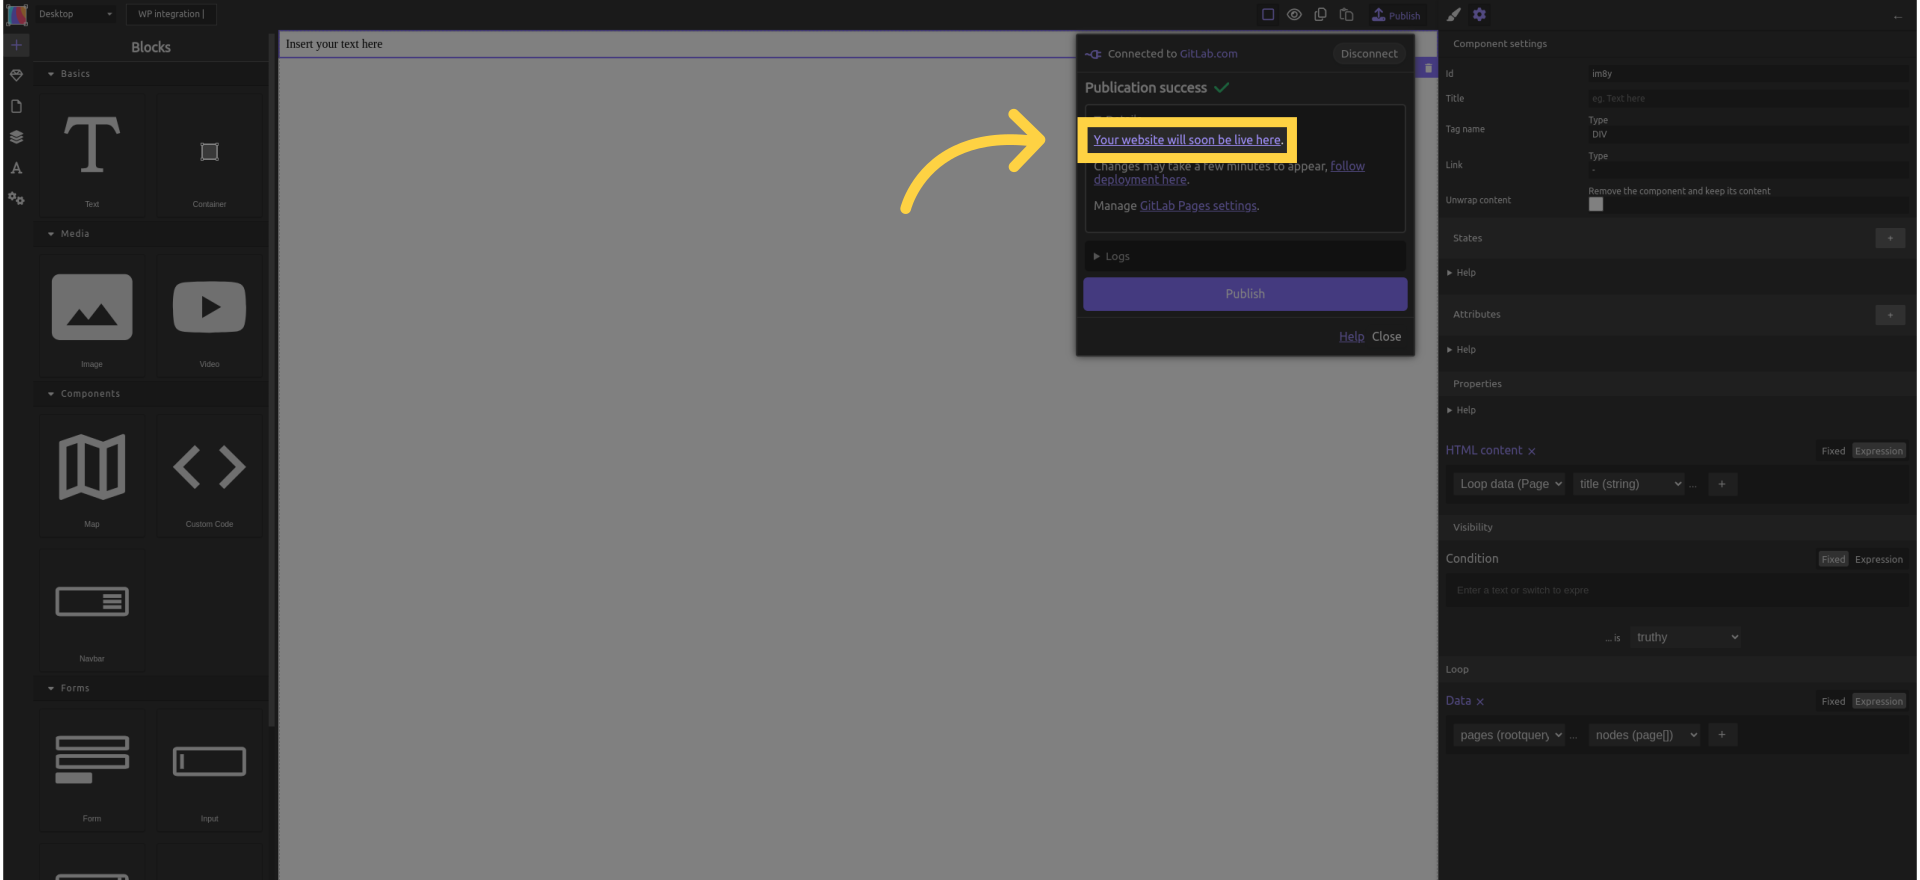
¶ 39. Click "Your website will soon be live here"
Access the live website link.
¶ 40. The generated website
Here is your website, with one text field for the one page that WordPress has by default.
Copy the URL of your website for later use (the address in the address bar).

¶ Rebuild and deploy the static site without opening Silex
For your custommers to edit the site and update the content without opening Silex
Goal: Trigger a GitLab build from WordPress
-
Install the WP Jamstack Deployments plugin
WordPress admin →Settings→Jamstack deployments
URL:/wp-admin/options-general.php?page=wp-jamstack-deployments-settings -
Create a Trigger Token in GitLab
Your repo →Settings→CI/CD→ Triggers
Copy:- Project ID
- Branch name (ex:
main) - Trigger token
-
Add the trigger URL in the plugin
https://gitlab.com/api/v4/projects/PROJECT_ID/ref/BRANCH/trigger/pipeline?token=TRIGGER_TOKENExample:
https://gitlab.com/api/v4/projects/75822331/ref/main/trigger/pipeline?token=glptt-e8c95c5ab100663c391d4cf370b64b325810d78a -
Test the build
- Click the "deploy" button in WordPress
- GitLab starts a pipeline and rebuilds the site (check the "jobs" in gitlab)
¶ Better UX for WP users
Using Faust with WordPress + Silex
FaustWP is not required to build the site
It is only useful for preview and editor comfort inside WordPress
What it does in this context:
- redirects WordPress preview URLs to your Silex frontend
- rewrites preview links inside the WordPress editor
- makes the “Preview” button open the Silex site instead of the default WP theme
How to use it:
-
Install and activate FaustWP
-
Publish your Silex site once to get the final URL (GitLab Pages)
-
In WordPress → Faust settings:
- set Front-end Preview URL = your Silex site URL (ex:
https://my-site.gitlab.io) - save changes
- set Front-end Preview URL = your Silex site URL (ex:
-
Now when you click “Preview” in WordPress, the editor opens the Silex frontend with the right preview URL
Faust doesn’t replace Silex, it just helps WordPress send editors to the correct front-end site for previews and links
¶ Next
Now you probably want to
- Settings of the plguin "WP Jamstack Deployments" to display a badge with the status of the deployment:

- create one silex page per collection in WordPress: pages, posts, authors, and custom collections you create in ACF
- use a plugin for multi-lingual website - HELP WANTED TO WRITE THIS DOC
- set-up a web hook to rebuild and deploy the site on the push of a button in WordPress admin - HELP WANTED TO ADD TO THIS DOC => Check this video