¶ Publishing a Website with Silex V3
Here is a step by step guide on how to publish to GitLab pages
Publishing your website with Silex V3 is a crucial step in making your project accessible on the internet. This guide will help you understand the publication process and explore the various options available in Silex for making your site live.

Before you go live, review the Go Live Checklist.
¶ What is Publication?
Publication in Silex refers to the process of deploying your website from the Silex editor to a web server or hosting platform. This step is necessary to transition your site from a local or development state to being publicly accessible on the internet.
¶ Publication Options
Silex V3 supports several methods to publish your website, catering to different hosting preferences and technologies:
- FTP (File Transfer Protocol): Use this method to upload your site directly to a web server.
- ZIP: Generates a ZIP file of your site which can be manually uploaded to a hosting provider.
- GitLab Pages: Specifically for projects hosted on GitLab. Optional: allows you to deploy directly and use a headless CMS or dynamic data from a GraphQL API.
- File System: Available when running Silex on your local machine, letting you publish directly to your computer's file system.
¶ Publishing Steps
¶ Step 1: Start the Publication
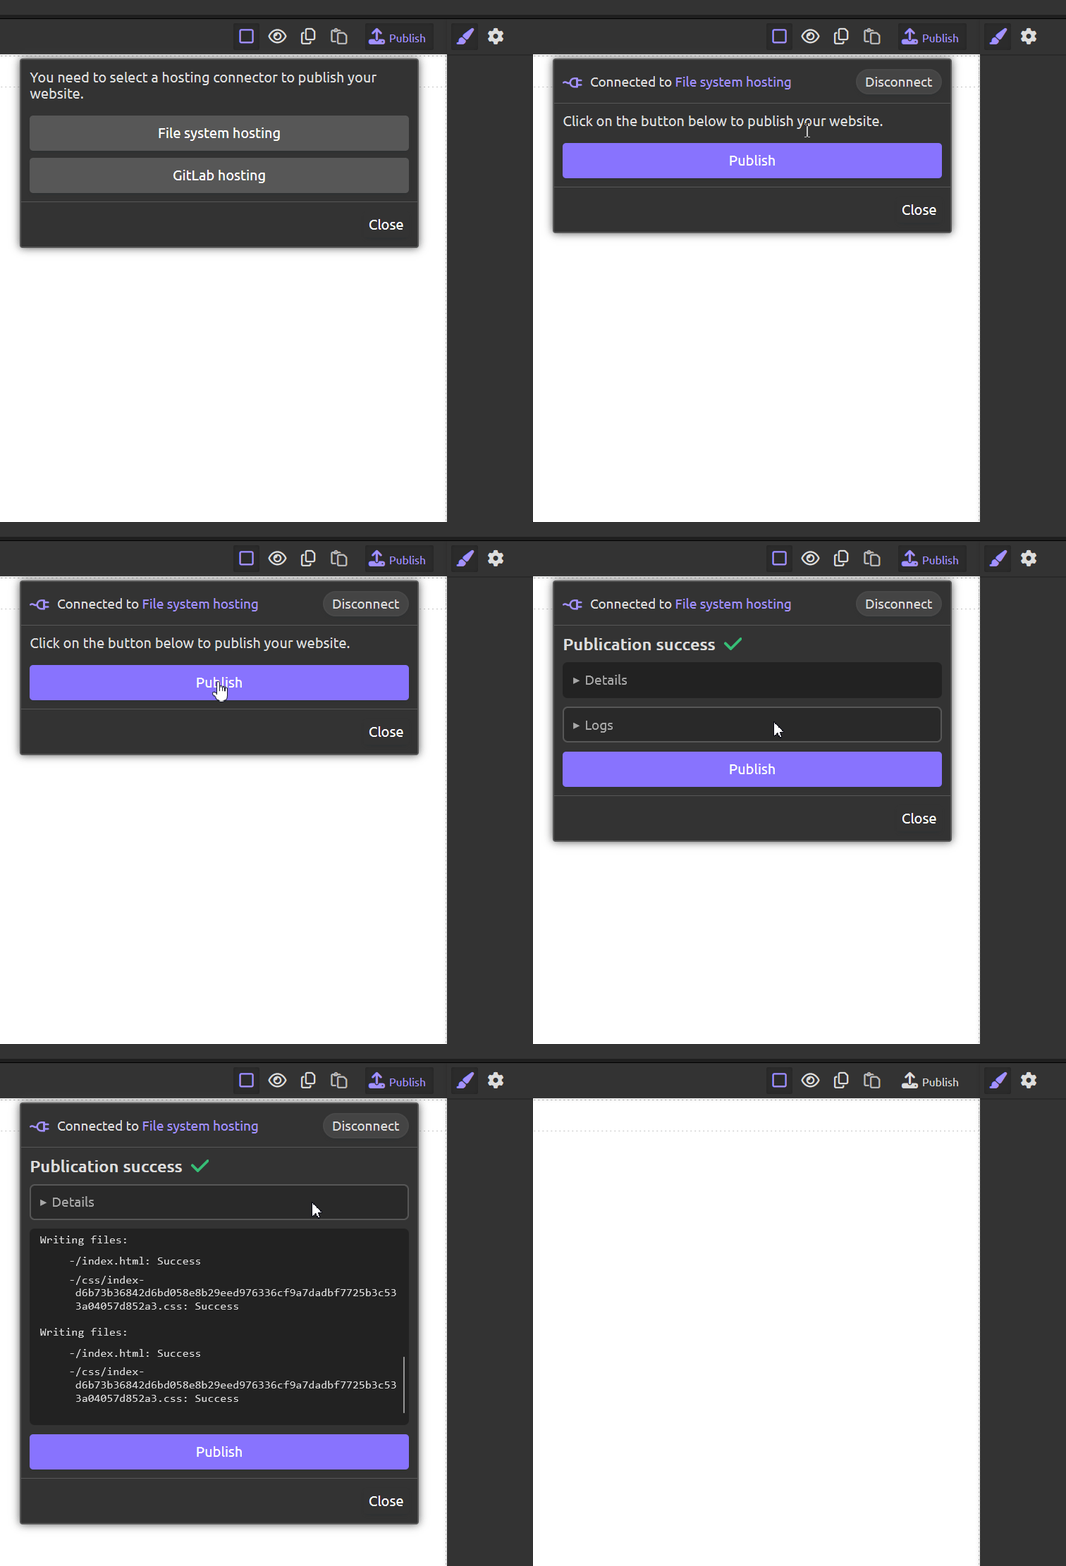
- In the Silex Editor, locate and click the "Publish" button in the top-right corner.
¶ Step 2: Select Your Publishing Method
Choose the preferred method for publishing your website:
- FTP: Enter your server’s FTP credentials.
- ZIP: Opt to download a ZIP file.
- GitLab Pages: If your project is on GitLab, select this to deploy directly.
- File System: Select this when working locally on your machine.
¶ Step 3: Connect and Confirm
- FTP/GitLab Pages: Input your credentials and connect to the service.
- ZIP/File System: No connection necessary; proceed to publish.
¶ Step 4: Publish Your Website
Click the "Publish" button to execute the publishing process:
- FTP/GitLab Pages: Files are uploaded to the server.
- ZIP: The ZIP file is prepared for download.
- File System: Files are saved to the specified location.
¶ Step 5: Download and Deploy (For ZIP)
- After clicking "Publish":
- You will see "Publication in progress" and then "Publication success."
- A prompt to "Download ZIP file now" appears. Click to download.
¶ Hosting with Netlify and Neocities Using ZIP
Netlify:
- Create a Netlify account and log in.
- Drag and drop your ZIP file contents into Netlify's sites dashboard.
Neocities:
- Sign up or log into Neocities.
- Use the file manager to upload the contents of your ZIP file.
¶ Conclusion
By following these detailed steps, you'll be able to successfully publish your website using Silex V3. Each method provides flexibility depending on your hosting needs. For any additional help or queries, join the discussions at Silex Community Forums.
Happy publishing!