Connecting a data source
To pull content from WordPress, Strapi, or any GraphQL API into Silex, you need to add a data source. This page walks through the settings dialog.
Opening data source settings
In the Silex editor:
- Open Site Settings (Settings button in the left bar, or
Alt+S) - Open the CMS tab
- Click Add Your First Data Source, or the + button next to Data Sources
A dialog opens with fields for the API connection. It has two steps: the connection (label, URL, headers), then the backend type.
Filling in the basics
Label — A name for this data source (e.g., "My WordPress Site"). This is only for you in the editor; users never see it.
URL — The GraphQL endpoint. Examples:
- WordPress:
https://yoursite.com/graphql - Strapi:
https://yoursite.com/graphql - Supabase:
https://yourproject.supabase.co/graphql/v1(see Supabase setup)
Check your API provider's documentation for the exact endpoint URL.
Then click Next (see Testing the connection).
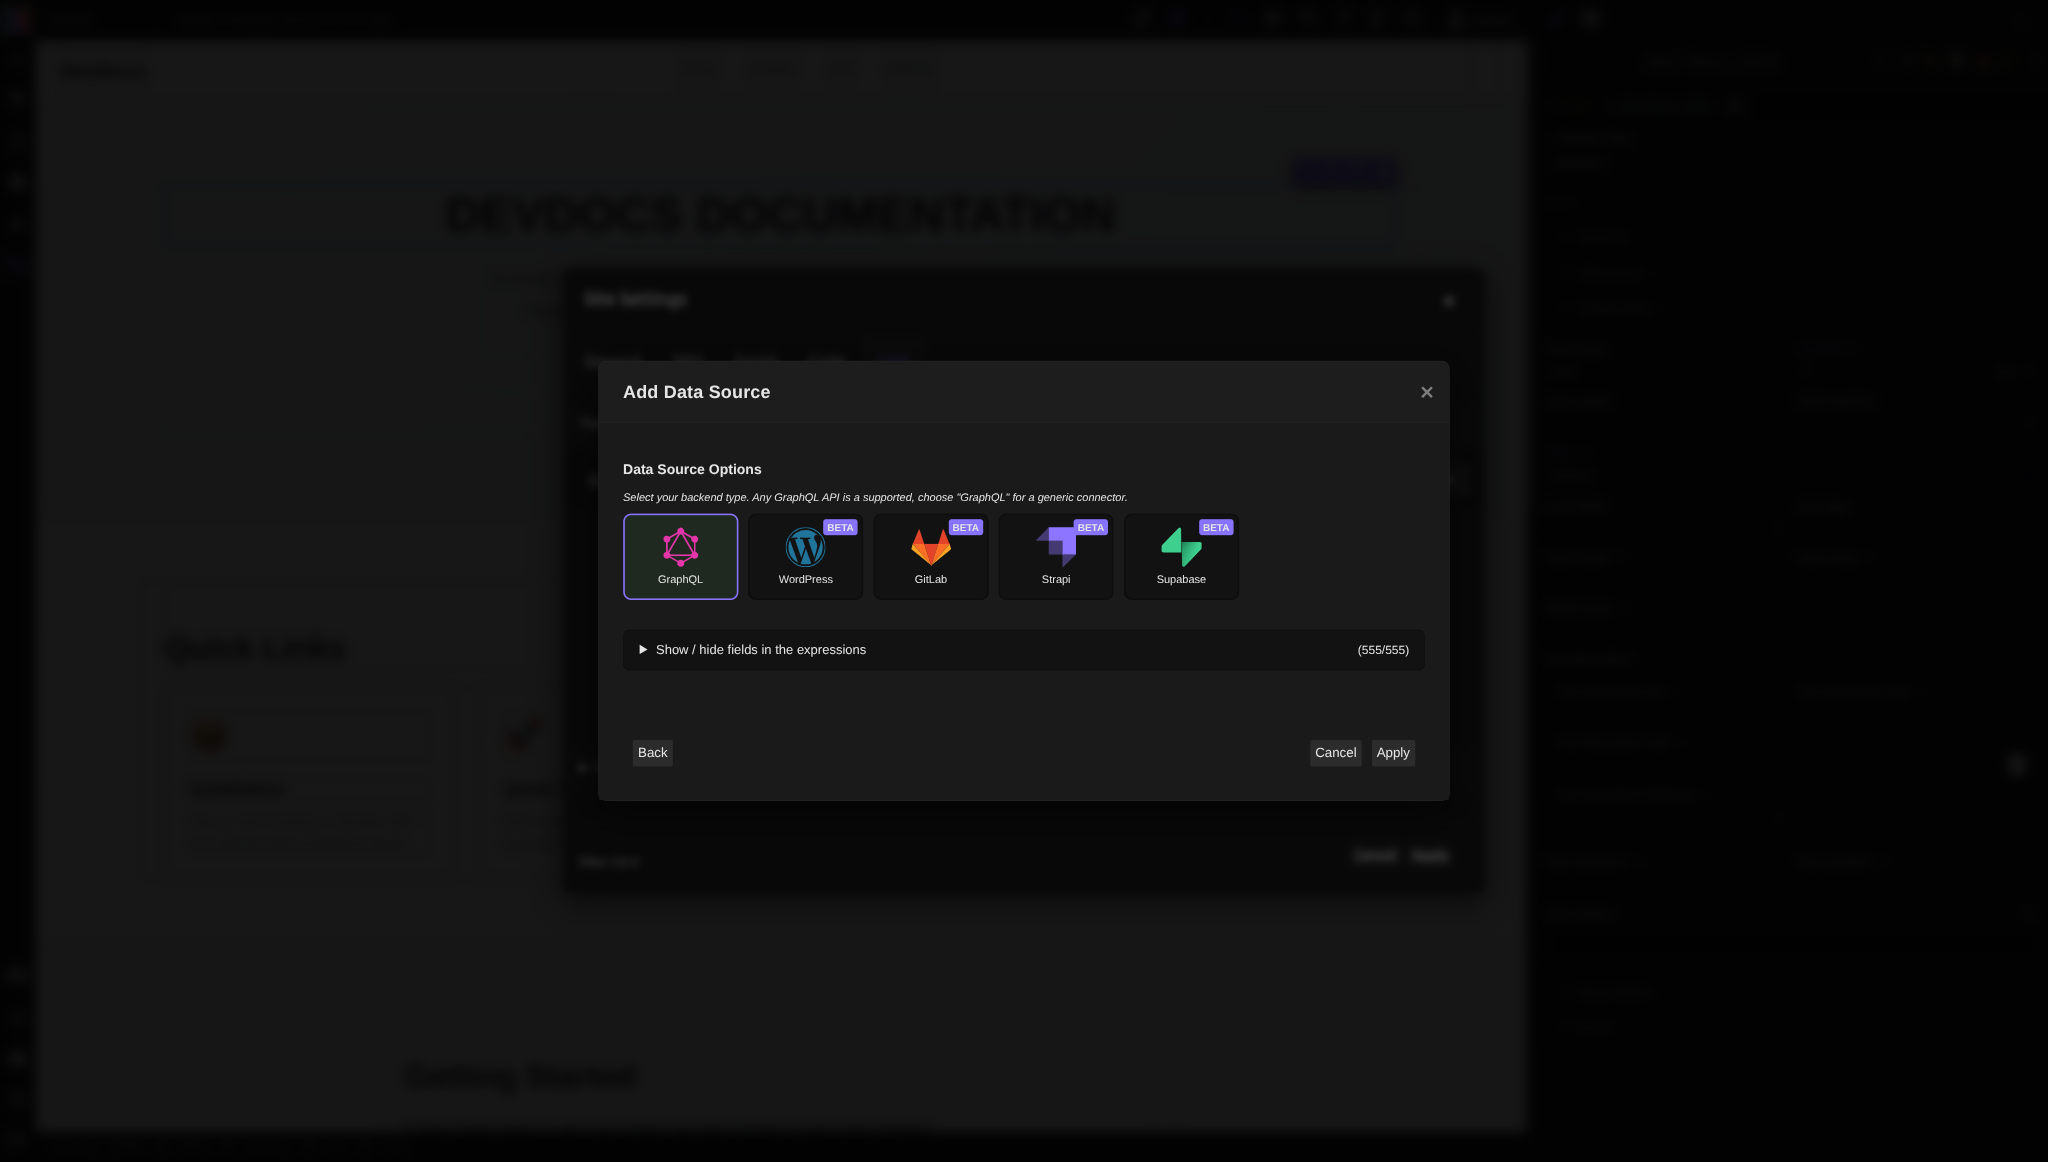
Backend type — In the second step, select which platform you're connecting to:
- GraphQL — any GraphQL API. It is selected by default
- WordPress — WordPress with WPGraphQL
- GitLab — the GitLab GraphQL API
- Strapi
- Supabase
WordPress, GitLab, Strapi and Supabase are marked BETA in the dialog. Silex uses it to choose which types and fields are shown by default. If your platform isn't in the list, keep GraphQL.
Adding authentication headers (if needed)
Some APIs require authentication. If your API is password-protected or requires an API key:
- In the data source dialog, open HTTP Headers
- A
Content-Typeheader is already there: keep it. Click Add a header - Enter the header name (usually
Authorization) - Enter the header value (usually a token or API key)
Example for WordPress with private content:
Ask your WordPress admin or API provider for the correct header format.
Testing the connection
After filling in the URL and headers:
- Click Next
- Silex fetches the schema from your API
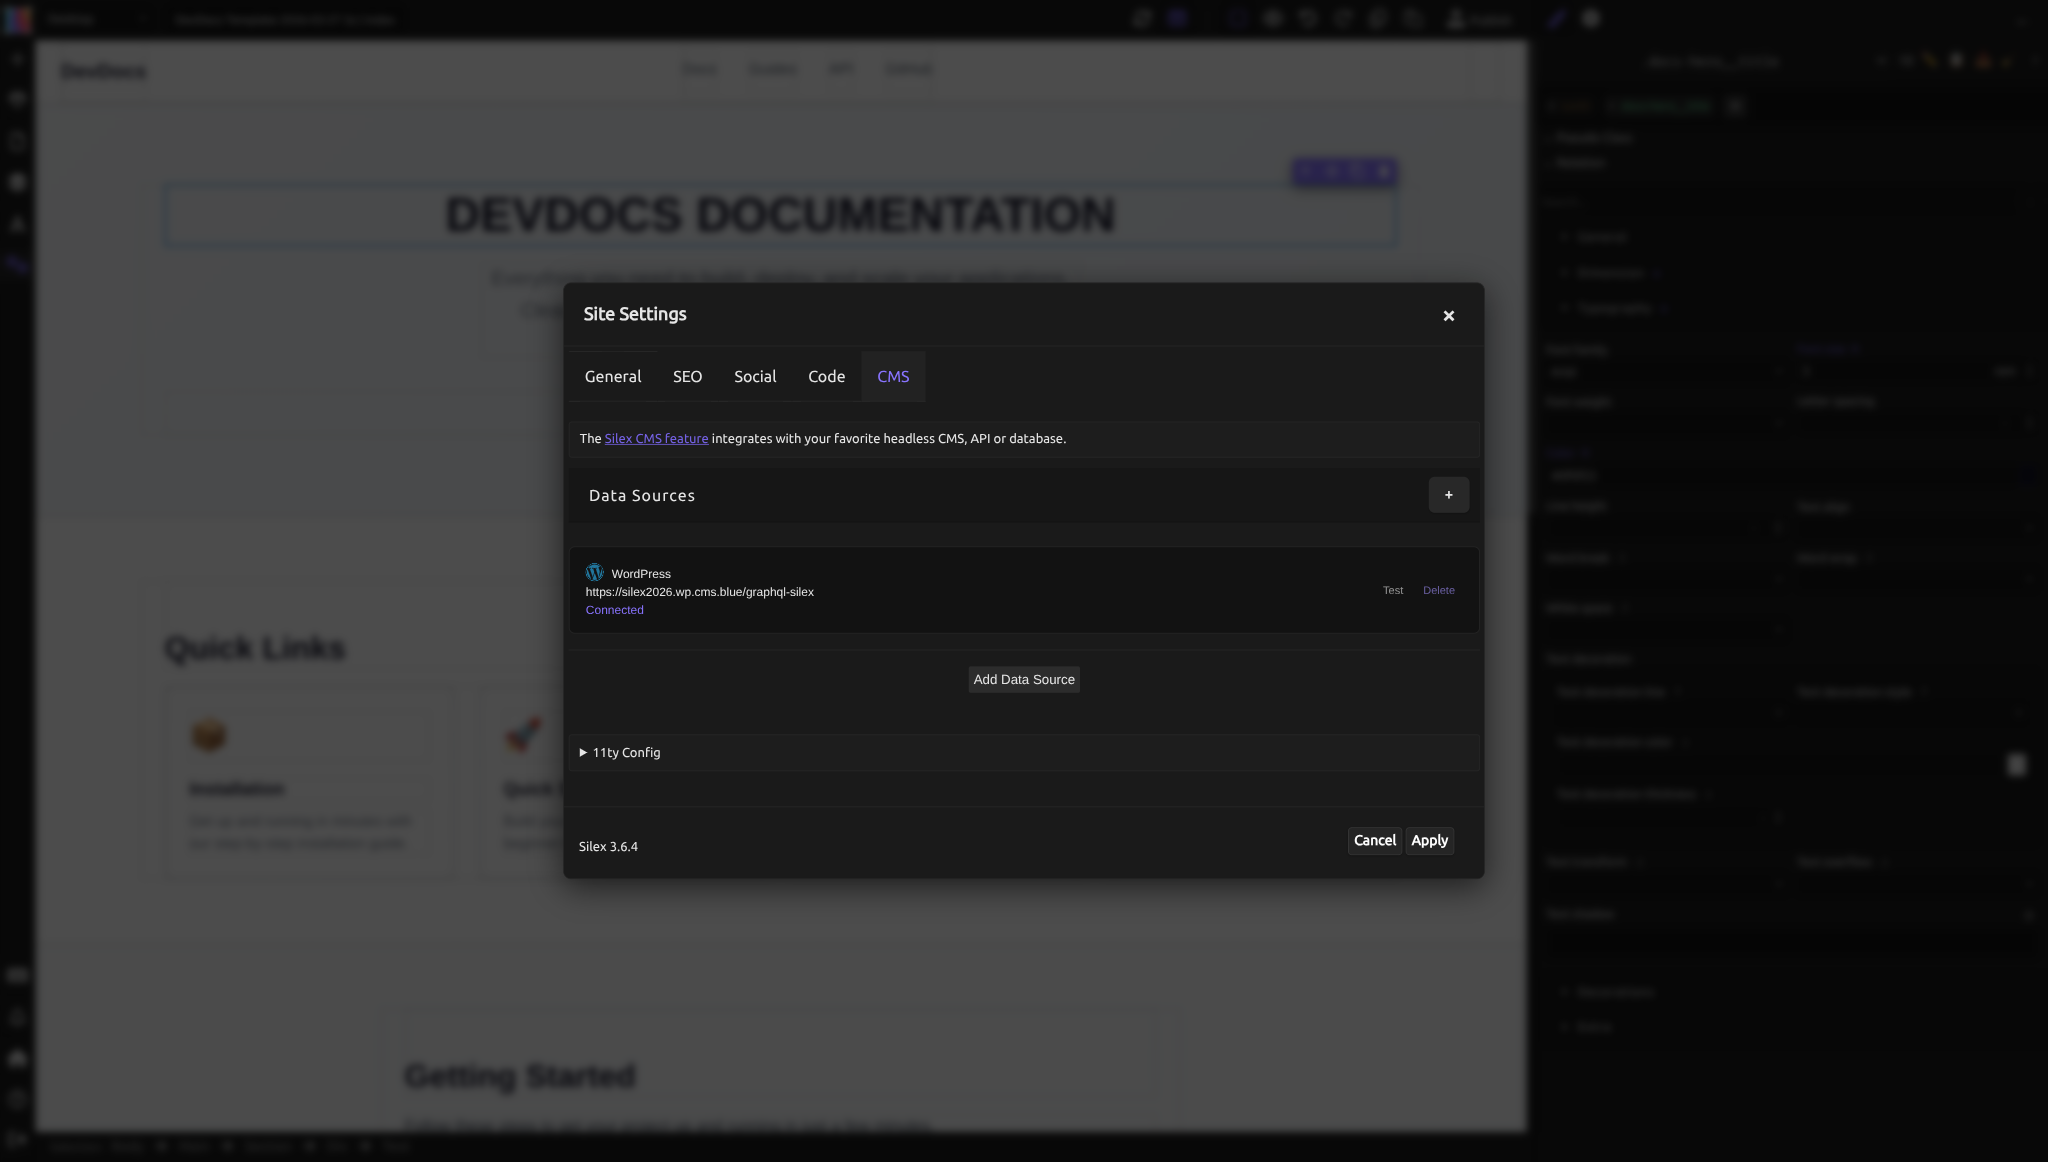
- If it works, the second step opens: choose the backend type and click Apply. The data source shows Connected in the CMS tab
- If it fails, an error shows under the form, for example "Error: Failed to fetch type names: Failed to fetch". The browser gives this message when the URL is wrong, when the API is down, or when the API doesn't allow requests from Silex (CORS, the API provider needs to configure it). Open your browser's console to see the exact cause
Later, the Test button next to a data source checks the connection again.
Showing or hiding types
Your API offers types: the kinds of data it holds (for WordPress: Post, Page, Category, User…). They are listed in the second step of the dialog. To get back to it later, click the data source in the CMS tab, then Options.
Open Show / hide fields in the expressions: each type has a checkbox and its kind (object, scalar…). Uncheck the types you don't want to see in your expressions. Search types... filters the list, Reset to Defaults restores it.
To see the fields of a type, use the + menu when you bind data.
Understanding field types
In the + menu of an expression, each field shows its type in brackets, for example title (string), comments (commentspage{}) or data (post[]). There are three kinds:
Scalar — a single value (text, number, date, true/false).
Object ({}) — a value with its own fields. Example: the "author" field of a post is an object with fields like name, email, bio.
List ([]) — multiple items of a type. Example: "posts" is a list of post objects.
When binding data, you chain through these types: author → name goes from the author of a post (an object) to the author's name. Field names depend on your API.
Editing or removing a data source
Once added, your data source appears in the settings. To edit it:
- In the CMS tab, click the data source. The Edit Data Source dialog opens
- Change the label, URL or headers. Options leads to the second step: backend type and types to show
- Click Apply
To remove it, click Delete next to the data source, then confirm.
Troubleshooting
For an error when you click Next, see Testing the connection.
Still stuck? Open an issue on GitHub with steps to reproduce, or ask in the community chat.
Learn more
- How CMS works — understanding the bigger picture of data flow
- WordPress setup — setting up WPGraphQL on your WordPress site
- Supabase setup — preparing a Supabase project for Silex
- Binding data — using the connected data source to display content
Quiz
Q1: Your WordPress site's GraphQL endpoint is at https://myblog.com/graphql. Where do you enter this in Silex?
- A) In the URL field of the data source dialog
- B) In the Label field
- C) It's automatically detected
Answer
A) In the URL field of the data source dialog — You paste the full GraphQL endpoint URL into the data source settings so Silex knows where to fetch data from.
Q2: You're setting up a data source for a private WordPress API that requires authentication. What do you add to the dialog?
- A) The username and password in the URL
- B) An Authorization header with the API token
- C) The JWT token in the label field
Answer
B) An Authorization header with the API token — Authentication headers are separate from the URL. Add a header (usually named "Authorization") with the token value your API provider gives you.
Q3: You selected "WordPress" as the backend type. What does this do?
- A) It installs WordPress on your server
- B) It connects specifically to WordPress and won't work with other platforms
- C) It sets which WordPress types and fields are shown by default
Answer
C) It sets which WordPress types and fields are shown by default — Silex uses the backend type to choose what your expressions show by default. Any GraphQL API works with the "GraphQL" option if your platform isn't listed.
Q4: When you click Next, Silex shows "Failed to fetch". The URL is right and the API is up. What is the likely cause?
- A) Your URL is wrong
- B) Your API provider hasn't configured CORS to allow requests from Silex
- C) The label is empty
Answer
B) Your API provider hasn't configured CORS to allow requests from Silex — CORS (Cross-Origin Resource Sharing) is a browser security feature. Your API provider needs to explicitly allow requests from Silex's domain. The browser's console shows the exact cause.